Users can now benefit from a process which imports general journal detail line items from external files. The process uses XML files as the import file type. These XML files can be created manually from source data from a bank or payroll firm. Excel can also be used to manipulate the source data and export it in the required XML format. An example of this Excel manipulation is shown below.
Configure Comsense Enterprise for Journal Detail Importing
Download the Required FIles
- Click the DataImport.dll file attached to this article, choose Save Target As, and save the file to your Downloads folder.
- Click the DataImport_JournalDetail.xsd file attached to this article, choose Save Target As, and save the file to your Downloads folder. Ensure that your browser does not attempt to change the file extension from .xsd.
- Locate your Downloads folder with Windows Explorer.
- Right click on each of the downloaded files and click Properties. If there is an Unblock button on the General tab click it to unblock usage of the file.
- Create a new folder in your Opening Suite \Common folder called Integration (this folder may already exist). Within the Integration folder create a new folder called DataImport. (Your Common folder location can be found in Advantage by clicking Help > About Comsense Advantage.
- Move the downloaded files into the new DataImport folder just created.
Configure Comsense Enterprise
- In Enterprise open the Data Import Window, from System Options > Data Import.
- Configure a new Data Import profile by completing the information in a new row.
- For Data Import, provide a name like Journal Detail.
- For Description, provide a description like Journal Detail.
- For Type, click the drop down and choose Journal.
- For Filename, click the button on the far right to open the file browser. Locate the DataImport.dll file that you previously placed in your \Common\Integration\DataImport\ folder.
- For Default Source Folder, you can optionally provide a folder where the user will frequently save the xml file in preparation for importing.
- For this type, Username and Password can be left blank.
- Sort can be left at its default value.

- Click Save to save the new profile.
Importing an XML File to Populate a General Journal Transaction
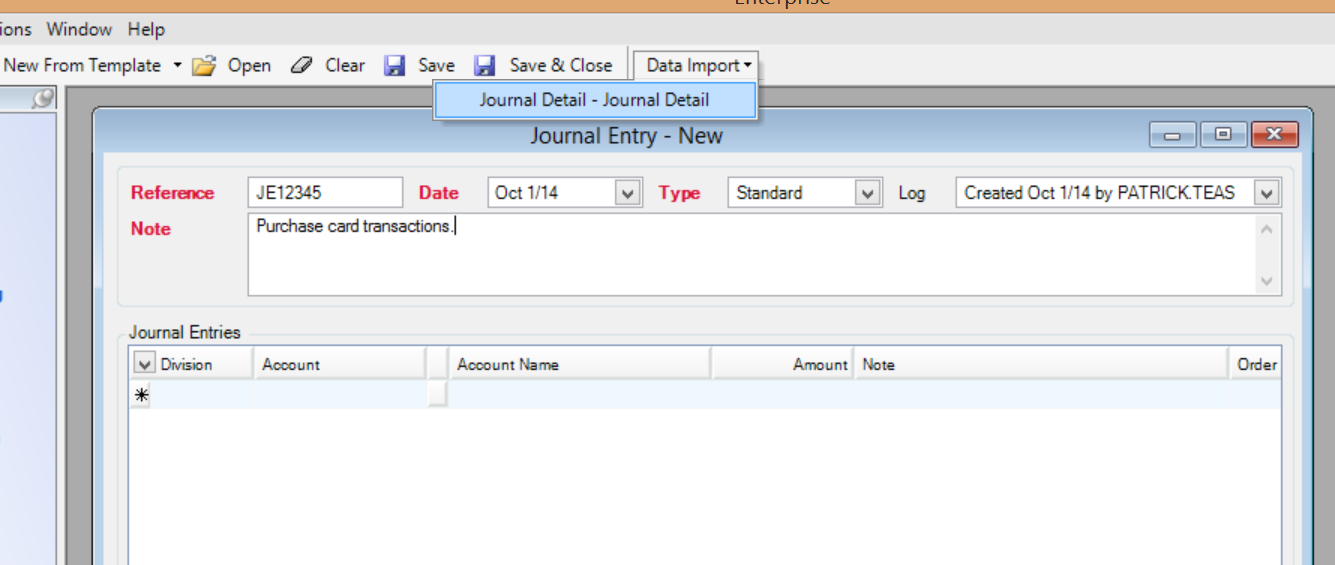
- With the new Data Import profile configured for the Journal type, a new menu option will be available on the Journal Entry window.
- Create a new Journal Entry by opening General Ledger > Journal Entry.
- Complete the header portion of the Journal Entry as required.
- A new toolbar is available called Data Import. Click this drop down and choose the import profile created previously.
- The import will inform the user of any accounts or orders that are were included in the import file but cannot be found in the system.
- The user can refine the rows in the journal entry as necessary and then save the Journal.
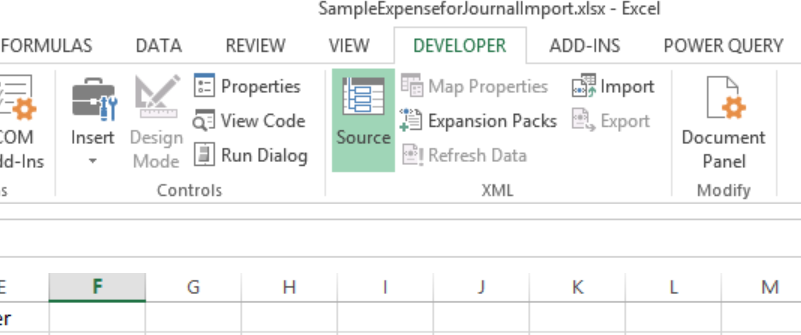
An Example Demonstrating Excel to Save Data as XML for Data Import
- The XML Data map feature in Excel can be used to properly structure and then export data from Excel to an xml file in the appropriate format for importing using the Enterprise Data Import feature.
- To start the process, open your data file in Excel.
- Set the Developer Ribbon to visible in Excel so you can see these advanced features.
- In Excel 2013 click File > Options > Customize the Ribbon.
- On the right hand side, locate the Developer item and check the box next to it to enable.
- Click OK to close the Options.
- To add the XML Map to the Excel file, click the Source button on the Developer ribbon.
- This will open the XML Source pane on the right hand side.
- On the XML Source pane, click XML Maps.

- In the XML Maps dialog click Add…
- Locate the DataImport_JournalDetail.xsd file downloaded previously to your \Common\Integration\DataImport\ folder.
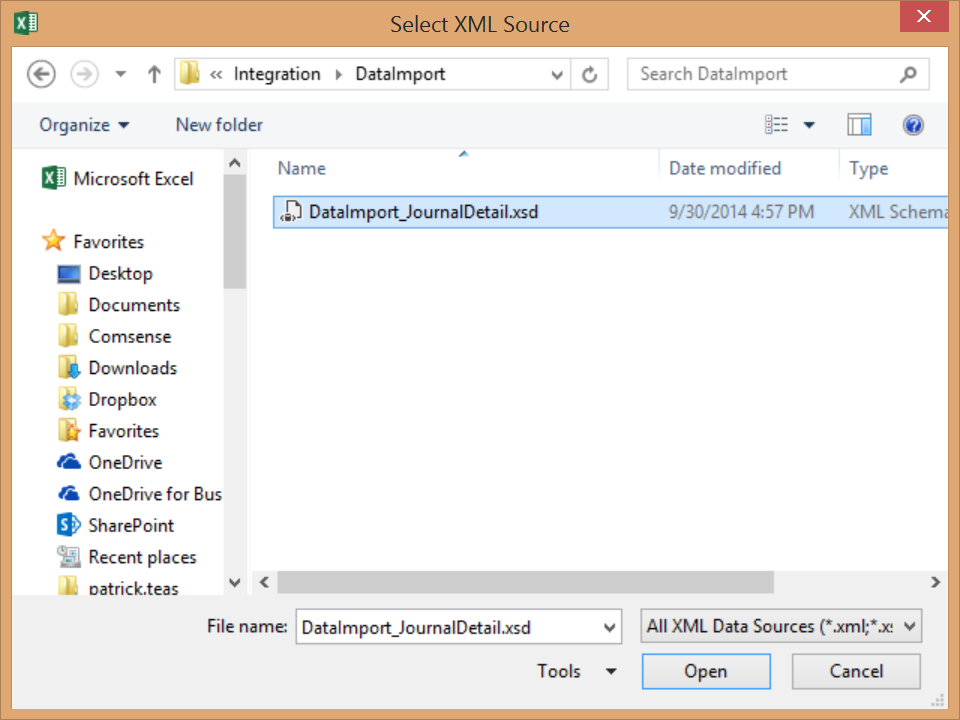
- Click Open.
- On the XML Maps dialog click OK.
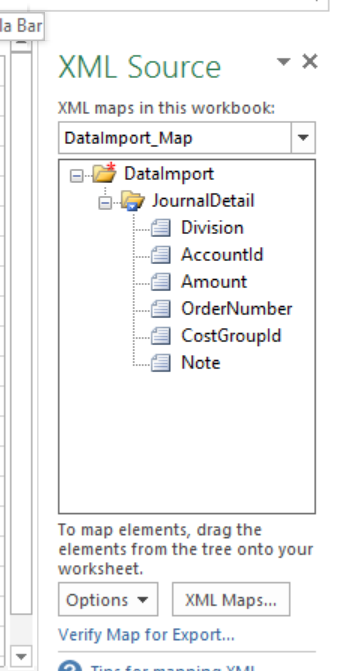
- You will now see the required structure for the XML export.
- The columns in your source data do not need to have the same column header names, but they do need to be in the proper order as outlined in the XML Map. You can use Excel features to move your columns around to achieve the proper column order. If your source data does not include a certain column required by the xml map, simply insert a new column in the correct position, give it a column header and leave the data blank.
- Once your columns are in the appropriate order, click on the Journal Detail node in the XML Source window and drag it to the column header of your first column, which should include your division codes, and drop it on the column header cell.
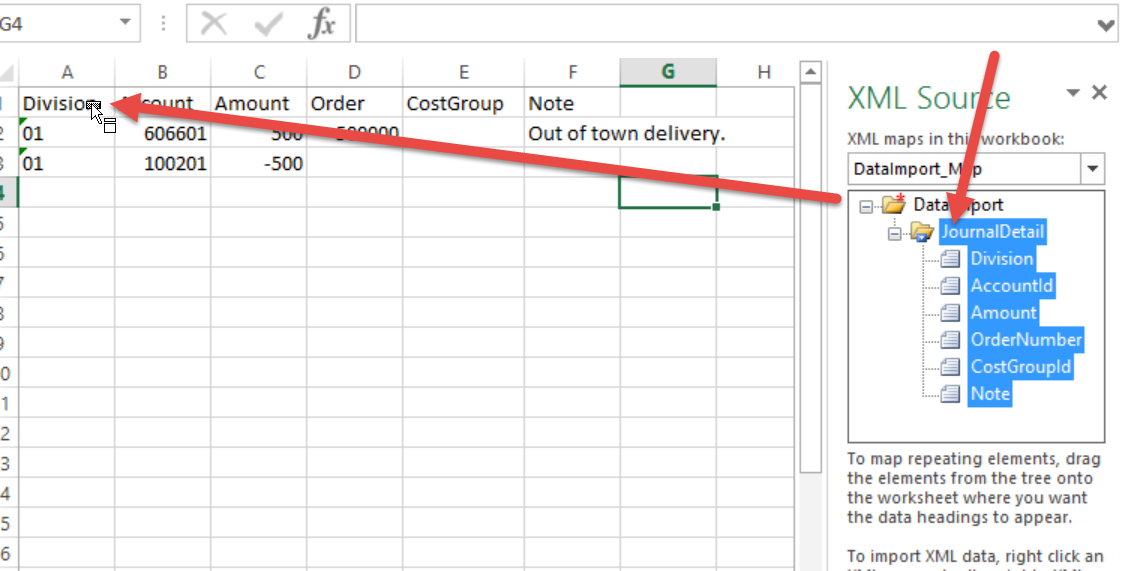
- This will convert your source data into an Excel Table, and map the columns to the XML structure of the Journal Detail.
- You can now verify that the mapping has worked correctly by clicking Verify XML Export at the bottom of the XML Source pane.
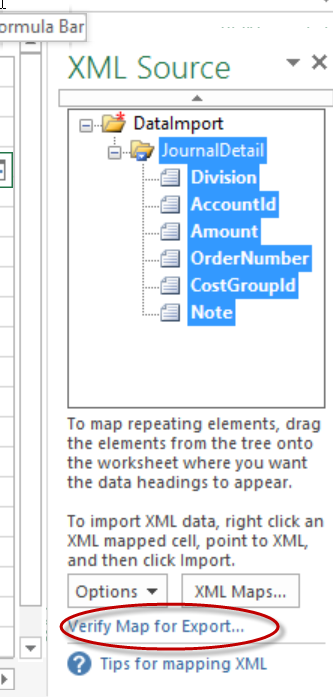
- The verification will display a message indicating success or failure. If it is successful you can proceed with the XML export. If it has failed, you may need to review the order of the columns in your source data and attempt to remap it.
- To export your data as XML click Export on the Excel Developer ribbon. This will prompt you for a location and file name to save the exported file. If you have set up a default source folder location in the Enterprise Data Import profile, you should save to this location to make it easier to find the file when importing into Enterprise.
- If you receive your source data regularly in a consistent form you can take advantage of the Macro capabilities in Excel to automate the re-ordering of columns and addition of the XML Data map to speed up that repetitive process.
Comments
Please sign in to leave a comment.