How to: Create a miscellaneous payable.
Environment: Comsense Enterprise
In this article:
About Miscellaneous Payables
Miscellaneous payables are payables for any purchase that is not on a purchase order. Miscellaneous payables can be used for:
- Rent
- Utilities
- Visa bills
- Other expenses
- Expenses related to an order
- Issuing check refunds
- Correcting or adjusting incorrect transactions
The contents of a miscellaneous payable are not tied to control accounts and the amounts must be manually distributed to the appropriate general ledger account. The steps in this article outline the basic use of miscellaneous payables. Since miscellaneous payables can be used for multiple types of transactions, the payable information and steps may vary. If you ever need help creating your miscellaneous payable, Contact Support.
Accessing Payable
Enterprise > Payables > Payable

Creating a Miscellaneous Payable
Setting Up the Payable
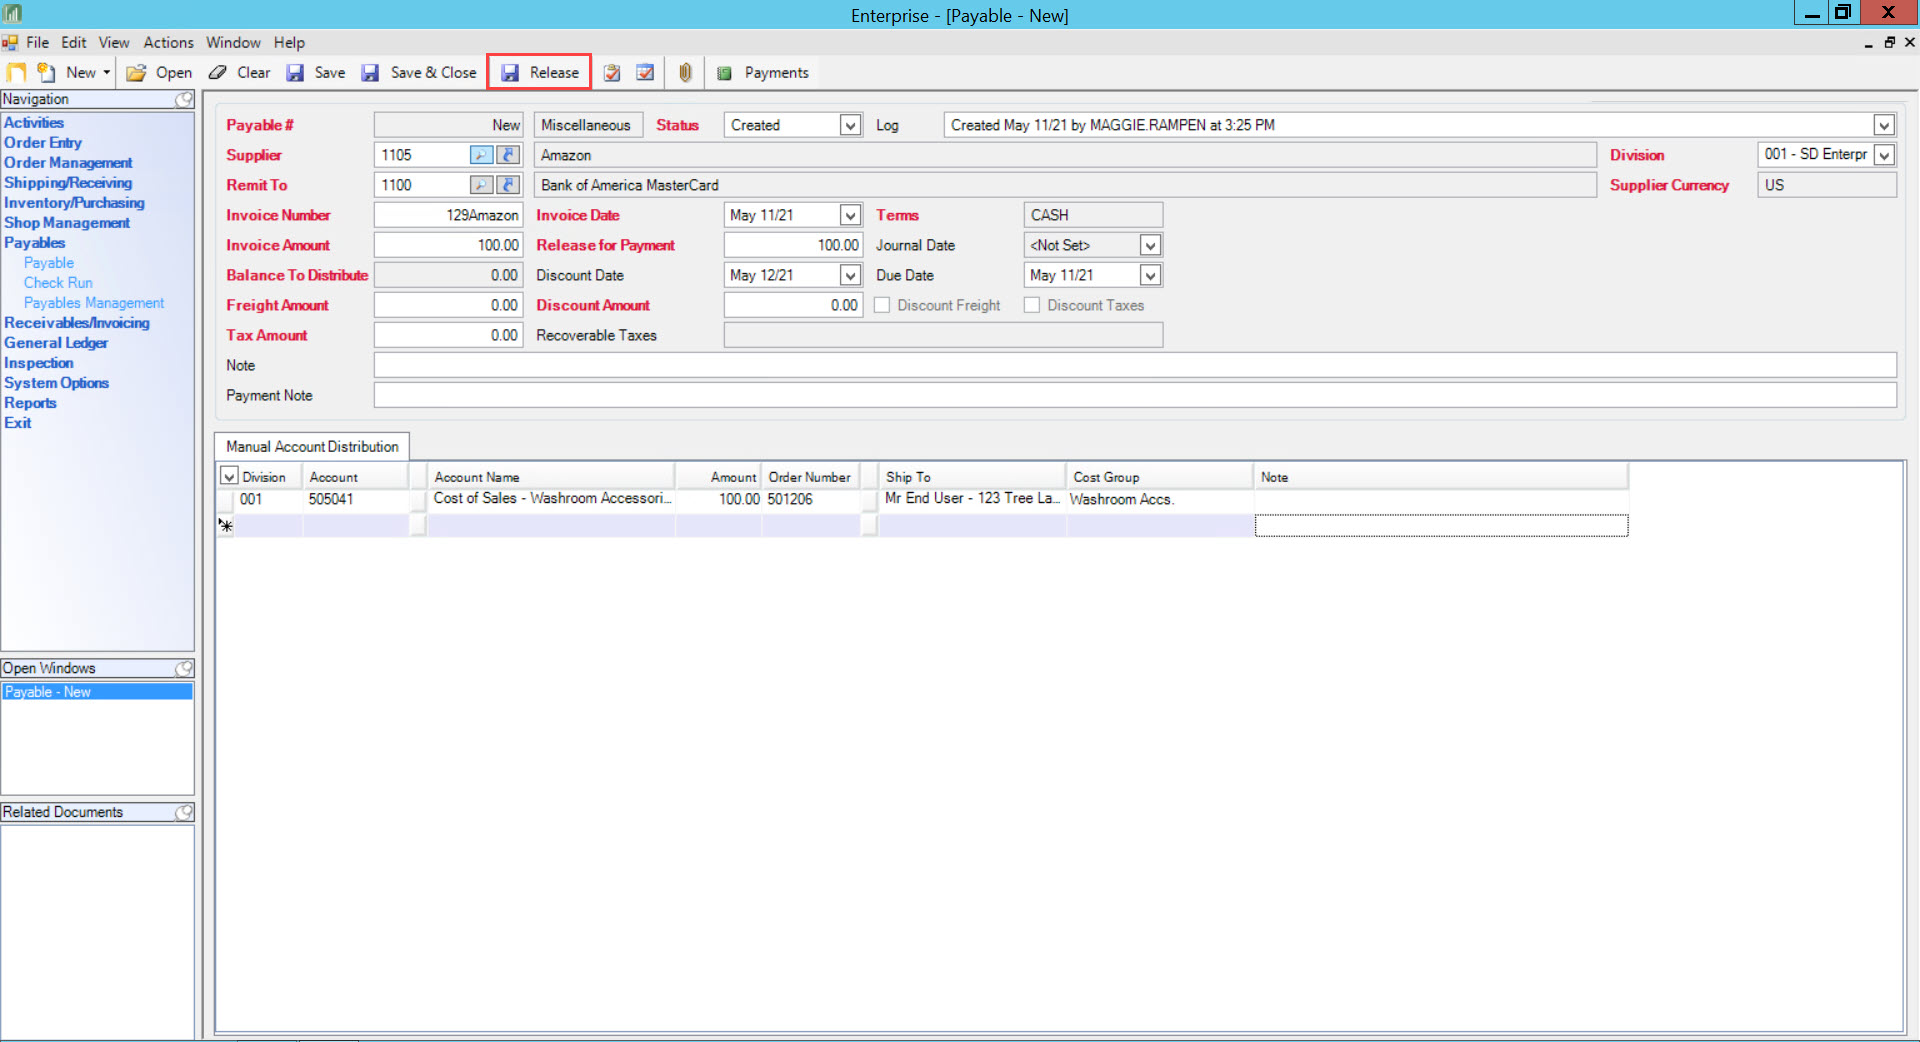
In the Payable window:
- Click New
- Click Miscellaneous
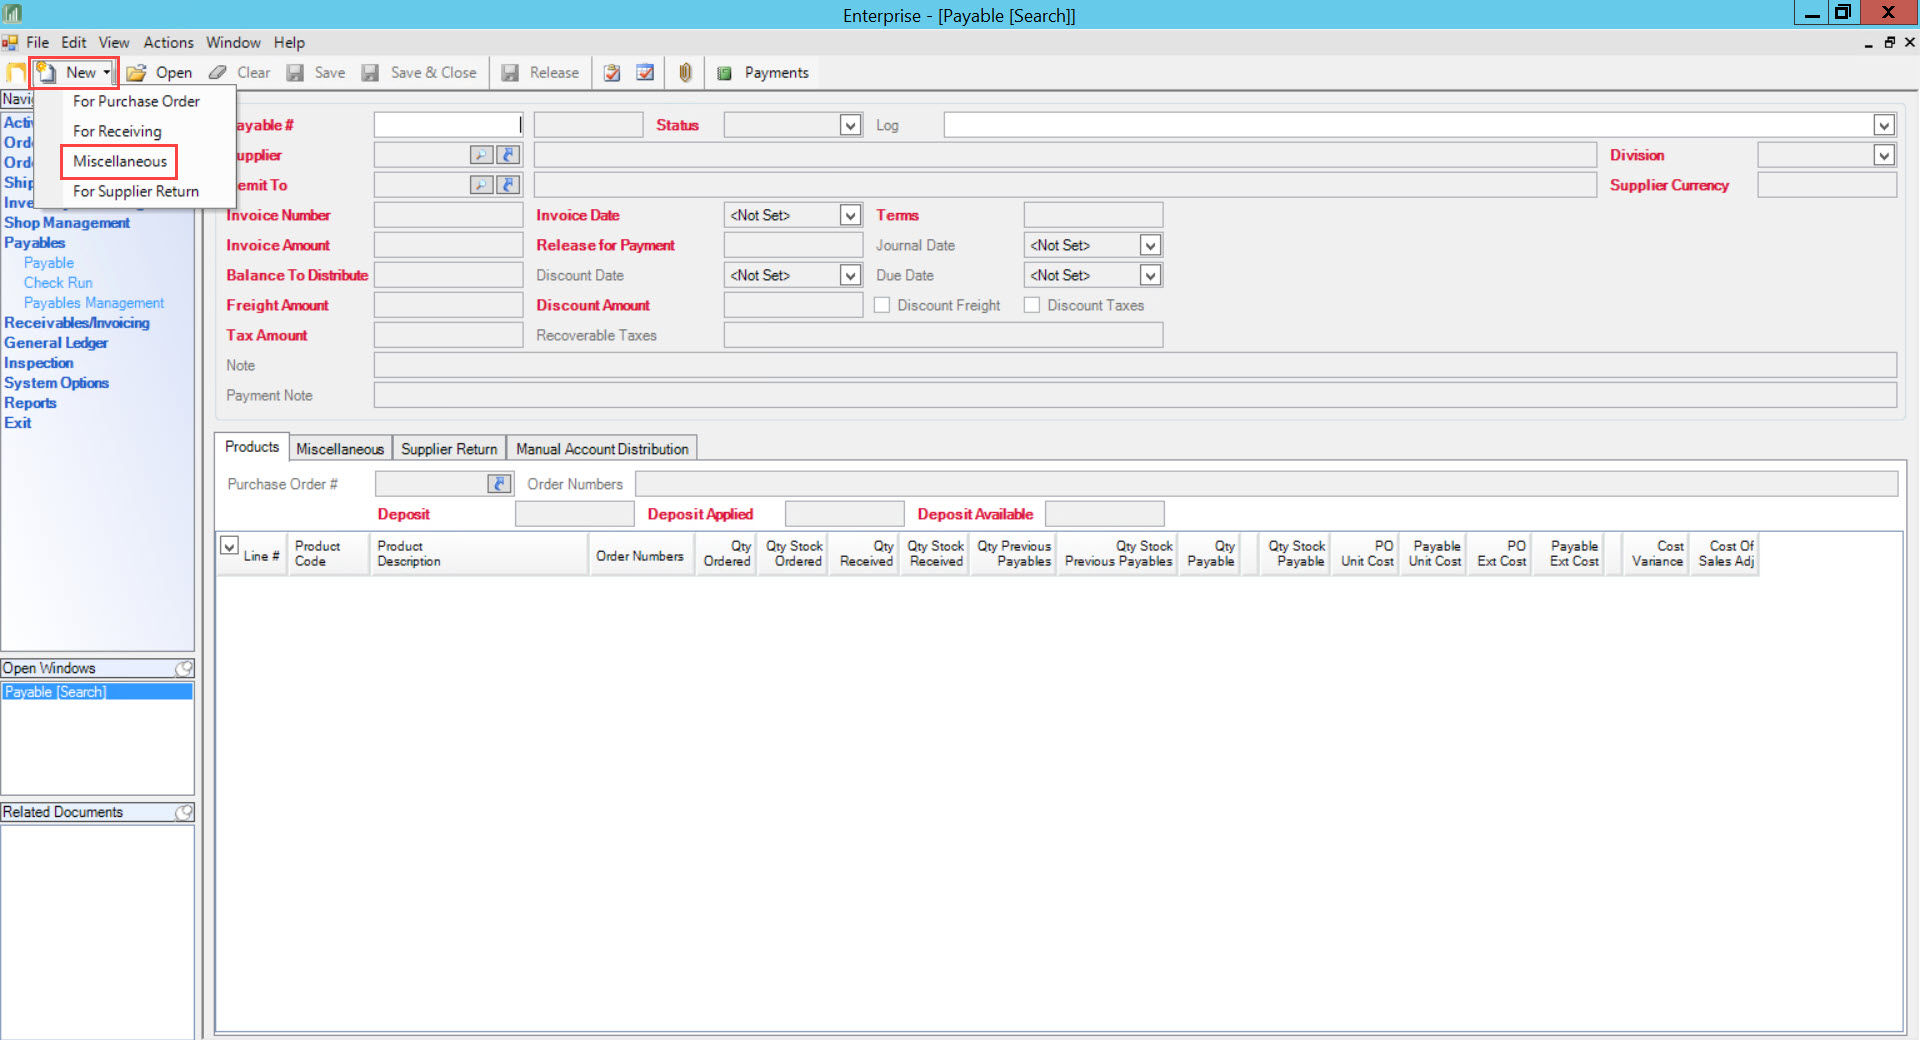
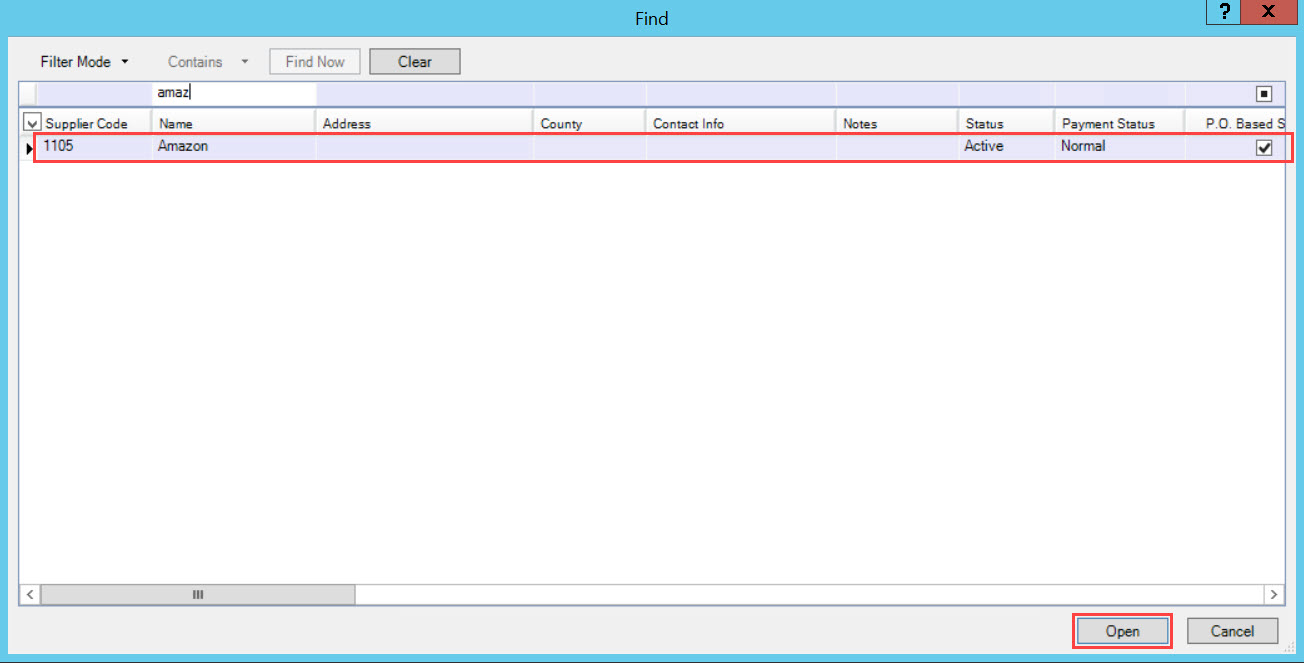
In the Supplier field:
- Click the Magnifying Glass icon
- The Find window will open
- Select the supplier
- Click Open
In the Payable window:
- Enter the payable amount in the Invoice Amount field
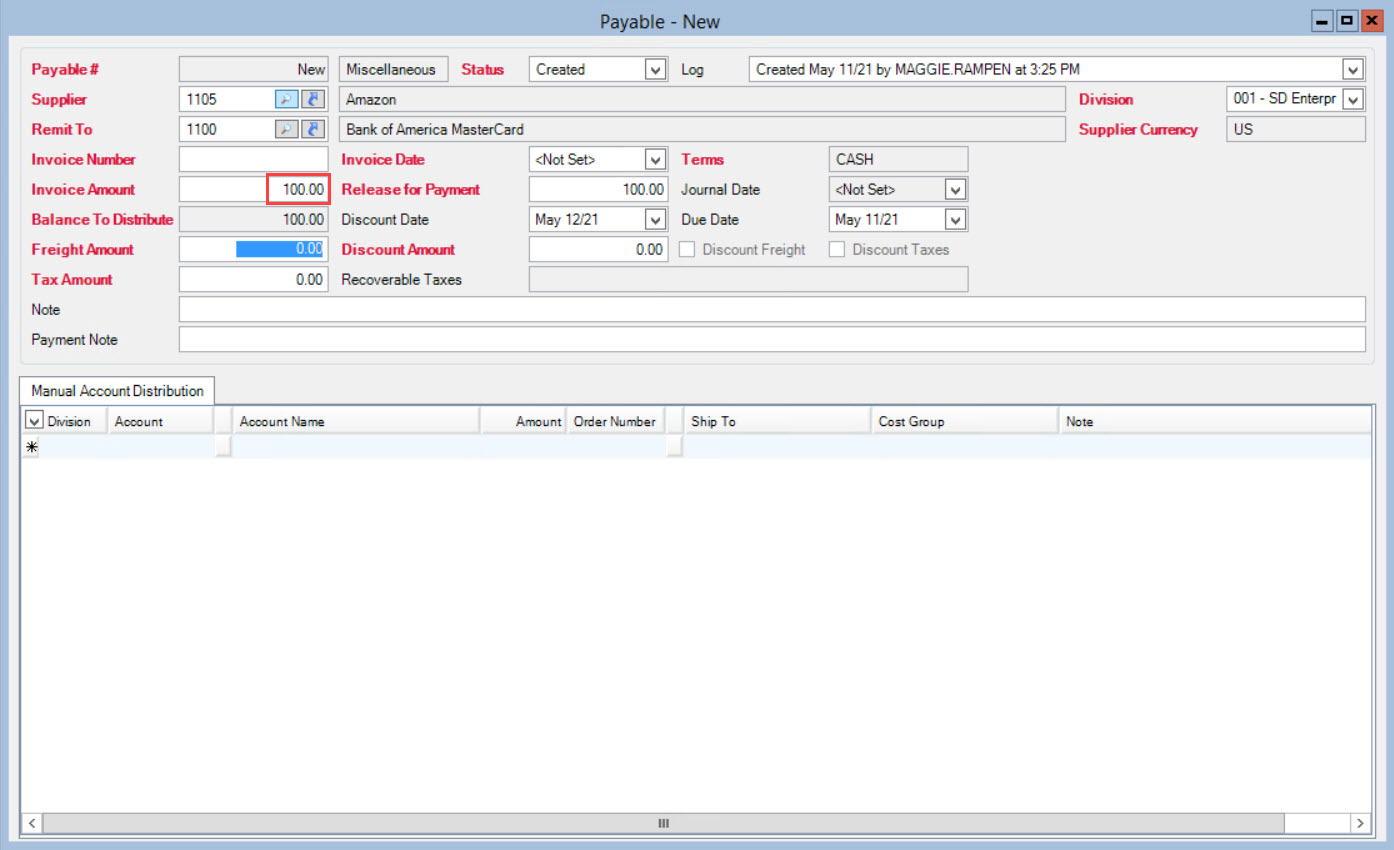
- Complete all other required fields:
- Invoice Number
- Invoice Date

Distributing the Payable Amount
You do not always need to complete each field on the manual account distribution line item. The information you include depends on purchase's relationship to a project or sales order in the system. You can either:
- Distribute the payable amount for a purchase unrelated to a project or sales order
- Distribute the payable amount for a purchase related to a project or sales order
Purchase Unrelated to a Project or Sales Order
For all independent purchases (purchases unrelated to a project or sales order in the system), the miscellaneous account distribution line only requires you to fill our the Account field and the Amount field. All payables for purchases unrelated to a project or sales order should use a non-cost of sales account.
In the Manual Account Distribution tab:
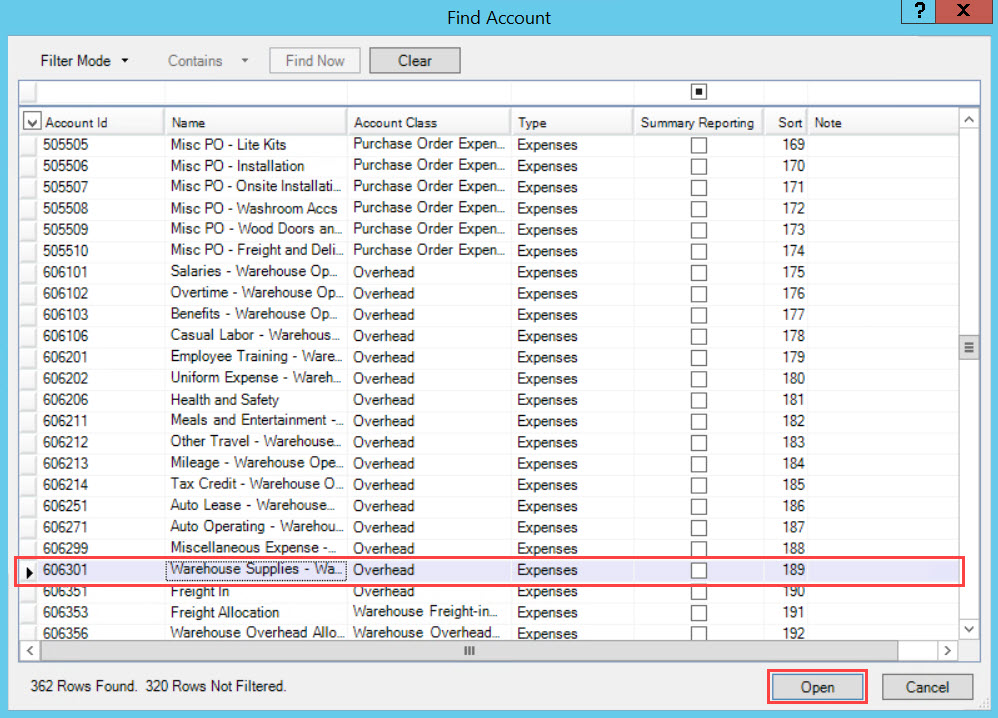
- Click the Account button on the fillable line item
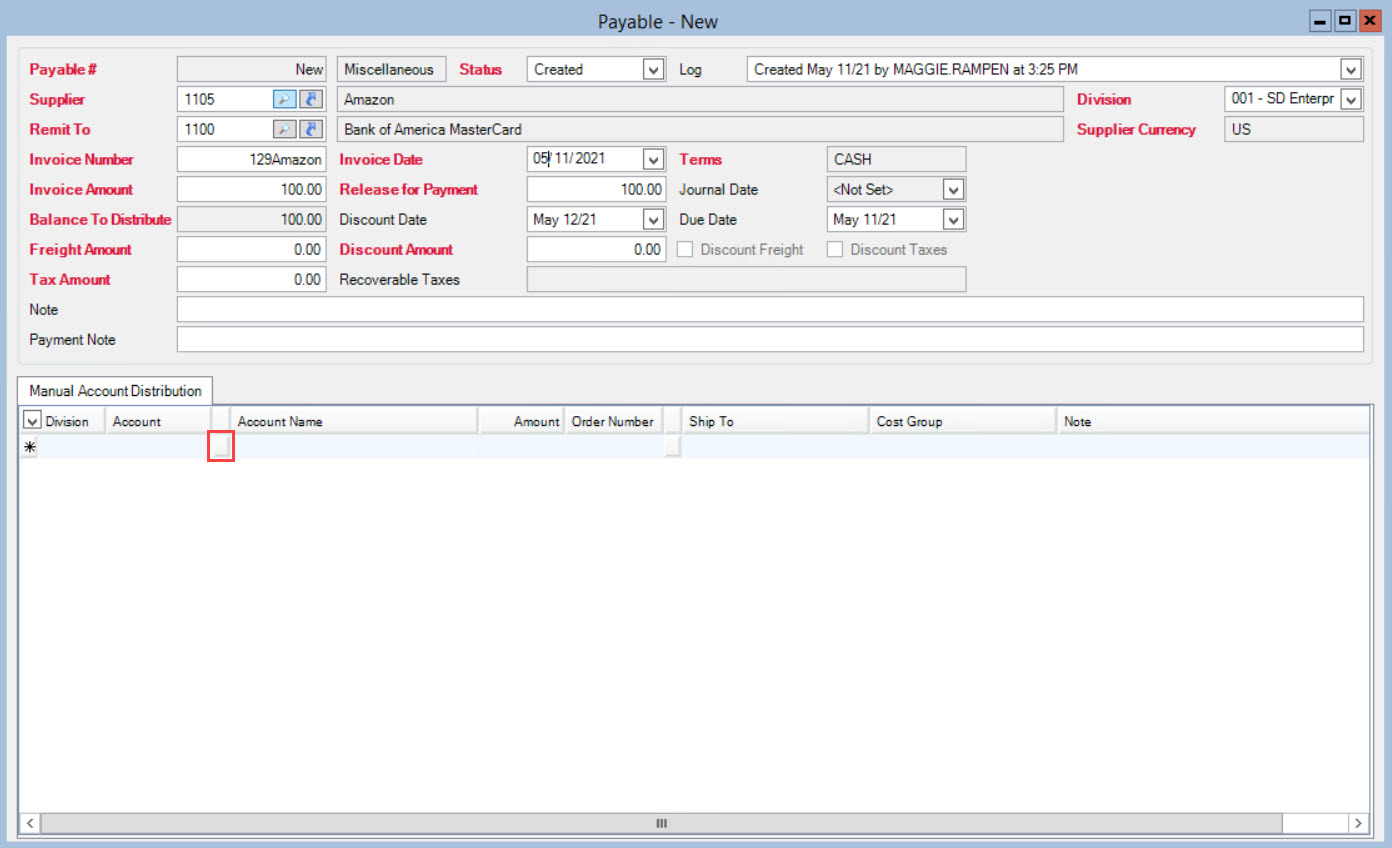
- Select the appropriate GL account
- Click Open
In the Amount field:
- Enter the amount to apply from that account
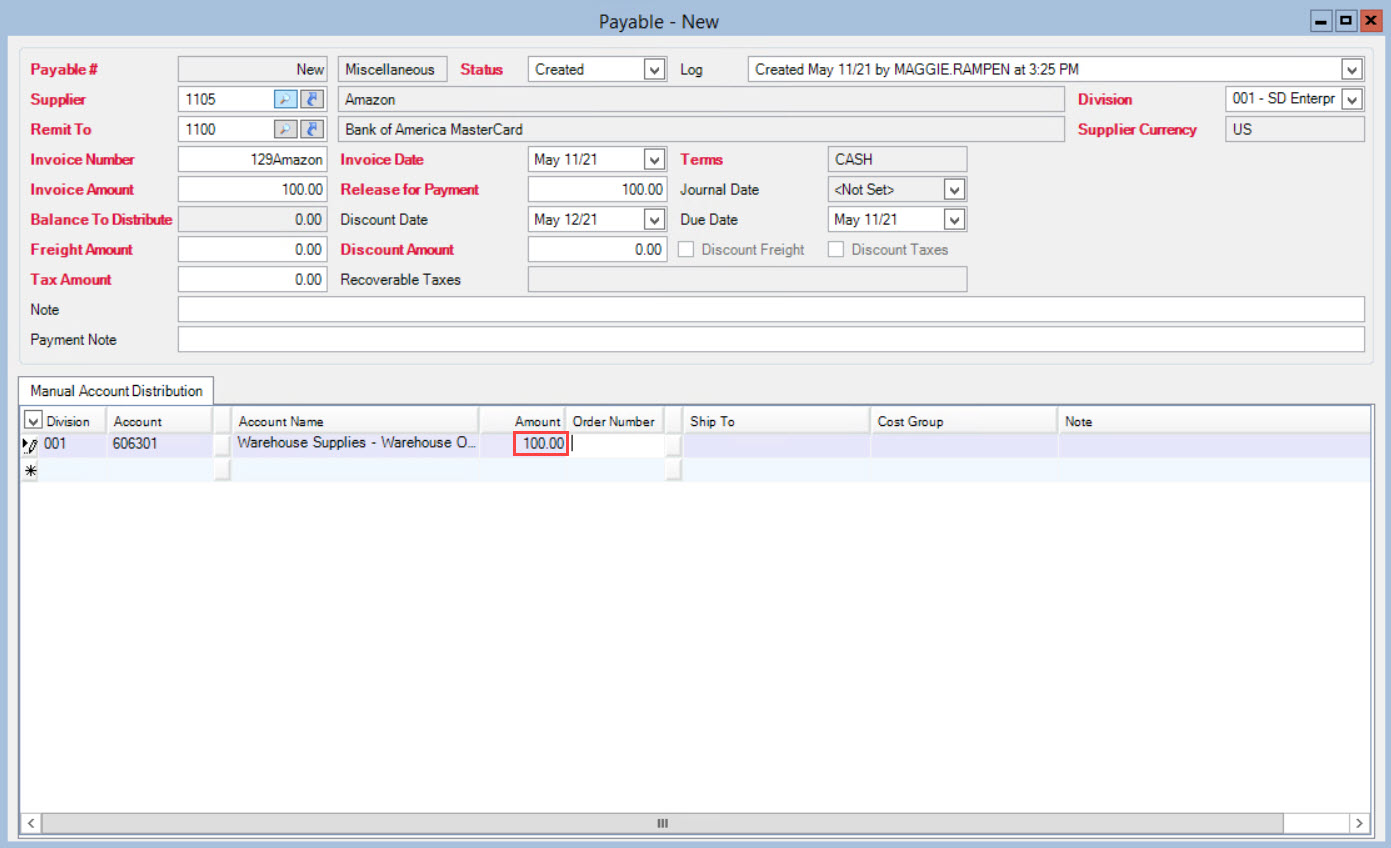
- Complete steps 1-4 for each GL account included on this payable
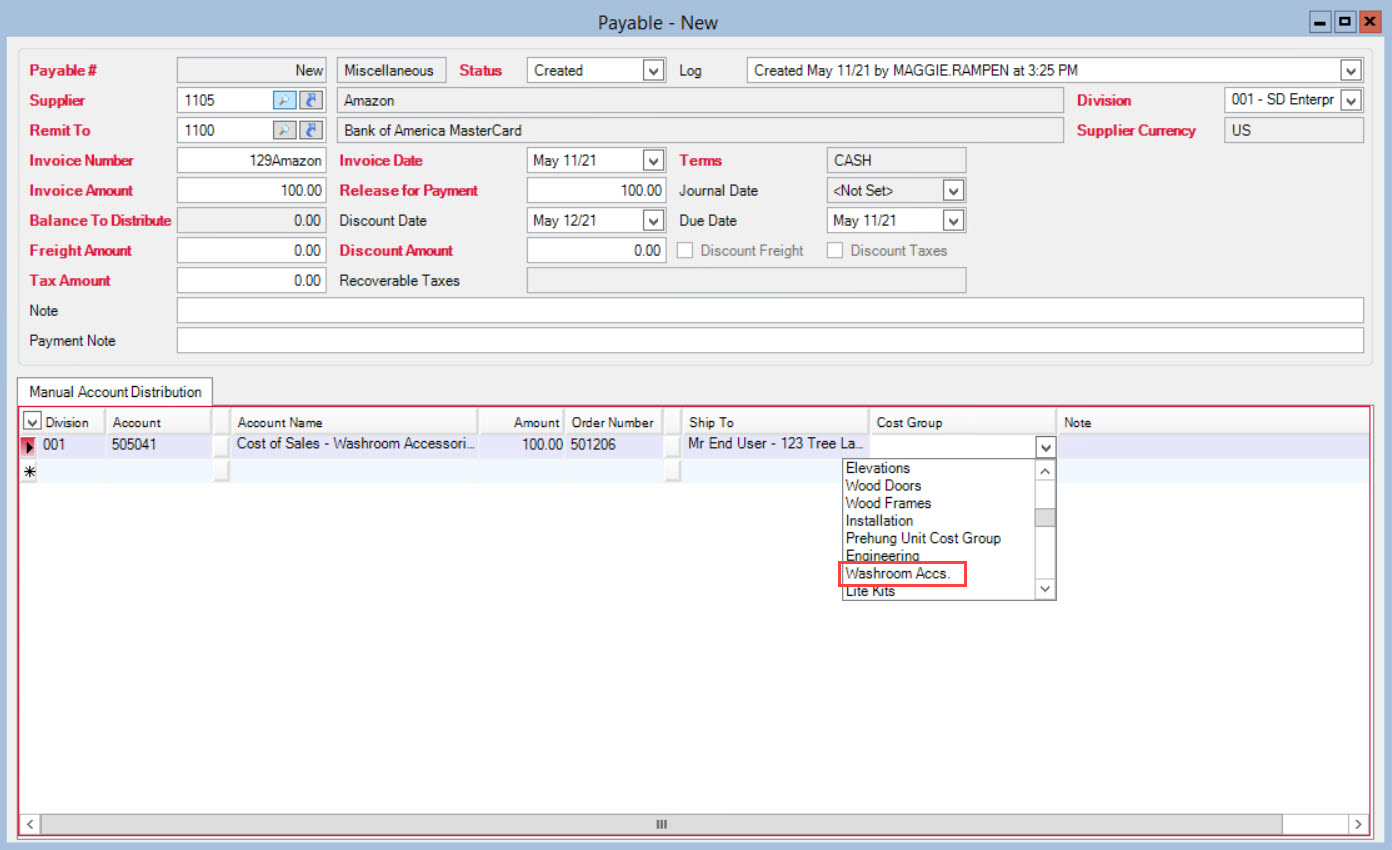
Purchase Related to a Project or Sales Order
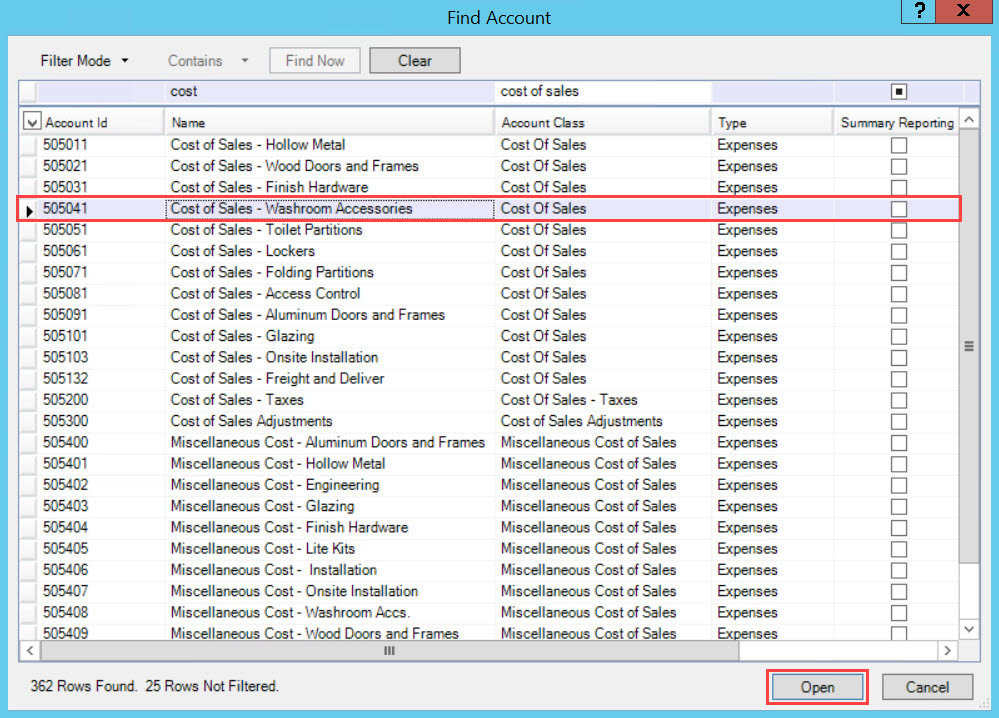
For any purchases related to a project or sales order, you must use a cost of sales account and include the order number and cost group.
In the Manual Account Distribution tab:
- Complete the steps in Purchase Unrelated to a Project or Sales Order using cost of sales account as the general ledger account
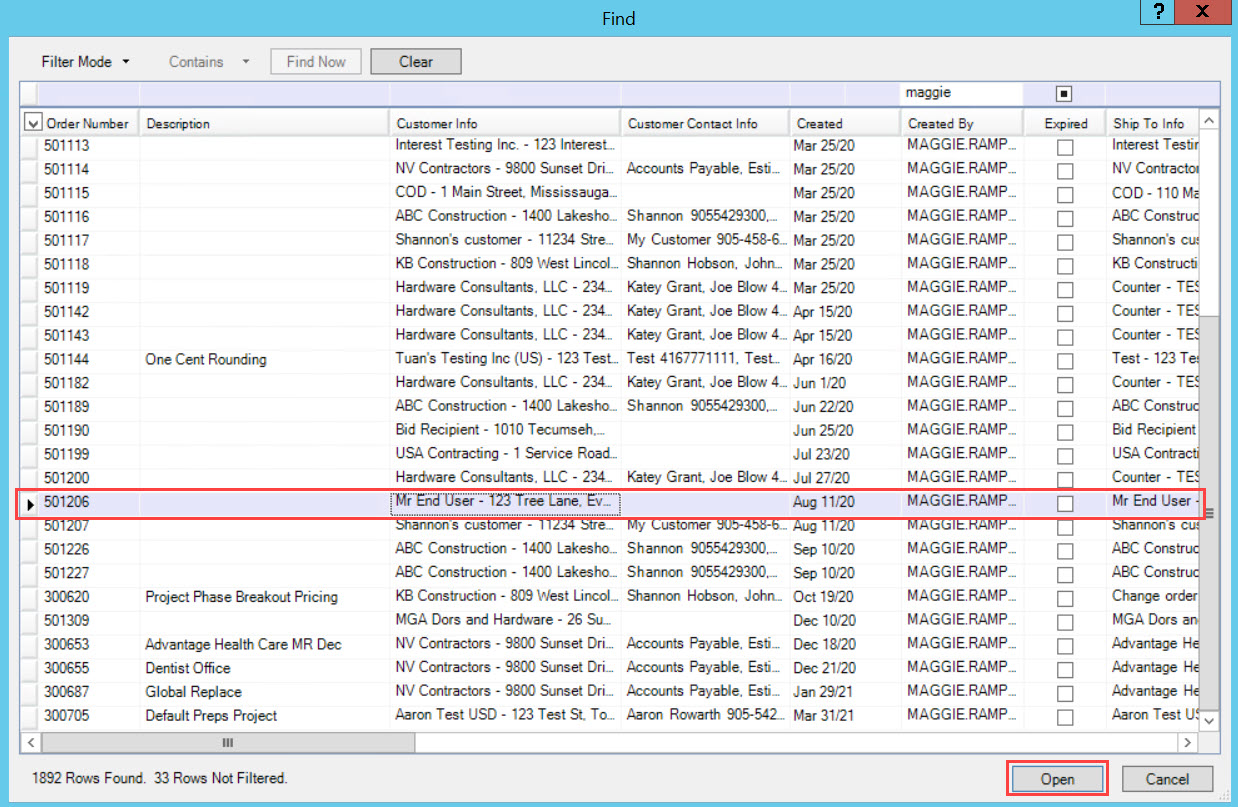
- Click the Order Number button

In the Find window:
- Select the order
- Click Open
In the Cost Group field:
- Select the appropriate cost group
Saving & Releasing the Payable
Always review the fields carefully before releasing a payable. After a payable is released you cannot update any fields except for the Supplier and Remit To field. The Supplier and Remit to field cannot be updated after you include the payable in the check run.
In the Payable window:
- Click Save & Release
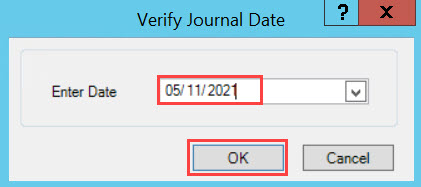
In the Verify Journal Date window:
- Select the appropriate date
- Click OK
Comments
Please sign in to leave a comment.