How to: Ship product to a customer.
Environment: Comsense Enterprise
In this article:
Shipment Window Statuses
| Status | Meaning |
|---|---|
| Open | The product is sourced |
| Released | The customer is ready for the shipment and the warehouse is picking the product |
| Shipped | The product is ready to be shipped with the packing slip |
| Completed | There is a signed packing slip confirming the receipt of all products |
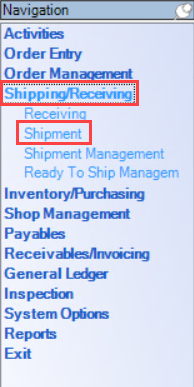
Accessing Shipments
If you create a new shipment through the Ready To Ship Management window, Stock Requisition window, or Work Order window, proceed with Step 4 of Sales Order Selection Page.
Enterprise > Shipping/Receiving > Shipment
Creating a New Shipment
You can only create a new shipment for a sales order or project if the purchase order, stock requisition, and/or work order is complete.
In the Shipment window, Click New and Click Next in The Shipping Wizard.
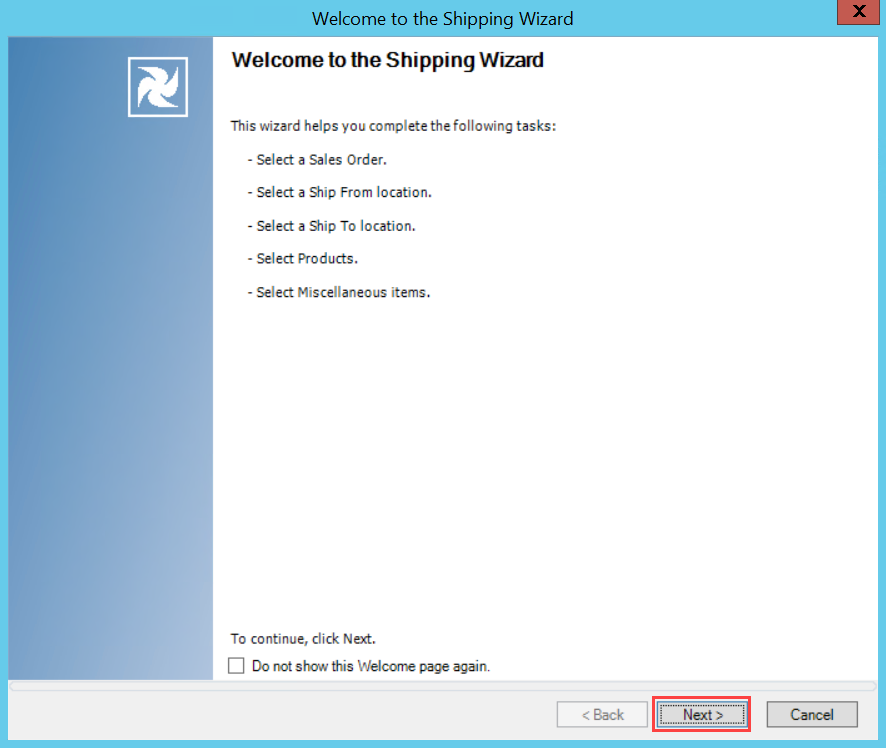
Completing the Shipment Wizard
Sales Order Selection Page
- Click the Magnifying Glass icon
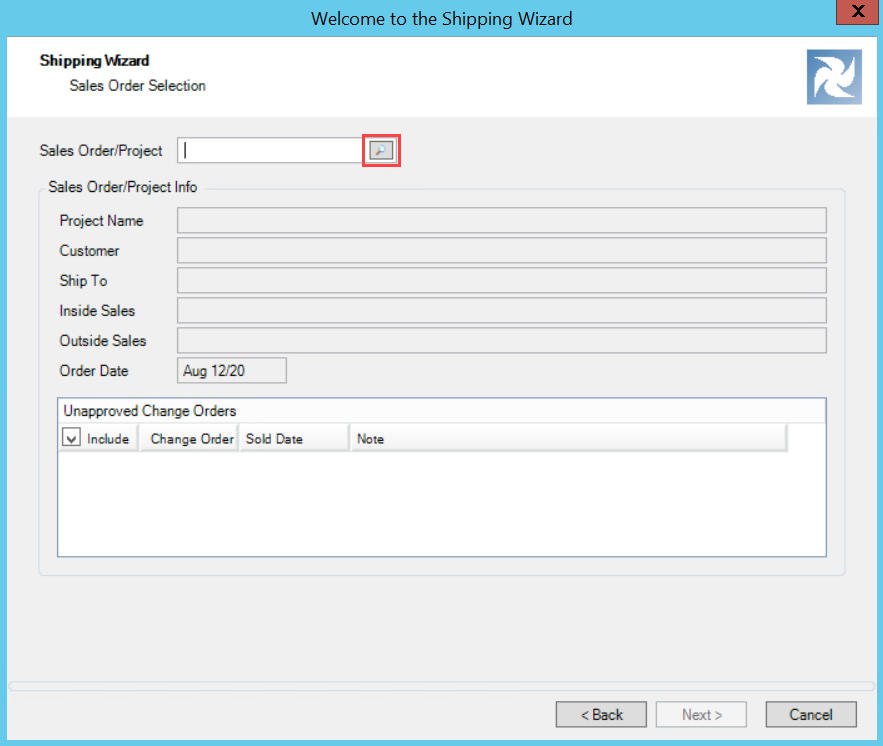
- Search & Select the project or sales order
- Click Open
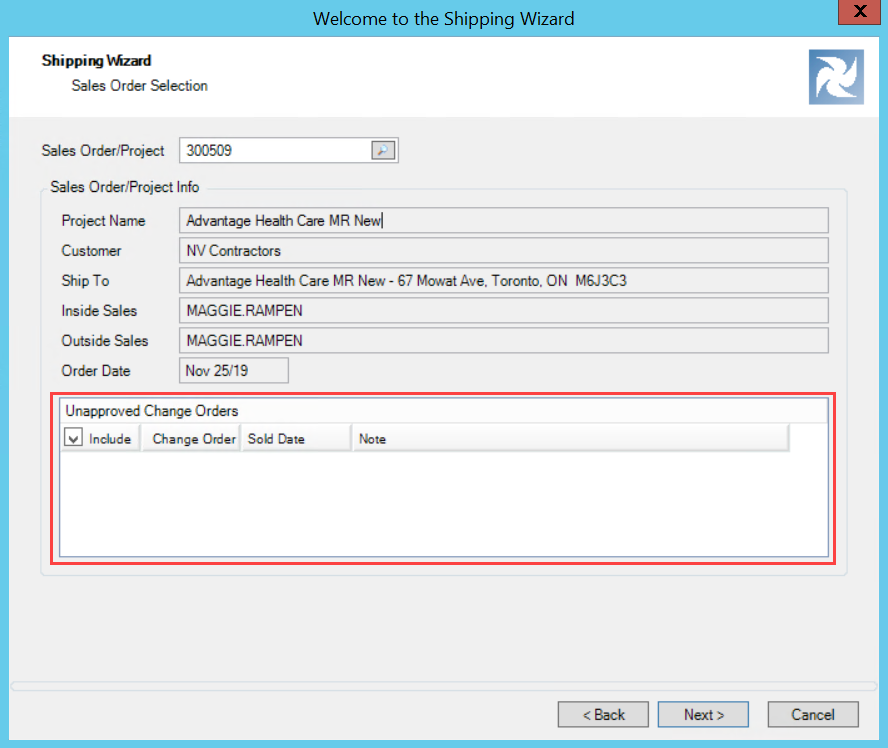
If you are shipping an unapproved change order:
- Select the Unapproved Change Order
- If you are not shipping an unapproved change order proceed with step 5
- Click Next
The project, change order, or sales order is now selected.
Selecting Unapproved Change Orders
There are security restrictions on shipping unapproved change orders. If you are shipping unapproved change orders, you must ship each change order in separate shipments. This security restriction promotes easier and more precise invoicing.
Shipment Options Page
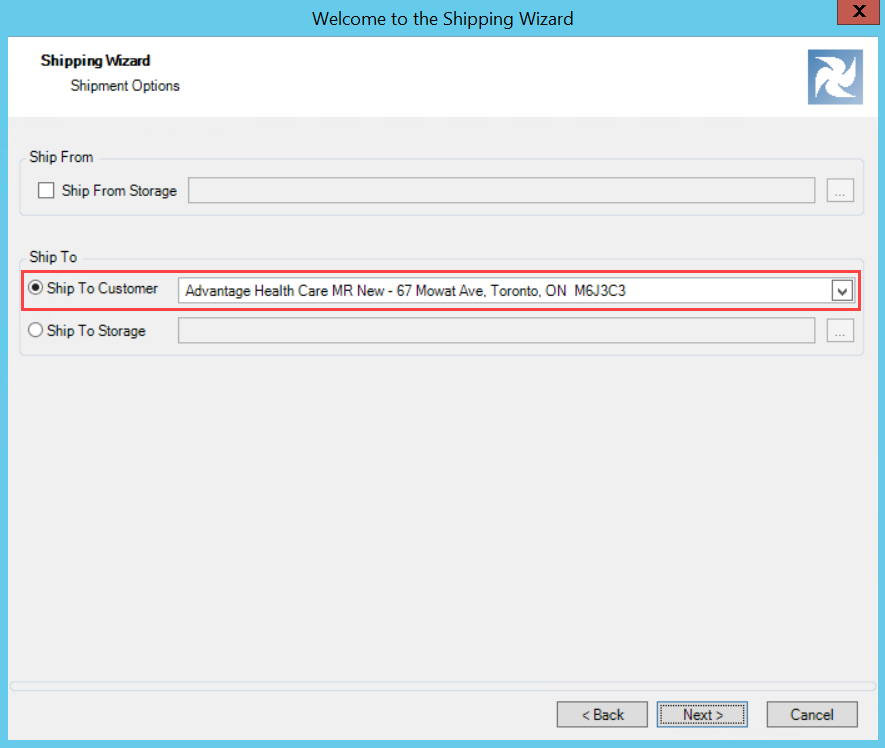
Ship to Customer
The Shipping wizard automatically selects the Ship To Customer radio button. Proceed with these steps if you are shipping directly to the customer.
In the Ship To Customer field, Ensure the correct Ship To Customer address and Click Next.
Ship to Storage
If you are storing the product for the customer:
- Select the Ship To Storage radio button
- Click ...
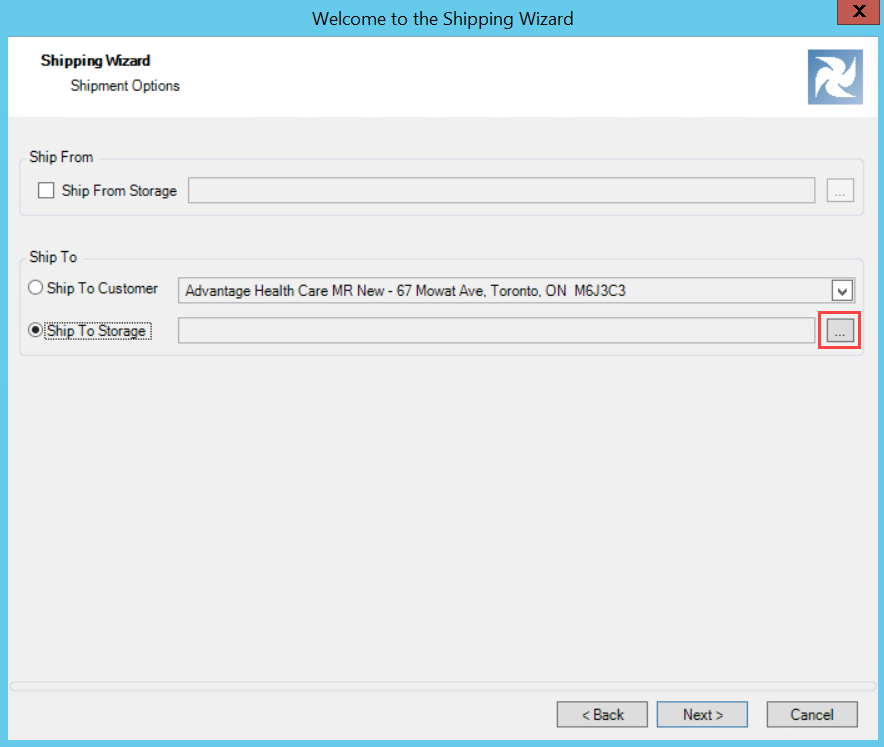
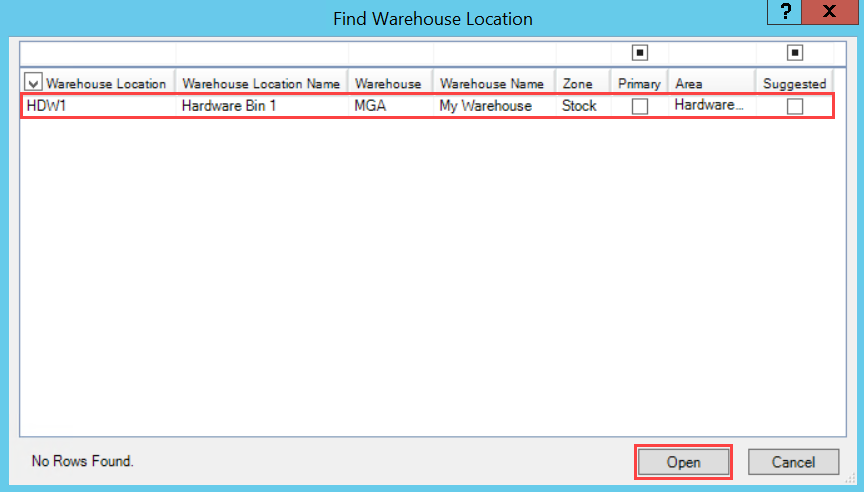
- Select the warehouse storage location

- Click Open
- Click Next
*Note: The system allows invoicing for product in storage.
Ship From Storage
If the item is in storage and ready to ship to the customer:
- Check the Ship From Storage Checkbox
- Click ...
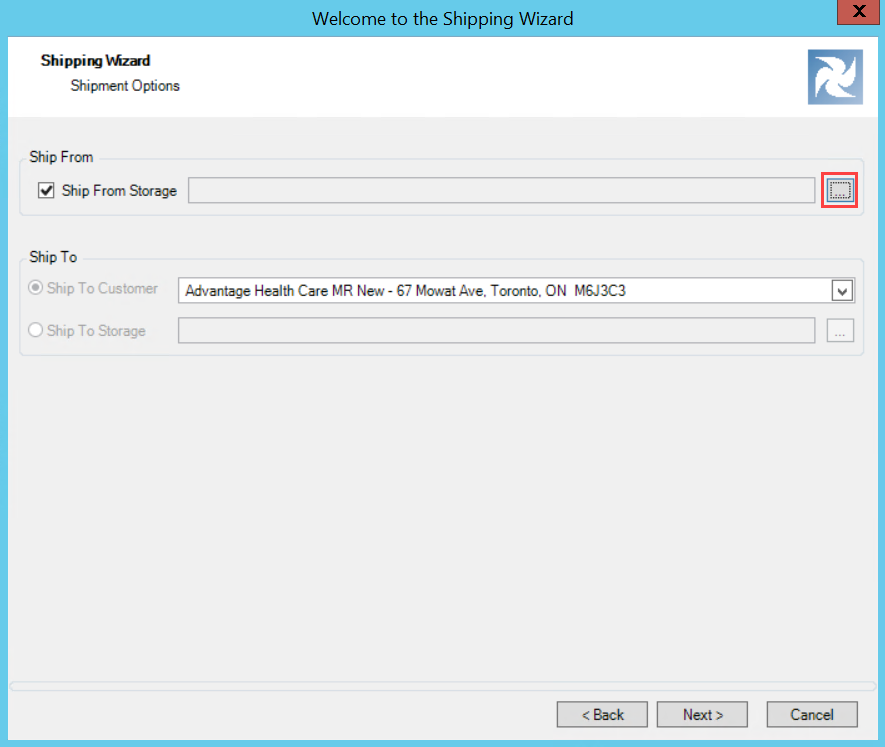
- Select the storage warehouse
- Click Open
- Ensure the Ship To Customer address is correct
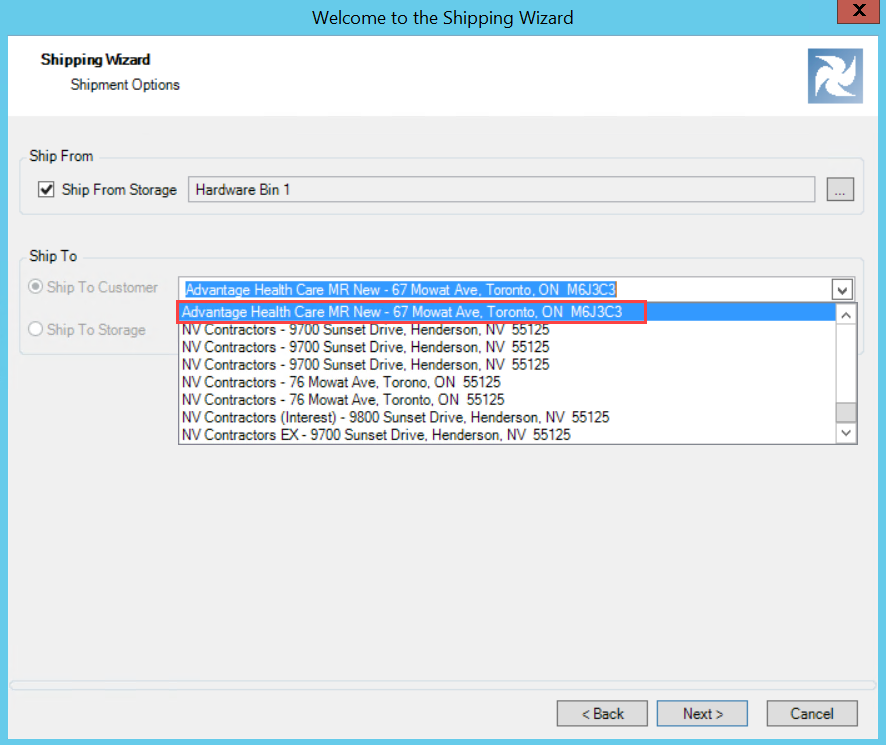
- Click Next
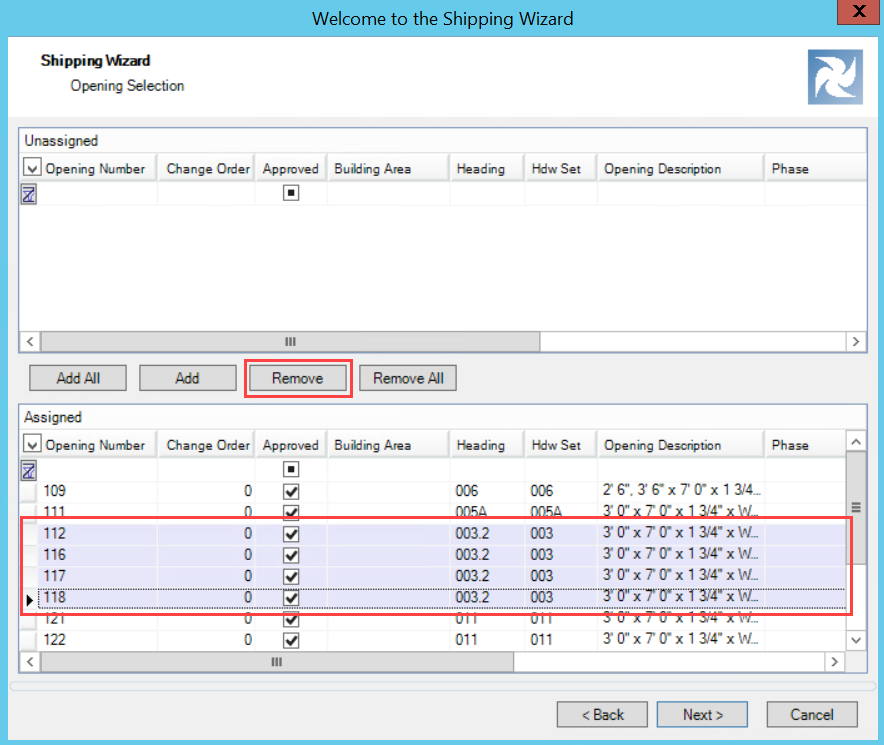
Opening Selection Page
All ready to ship openings or line items are automatically in the Assigned pane.
Select the openings or sales order lines and Click Next.
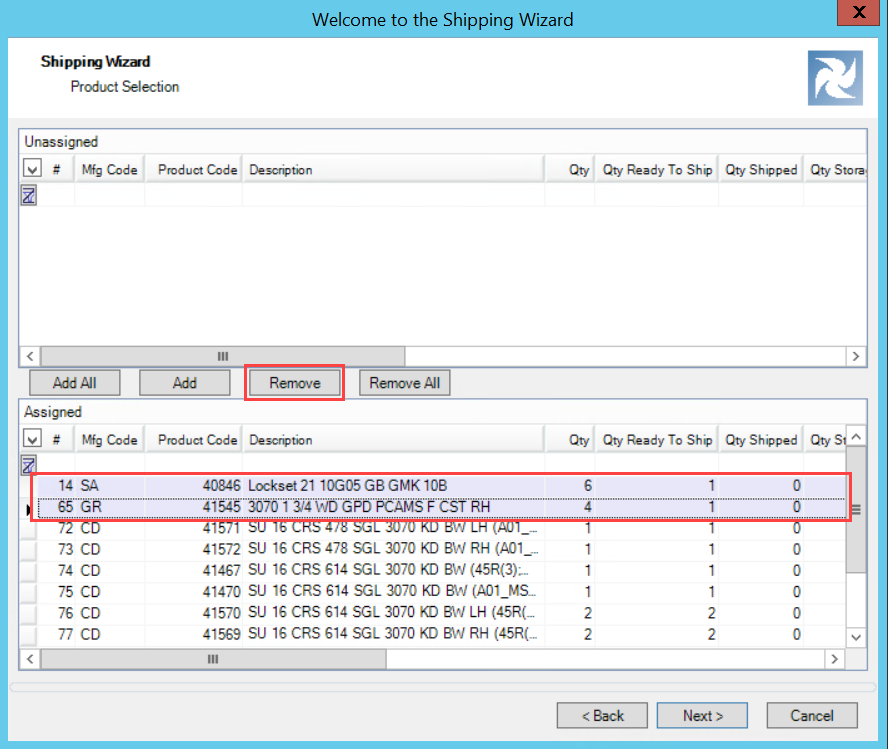
Product Selection Page
All ready to ship product from the openings or sales order lines from the previous page are automatically in the Assigned pane.
Select the product to ship and Click Next.
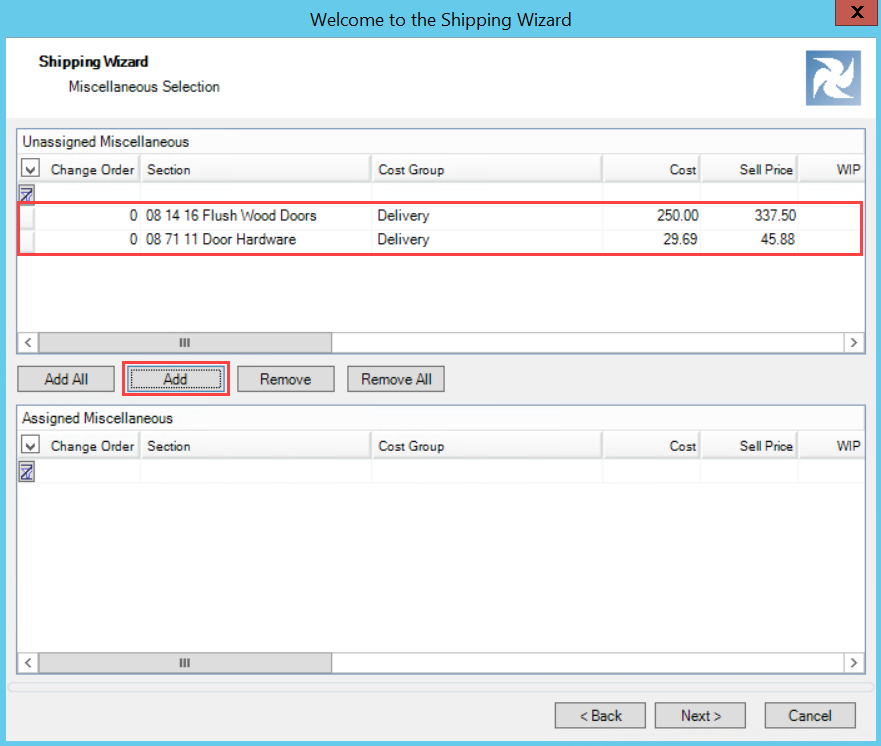
Miscellaneous Selection Page
Miscellaneous selection can include delivery fees or storage fees specific to the customer, project, or product.
Select any miscellaneous line items and Click Next.
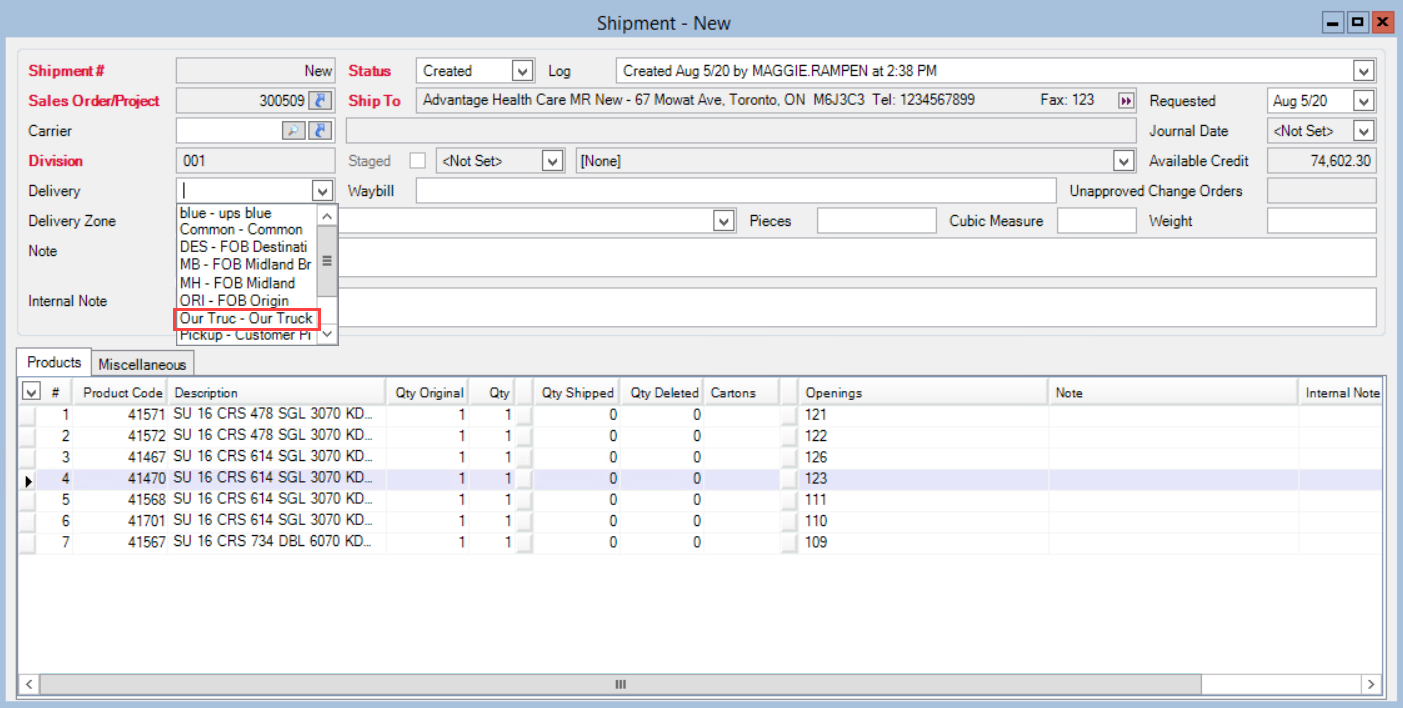
Releasing the Shipment
In the Delivery field:
- Select the delivery method
When you are ready to pick the product from the warehouse:
- Print the labels
In the Status field:
- Select Released
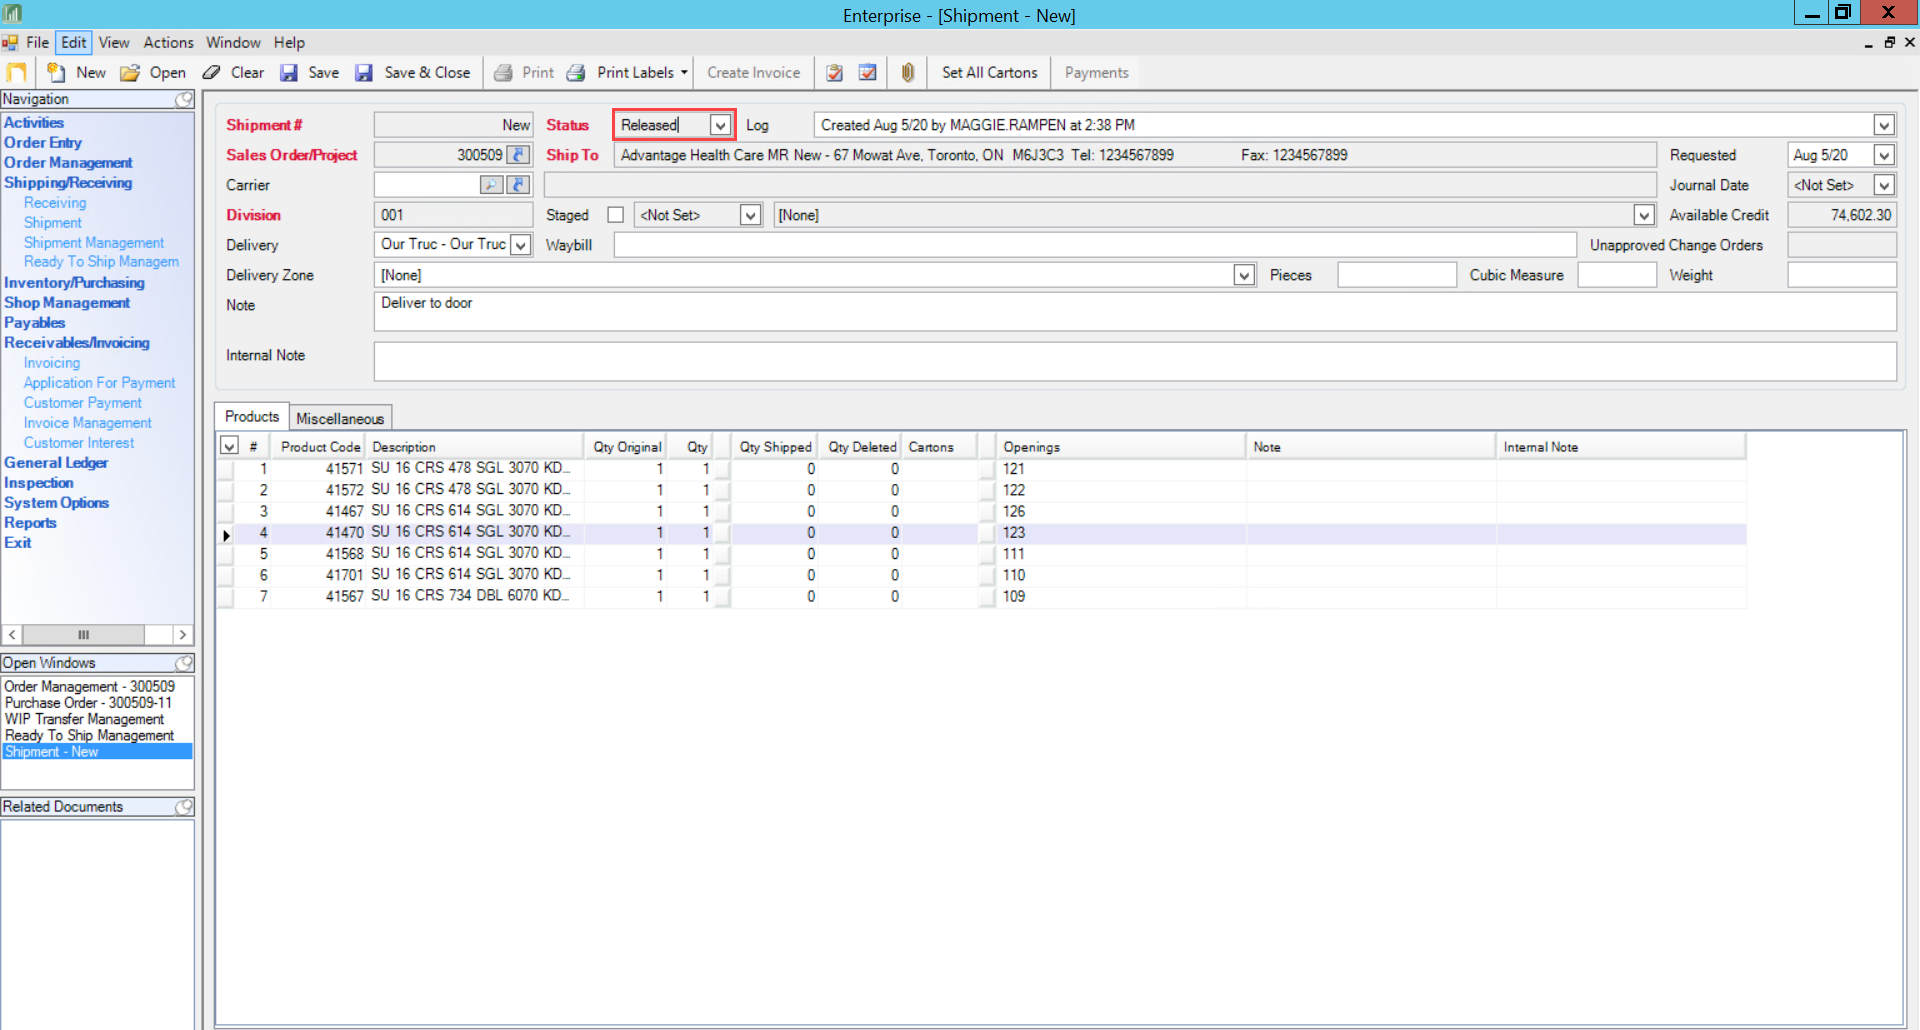
- Click Save
- The Generate Report window will open for the Picking Slip report
- Click Print
- Send the picking slip and labels to the warehouse
Printing Labels
In the top toolbar:
- Click Print Labels
- Click the Label Type
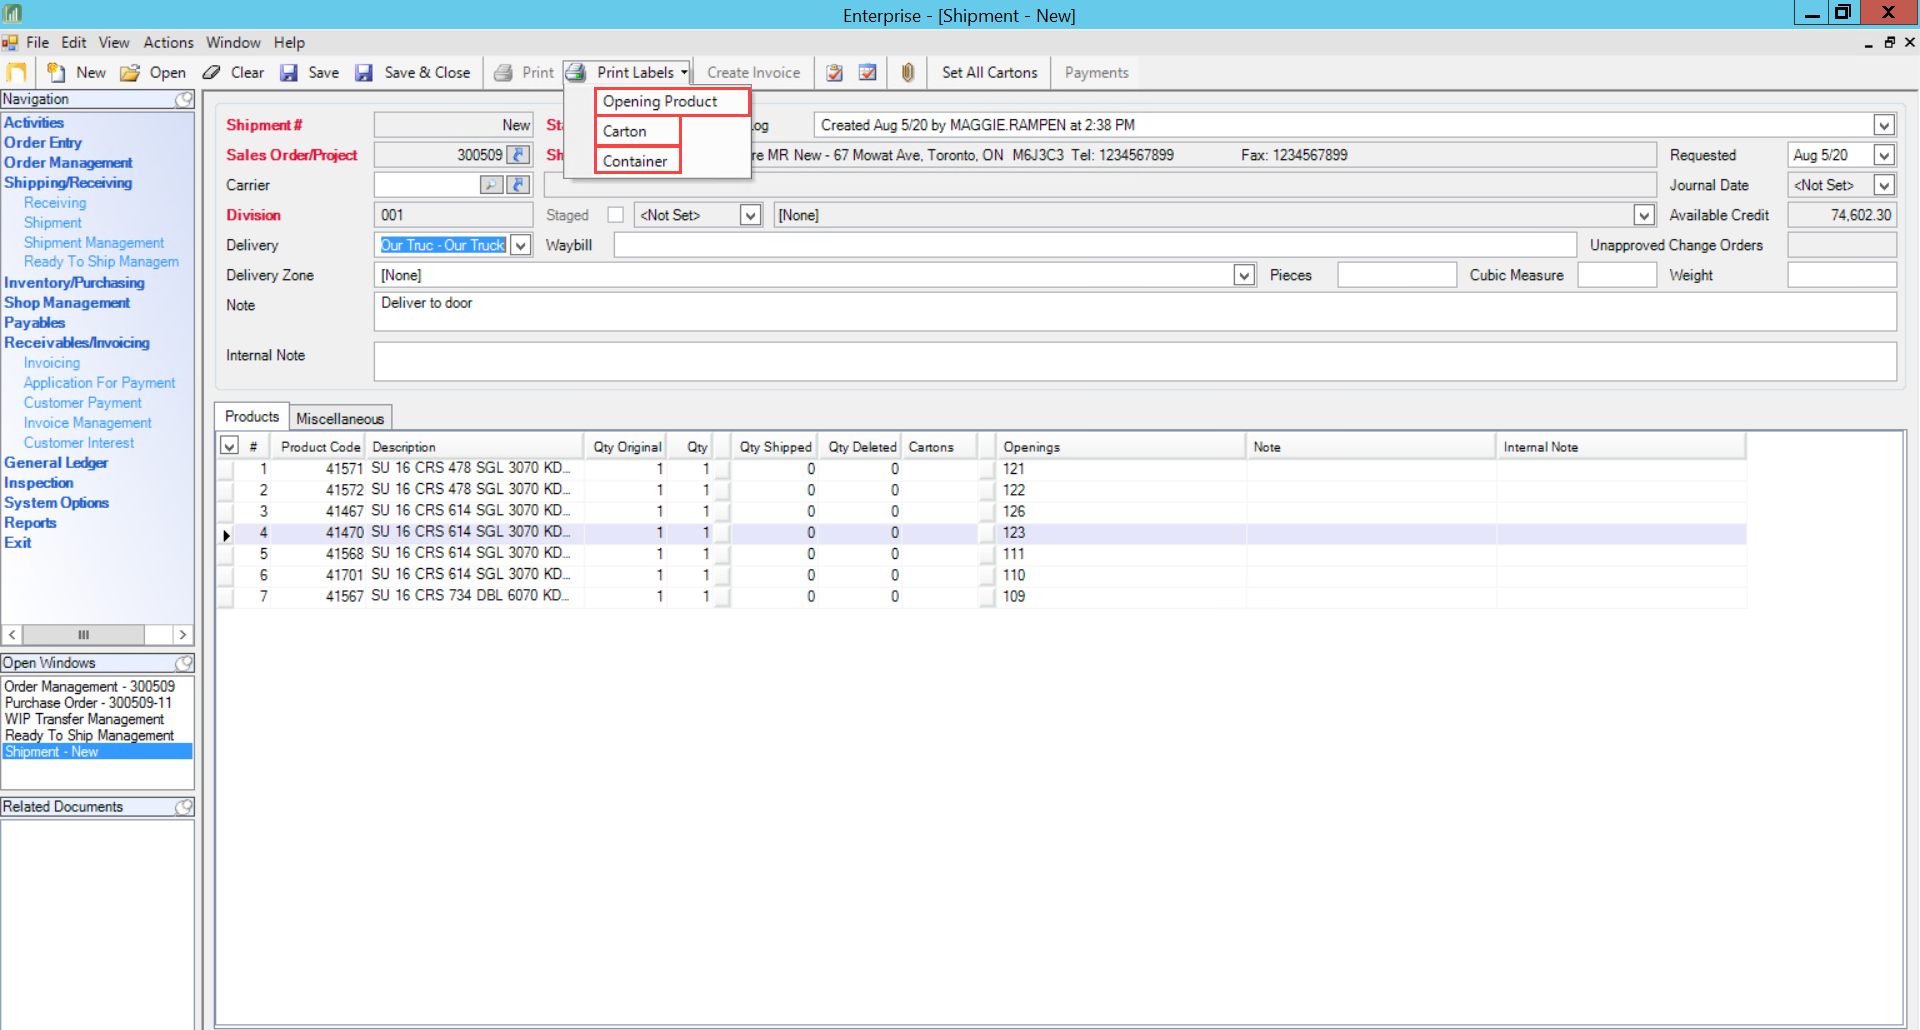
In the Generate Report window:
- Click Print
- Repeat steps 1-3 for each required label type
You now have labels for the shipment.
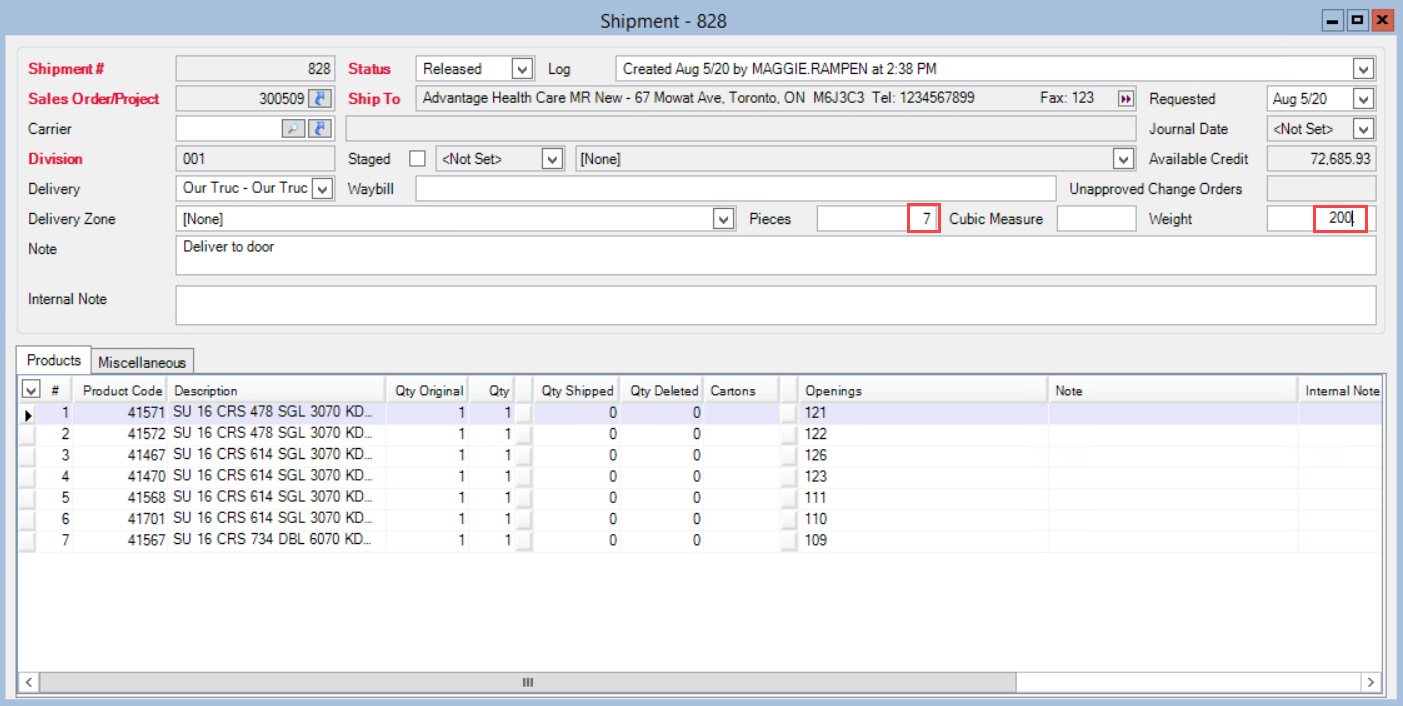
Shipping the Product
In the Shipment window:
- Fill in the Pieces and Weight fields
On the product line items:
- Click the Carton Number button
- The Shipment Carton window will open
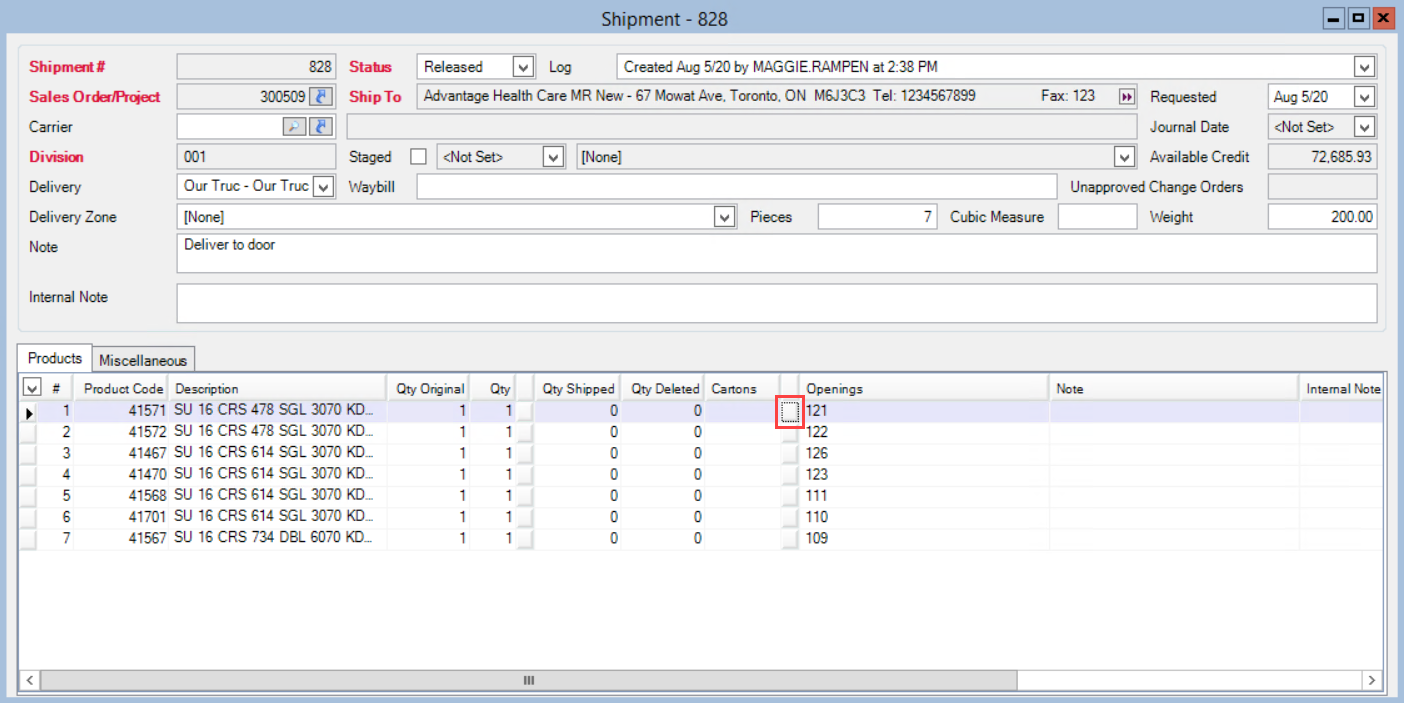
- Enter the Carton Number
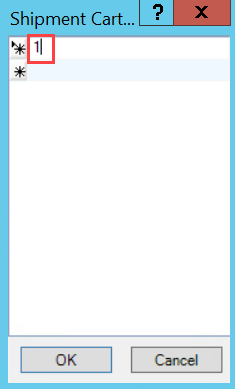
- Click OK
- Repeat steps 3-4 for each line item
- Update the status to Shipped
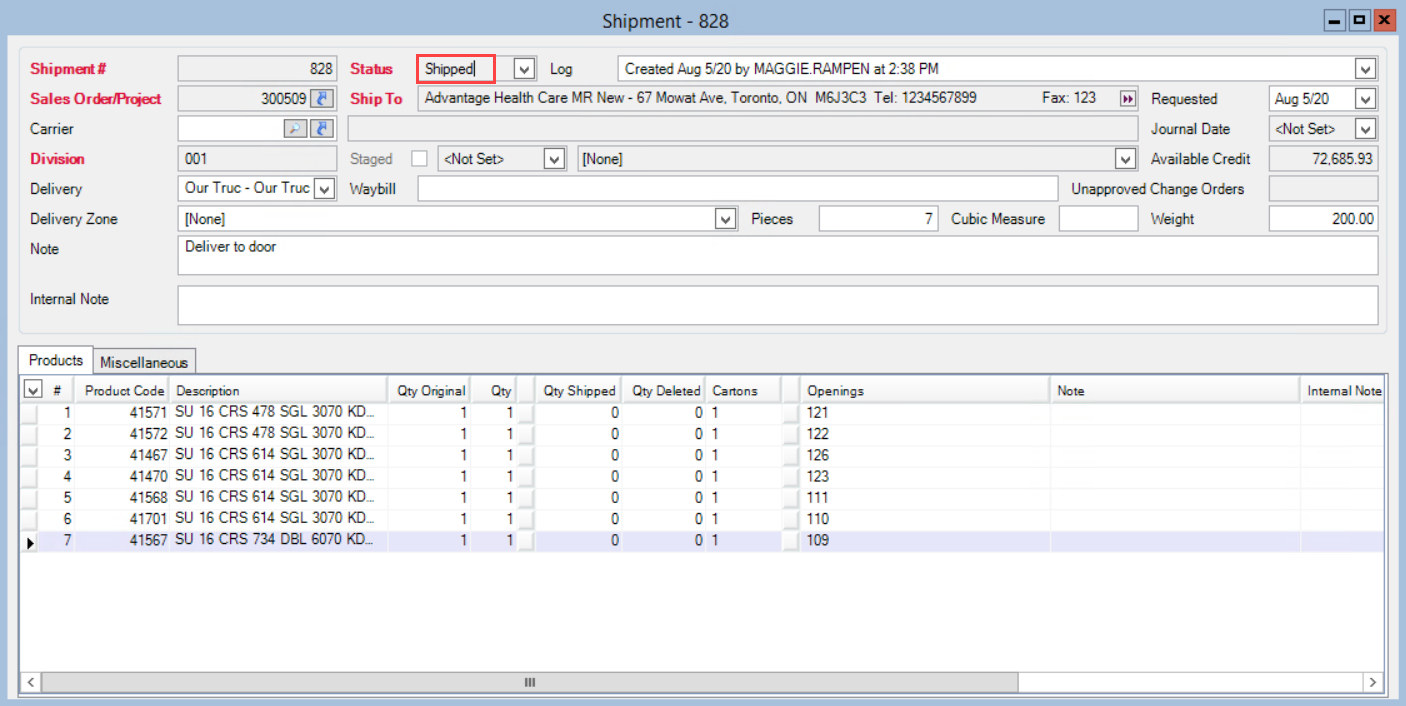
- Click Save
- The Generate Report window will open for the Packing Slip report
- Click Print
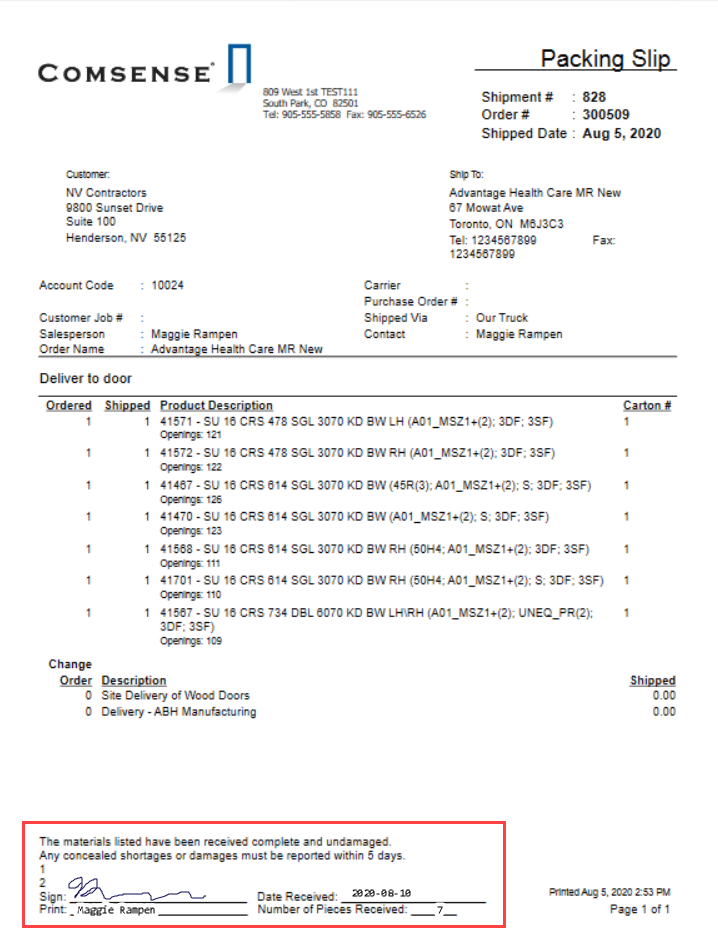
Receiving the Signed Packing Slip
After you receive the signed Packing slip, Review the packing slip. If all products were successfully delivered, Complete the Shipment. If there are any unsuccessful deliveries e.g. damaged product or product missing in the shipment, Update the Shipment Qty before Completing the Shipment.
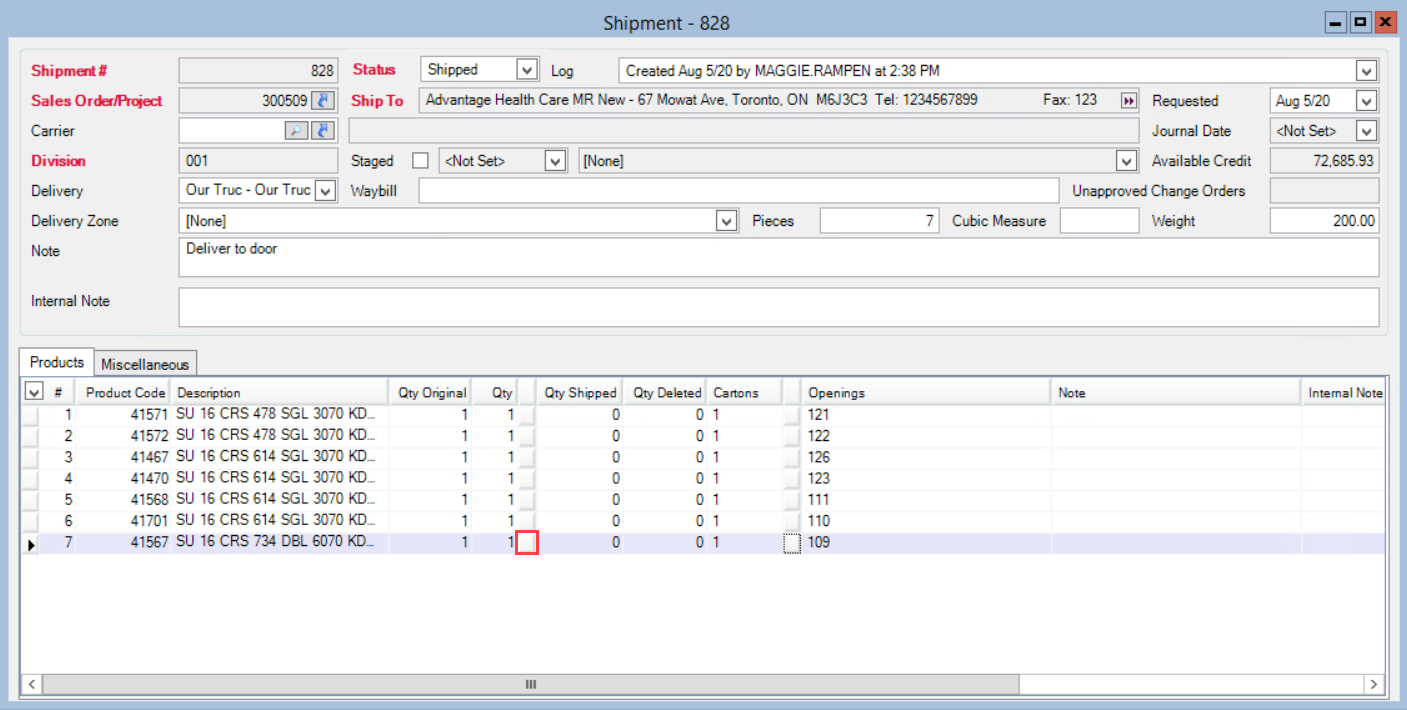
Updating Shipment Qty
Each item in a shipment is associated with an opening. You must update the shipment quantity from the opening level to accurately document the progress of the project. Items from individual sales orders unrelated to projects are also associated with openings. The sales order window assigns an "opening number" to each item. Opening numbers for individual sales orders number each line item e.g. Line 1, Line 2, etc. To update the shipment quantity, you must mark the item as Deleted from the specific opening in the Shipment Openings window rather than simply updating the quantity.
In the Shipment window:
- Find the unshipped product line item
- Click the Qty button
In the Shipment Openings window:
- Check the Deleted checkbox
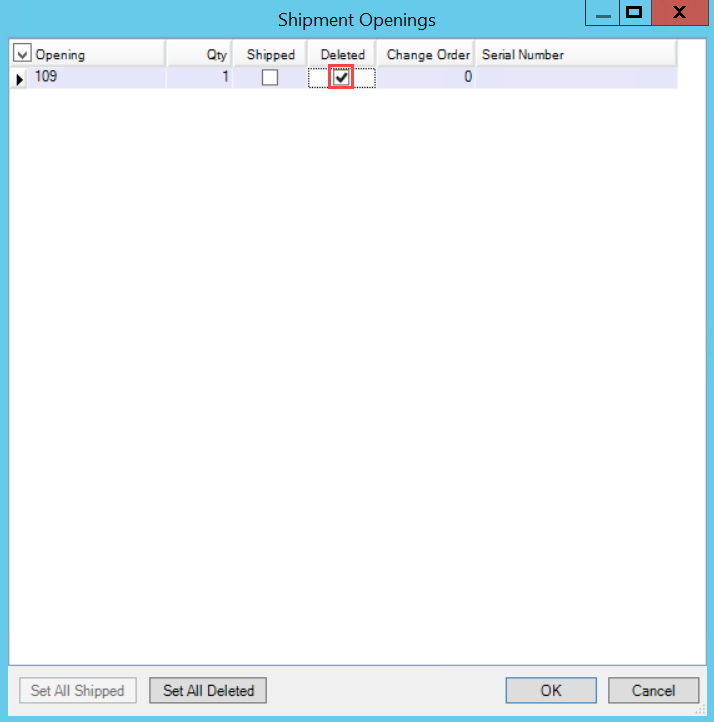
- Click OK
The shipped quantity is now updated.
Completing the Shipment
In the Shipment window:
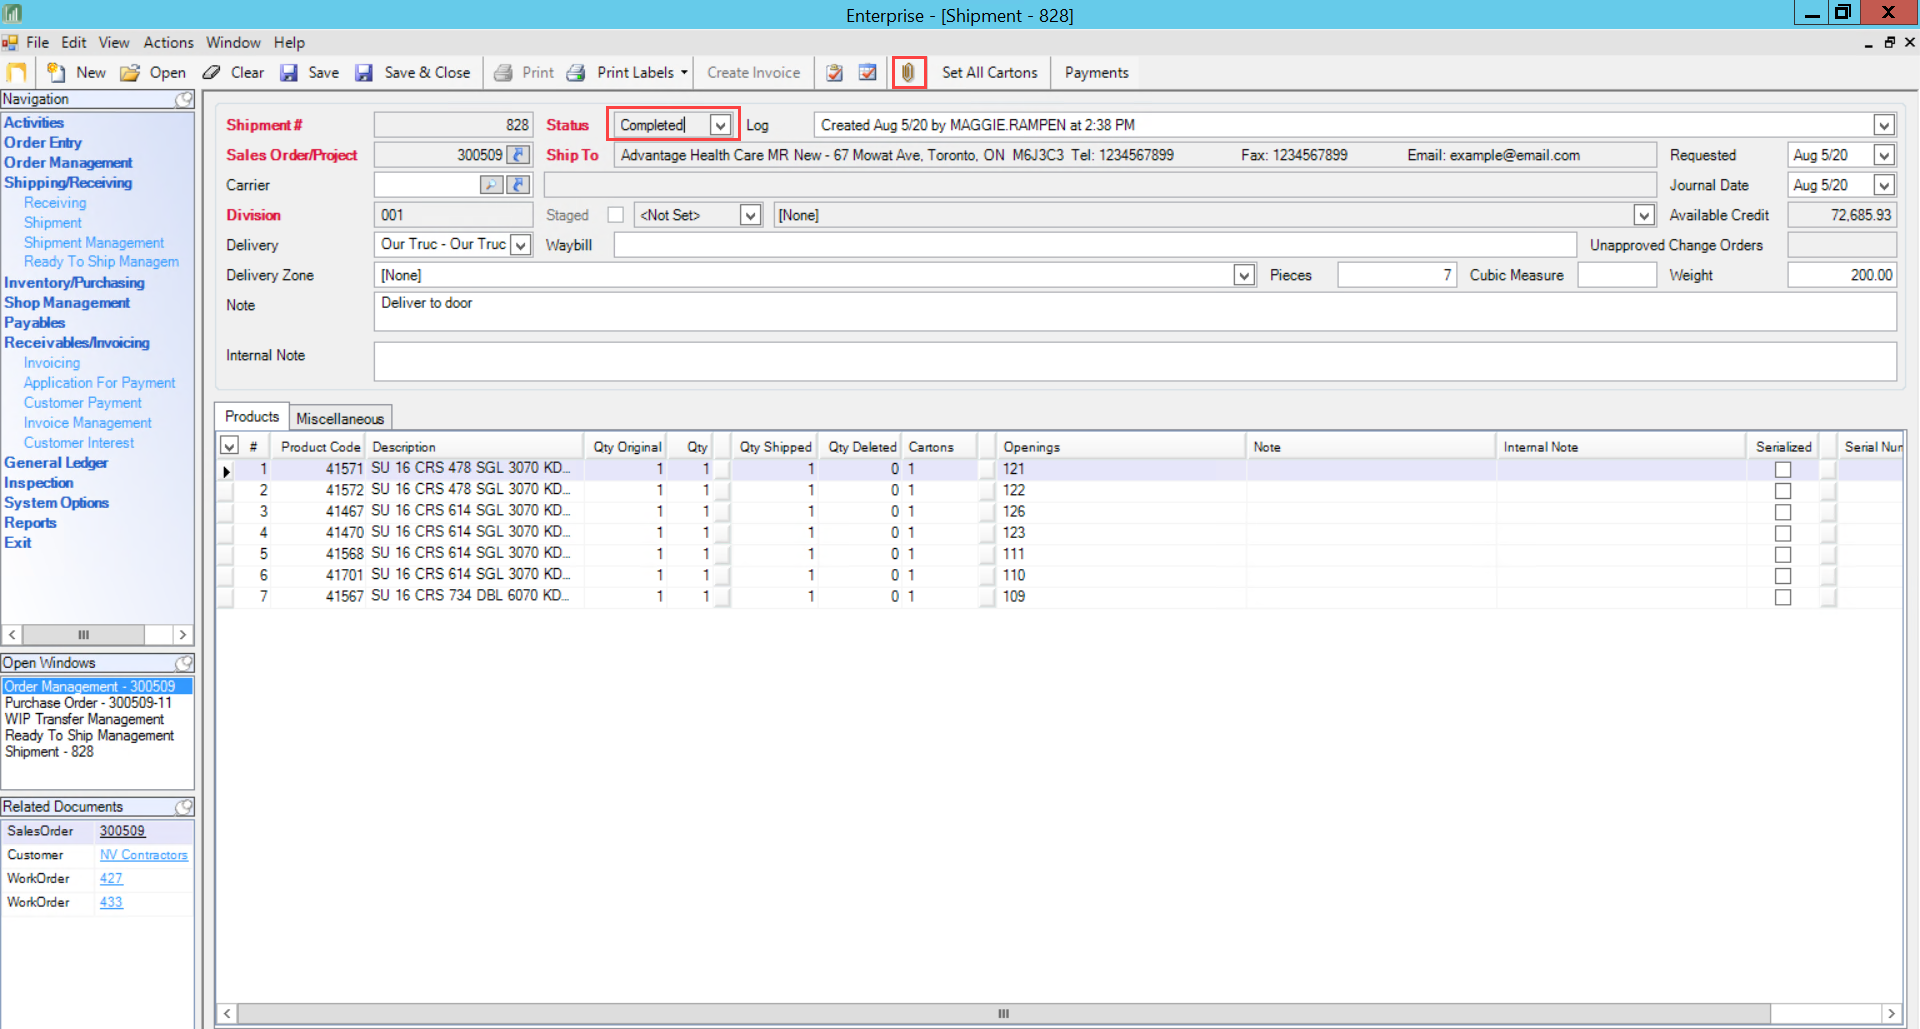
- Update the status to Completed
- Click Save
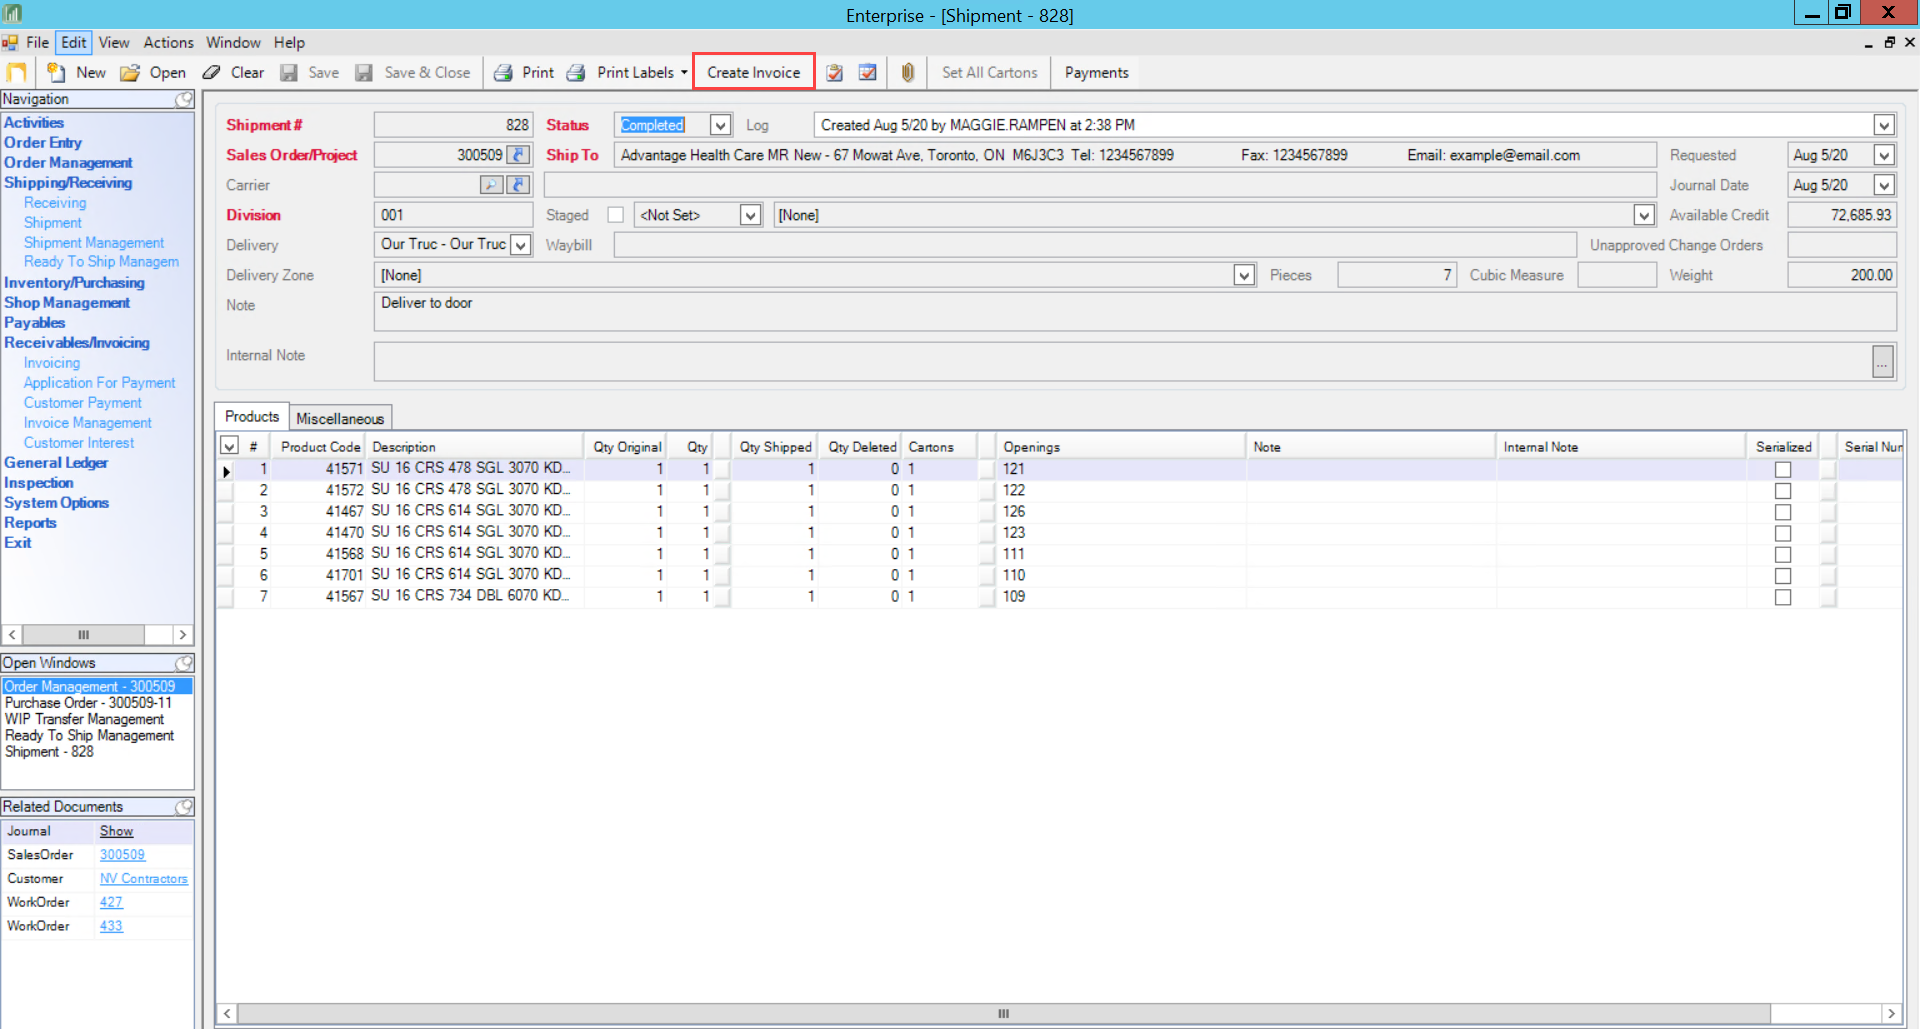
To begin the invoicing process from the shipment window:
- Click Create Invoice
- The Invoicing wizard will open
Comments
Please sign in to leave a comment.