How to: Create a change order for a project.
Environment: Comsense Advantage & Enterprise
In this article:
- Determining If You Should Create a Change Order
- Reviewing the Project
- Determining Project Adjustments to Complete the Change Order
- Creating a Change Order
- Completing a Cost & Contract Amount Change Order
- Building the Change Order
- Verifying Pricing
- Creating the Change Order Report
- Waiting for Change Order Approval
Determining If You Should Create a Change Order
Before you begin a change order, it is important to consider the stage of the project. Review what is complete, the request(s), and how the request(s) relates to everyone involved. Ask yourself, what will this change order mean for both our company and our customer considering:
- Financial adjustments
- Project timelines
- Resource availability
- Stock
- Shop time
Review the project with these considerations in mind.
Reviewing the Project
Review the project in the Complete window and determine which openings it will affect.
Accessing the Complete Window
Advantage > Detailing > Complete

Once you are in the Complete window, Open the project.
Reviewing the Has Sourcing & Released Columns
Determine the status of the project by reviewing the Has Sourcing and Released columns. The statuses of these columns tell you if there have been transactions involving the products and openings in Enterprise. Transactions include stock requisitions, purchase orders, work orders, etc. The Released column shows the product is available for sourcing and the Has Sourcing column shows the product is being sourced or is sourced.
Reviewing the Master Schedule Pane
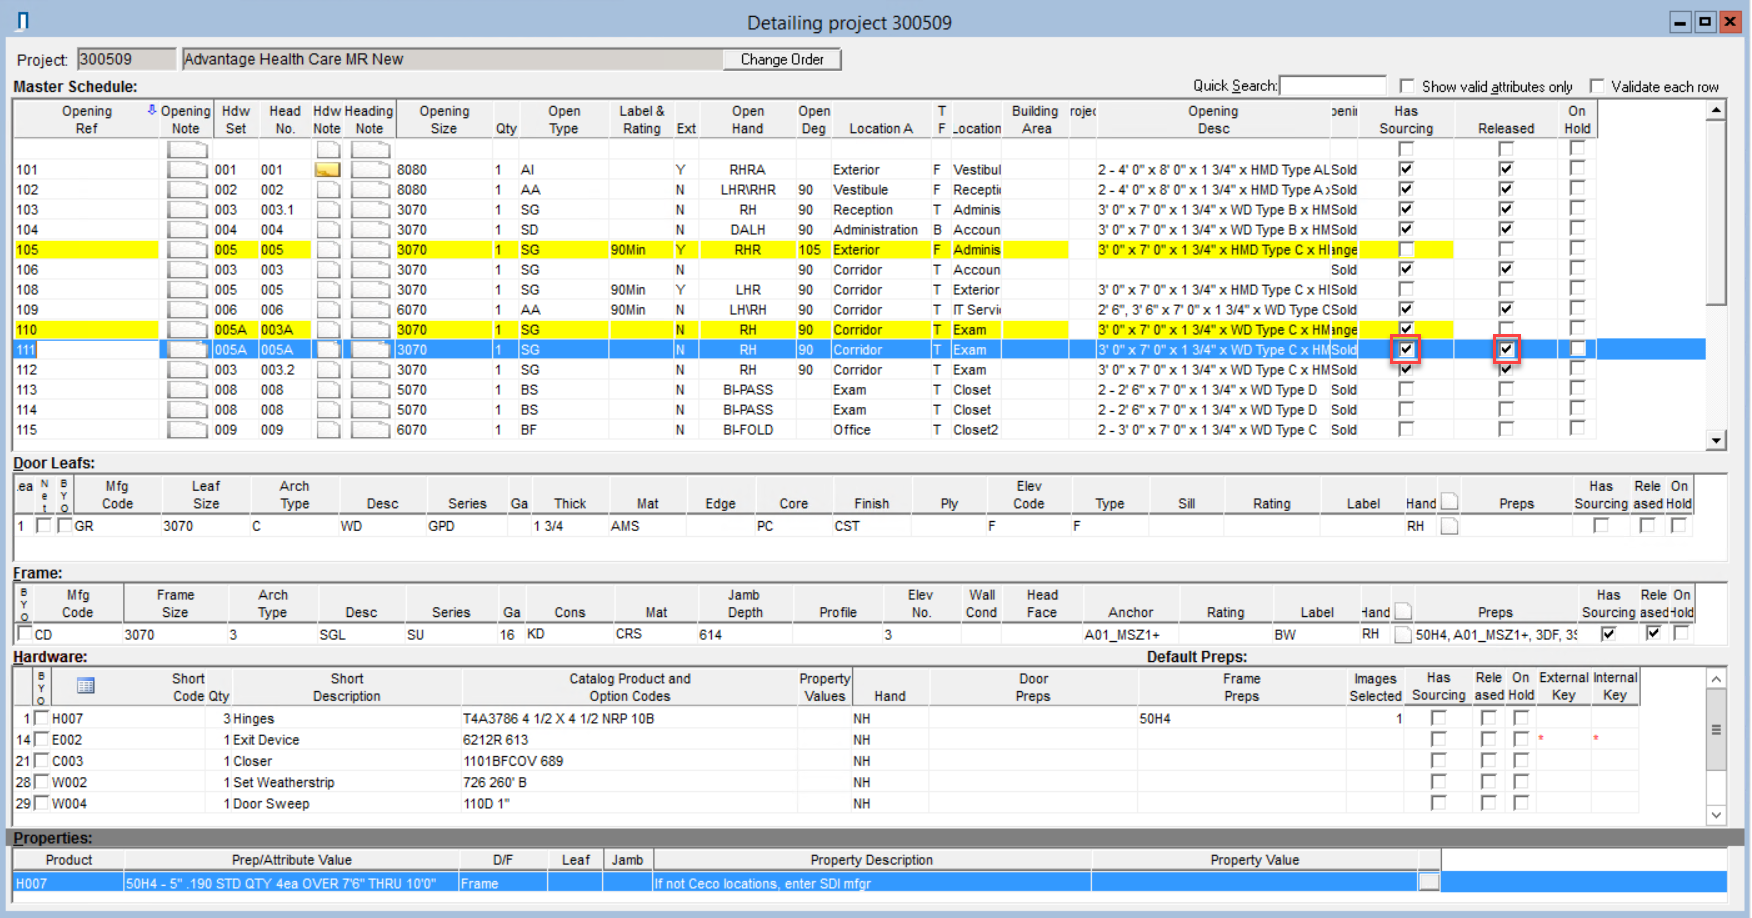
The Master Schedule pane shows you the project by opening. A checked checkbox in the Has Sourcing and Released columns means that a portion, or all, of that opening is released and sourced. Identify the specific products that are released and sourced by Reviewing Door Leaf, Frame, and Hardware Panes.
Reviewing the Door Leafs, Frame, and Hardware Panes
The Door Leafs, Frame, and Hardware panes show you each product on the opening selected in the Master Schedule pane. Each product line item has a Has Sourcing and Released column.
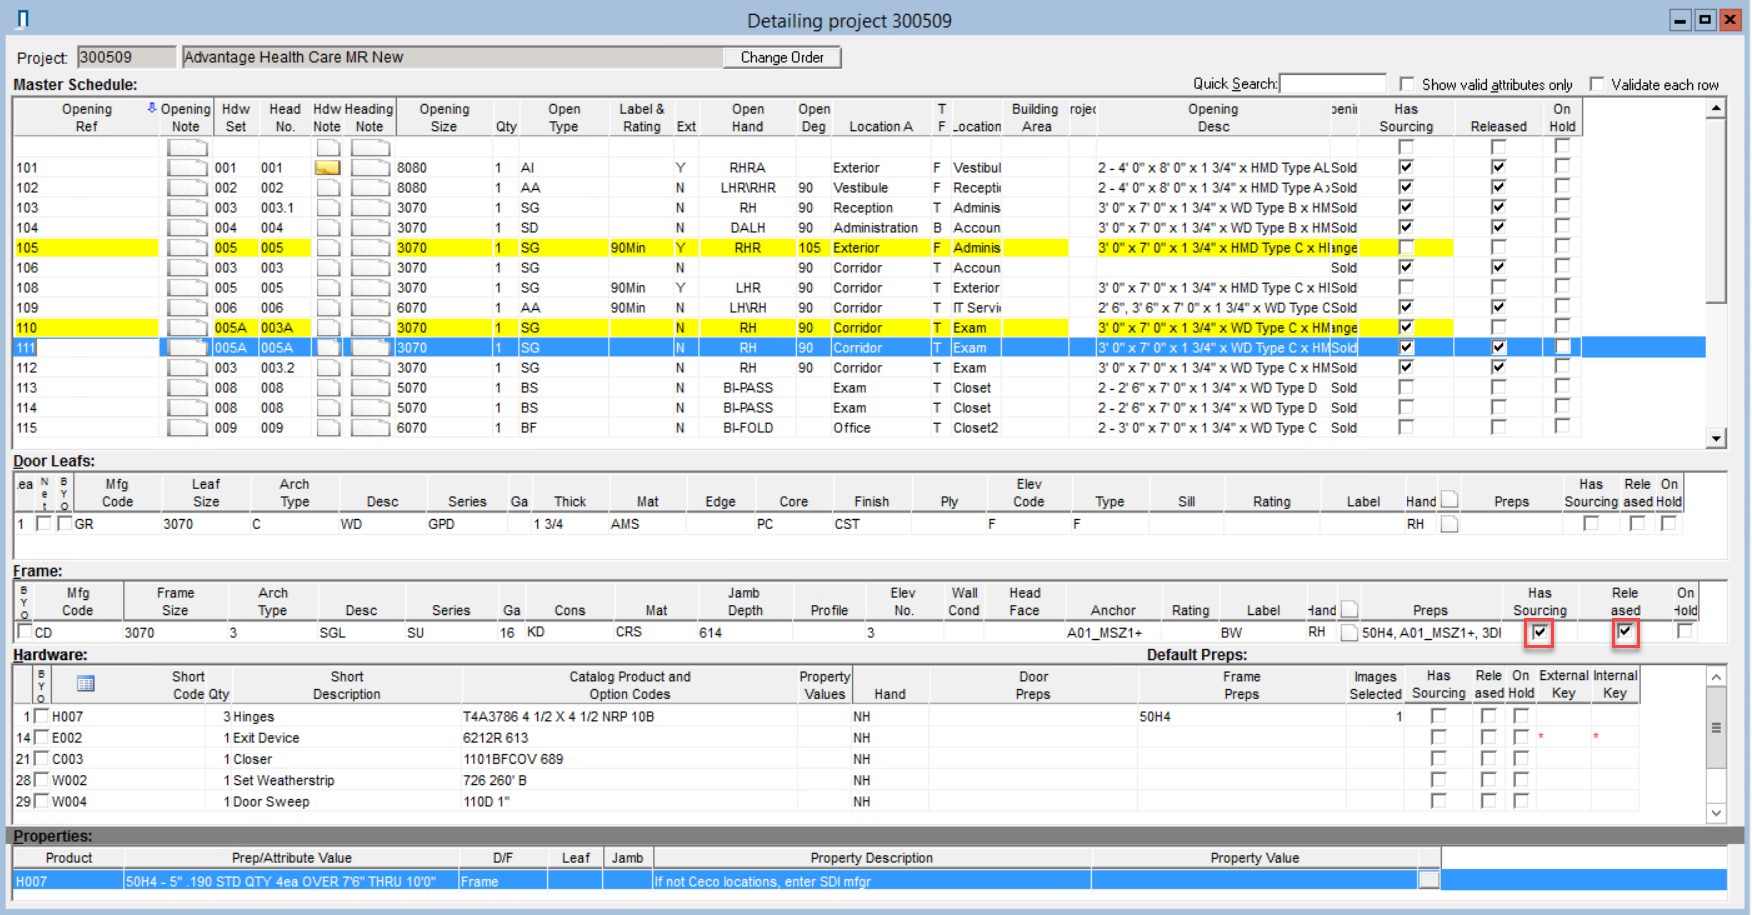
Reviewing the Exact Stage of the Product
Click the Has Sourcing checkbox to see the exact stage of the product. A stage is complete if the checkbox is unchecked.
If the product is sourced but a change order is necessary, review the purchase order, stock requisition, or any work orders in Enterprise Order Management to determine the exact stage of sourcing.
Determining Project Adjustments to Complete the Change Order
*Note: The scenarios below only apply openings affected by the change order.
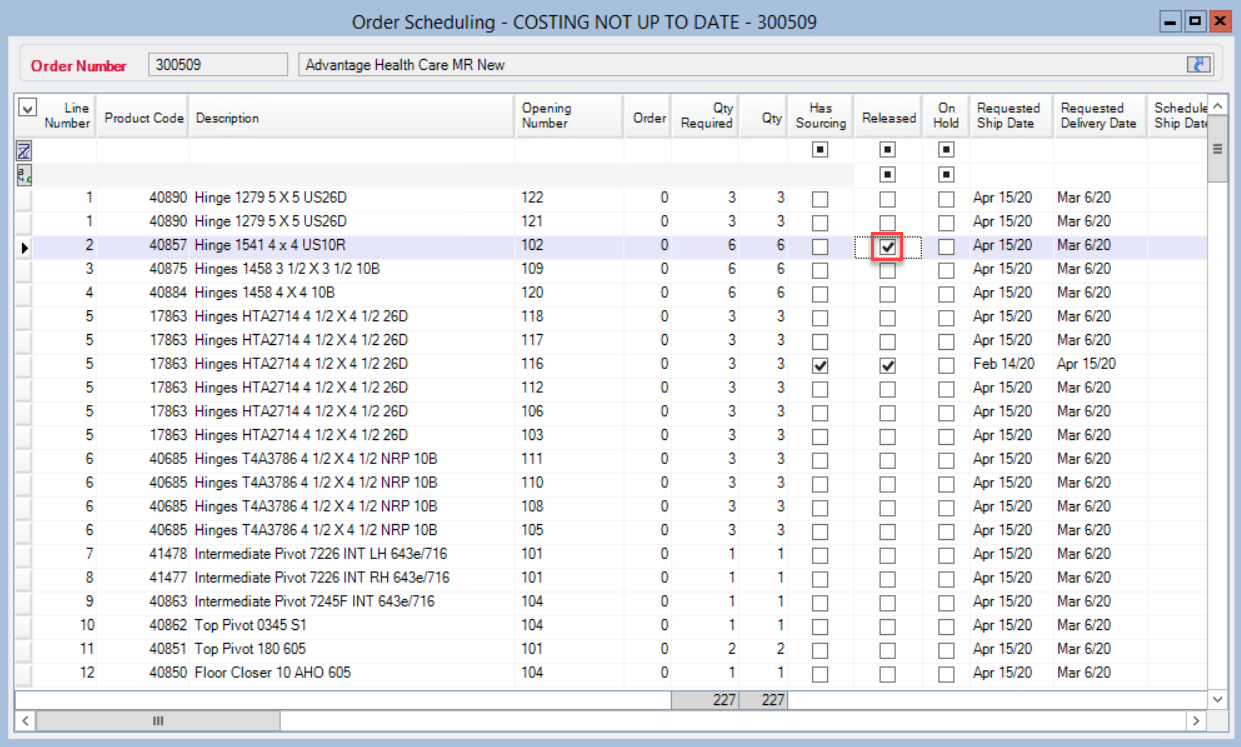
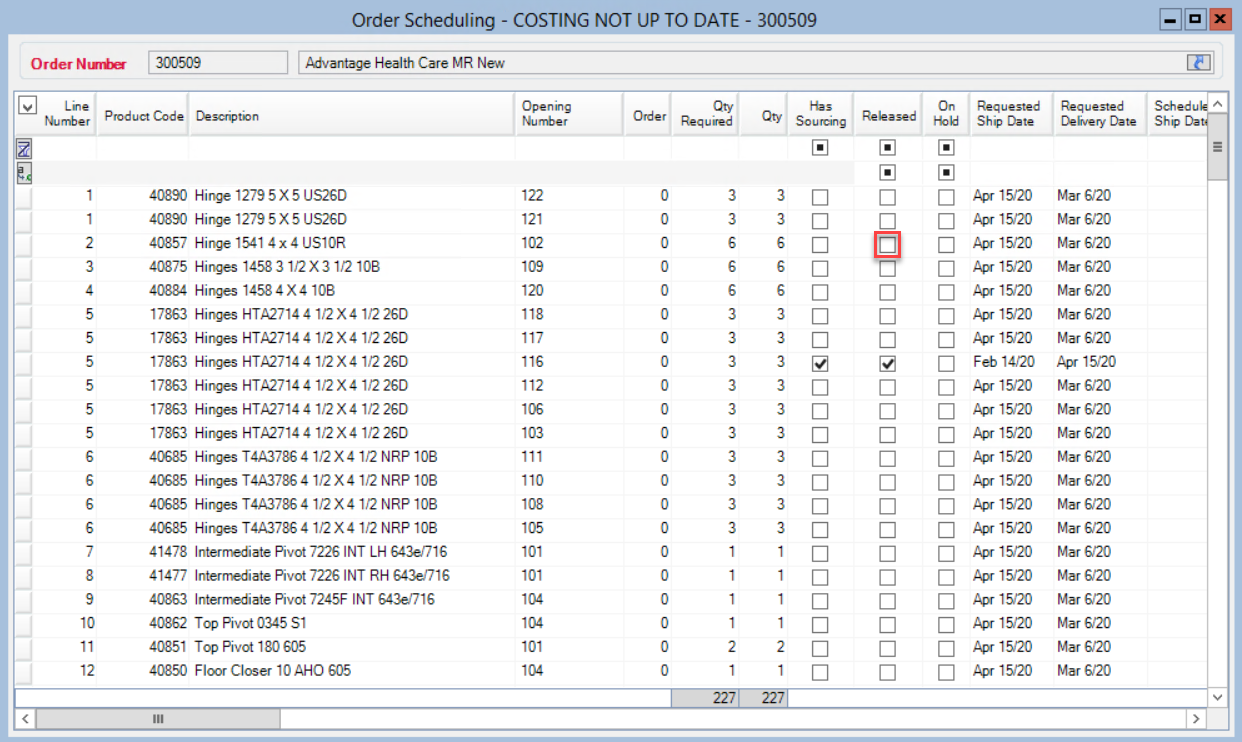
Released Items
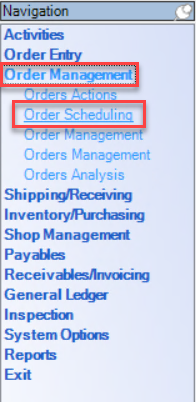
If the product is released but not sourced, determine if you should uncheck the released checkbox in the Order Scheduling window.
Enterprise > Order Management > Order Scheduling
Sourced Items
If the product is sourced and not shipped, determine if you want to Complete an Unsourcing.
Shipped Items
If the product is shipped, determine if you want to Complete a customer Return.
Creating a Change Order
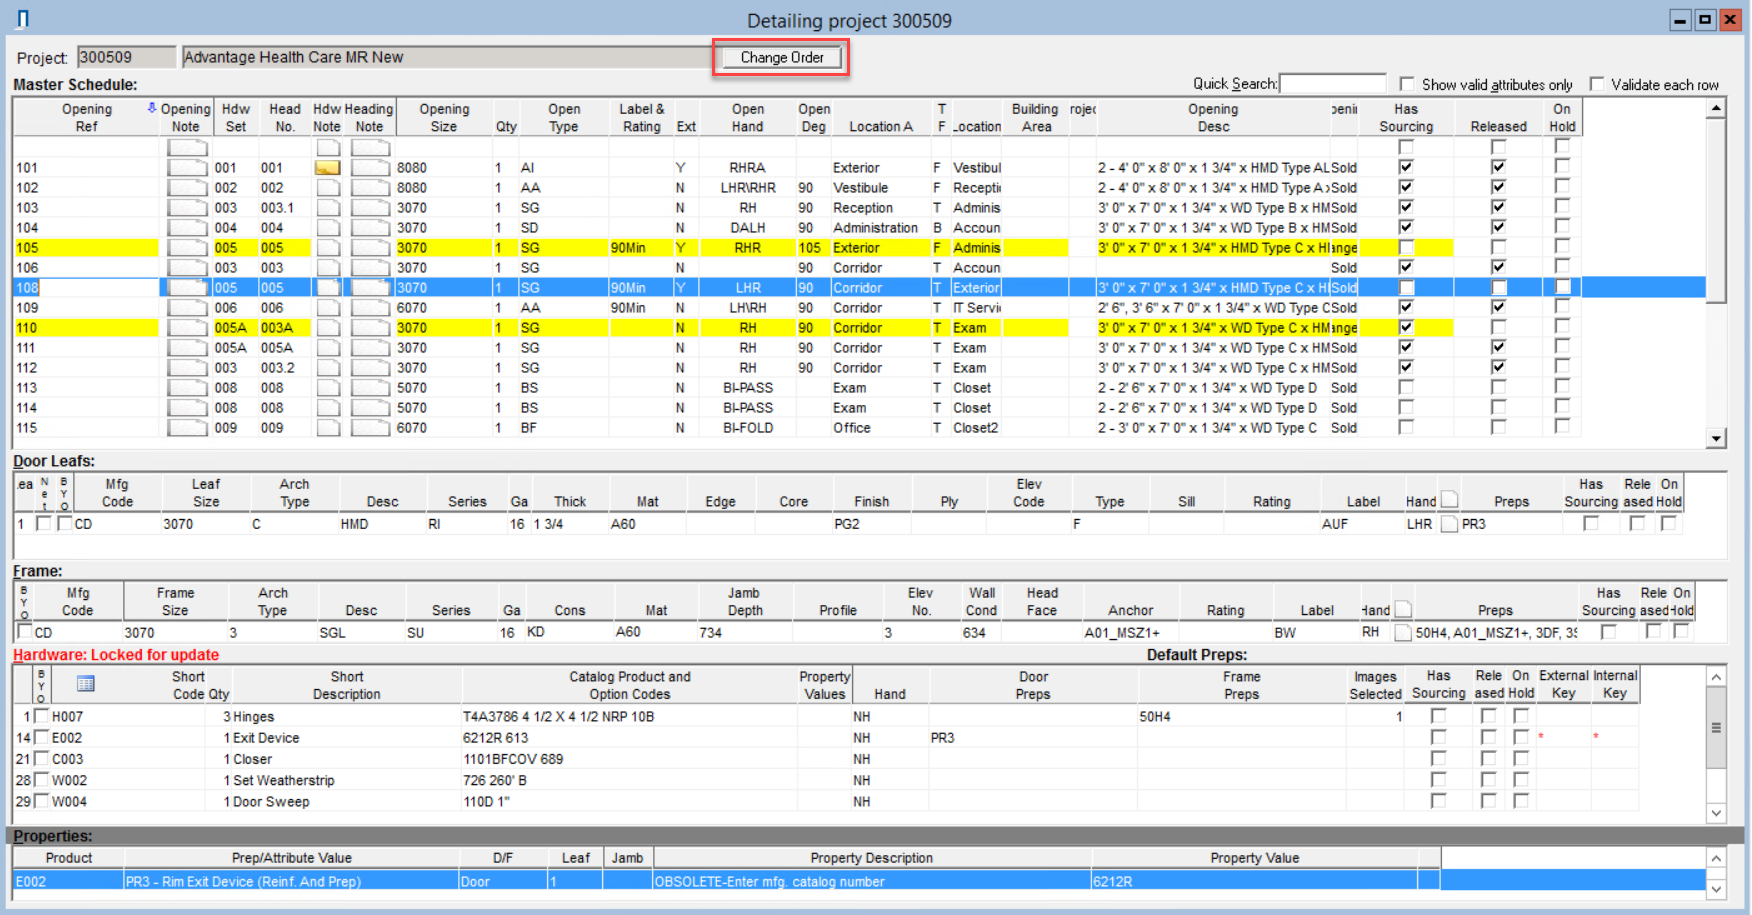
In the Complete window:
- Click Change Order
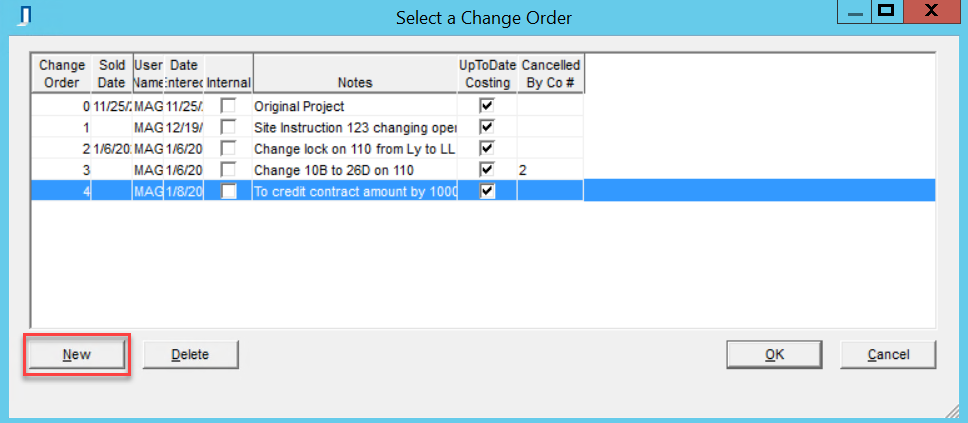
- The Select a Change Order window will open
- Click New
- The Create a New Change Order window will open
In the Description pane:
- Enter the details of the proposed changes
- The change order description shows when you search the change order and on the printed change order report
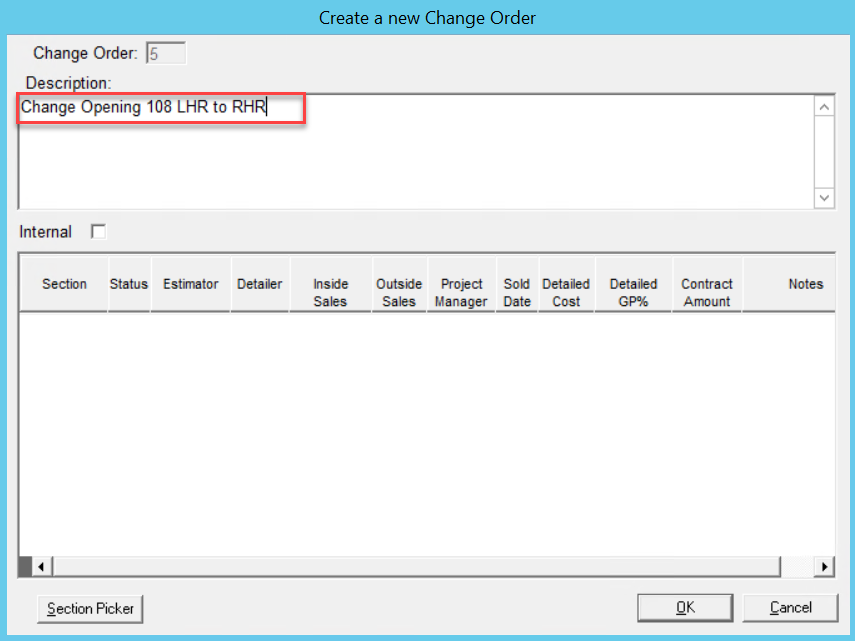
If this is an internal change order:
- Check the Internal checkbox
*Note: An internal change order must have a contract amount of $0.00 per section (even if there is associated costs) and does not affect AIA billing.
- Click OK
- Ensure the new change order is highlighted
- Click OK
You now have a new change order.
Completing a Cost and Contract Amount Only Change Order
If your change order is only to update cost and contract amounts with no changes to product or openings, you do not make any further changes in the complete window.
In the Complete window:
- Click Save & Close
- Verify Pricing
Building the Change Order
New change orders display as a blank Complete window. On the change order you can:
- Add new openings by:
- Duplicating an existing opening
- Adding a new opening
- Delete an existing opening
- Update an existing opening by:
- Making a change on the opening line item
- Adding new doors, frames, or hardware
- Deleting doors, frames, or hardware
- Updating any of the door, frames, and hardware
Validating Openings
Before you add, delete, or update any openings, you must check the Validate each row checkbox. This allows the system to validate each row as you create or update line items. Validating openings confirms that all required components of the opening are complete.
Above the Master Schedule pane:
- Check the Validate each row checkbox
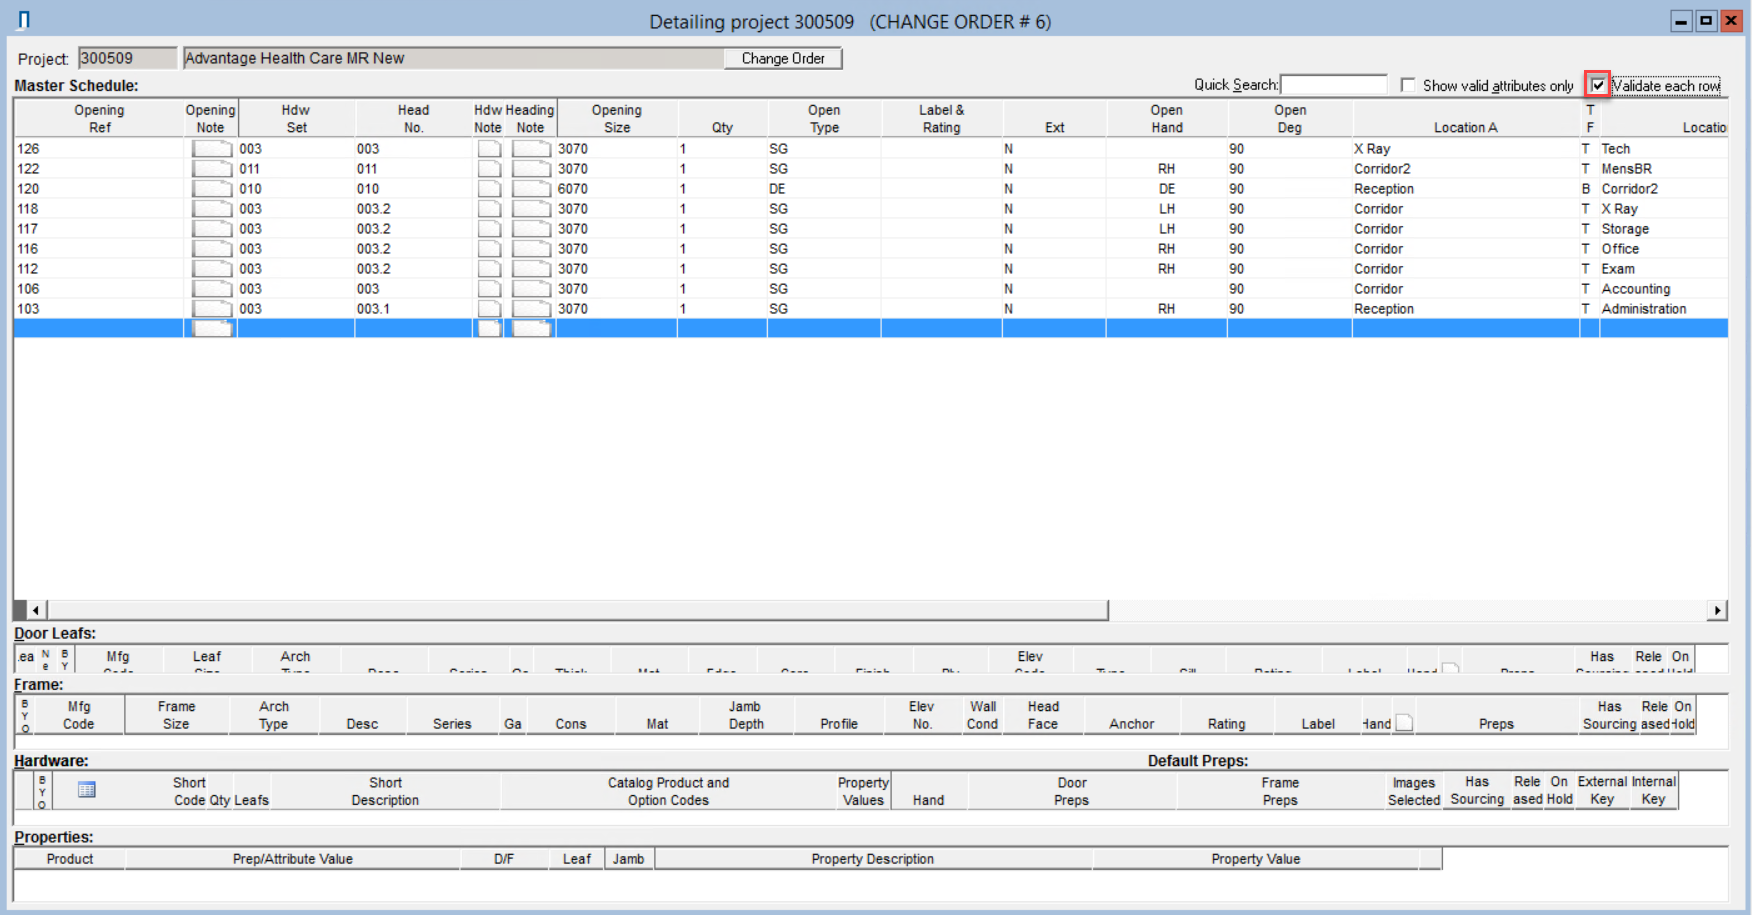
- Click Save
If some openings do not validate, review and update the change order accordingly before proceeding.
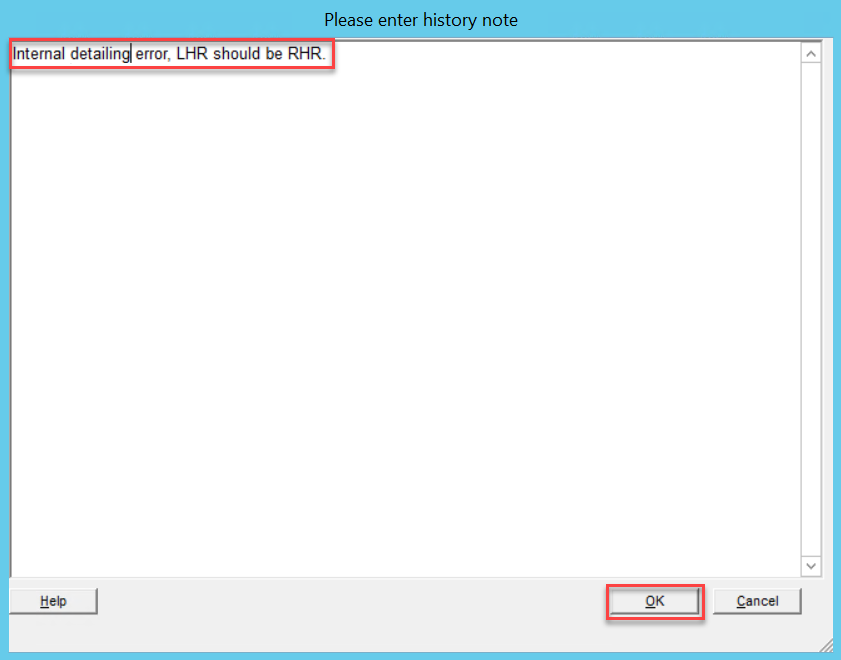
Entering History Notes
Every action you complete in the change order will prompt a History Note window. Enter a note detailing the changes for documentation purposes. Keep the history notes clear and concise.
Duplicating an Existing Opening
In the Master Schedule pane:
- Enter the new opening reference number
- Press Tab
- The Duplicate Opening window will open
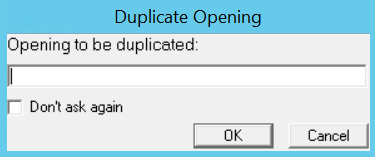
- Enter the opening reference number for the opening to duplicate
- Click OK
The change order now has a new opening.
Adding a New Opening
Add a new opening as you would when creating your initial project.
In the Complete window:
- Complete the new opening line item
- Complete the new door leafs line item(s)
- Complete the frame line item
- Complete the hardware line item(s)
Your change order now has a new opening.
Updating Existing Openings
There are two methods to import the affected openings, you can import by:
- Individual opening
- Product
- i.e. Import all openings that have a certain product
Consider the goal of your change order to determine which method you use.
E.g. to change all hinges to bronze, search by hinge type, import all openings with that hinge, and update each hardware heading accordingly.
E.g. to change the fire rating on one door, import that specific opening and update the fire rating.
Importing by Individual Opening
To import by individual opening, search and select the opening by the opening reference number.
*Note: If the opening shares the same hardware headings with another opening, the Hardware pane will read "Locked for update." Locked for update means you cannot update the hardware because it updates the heading that another opening uses. For this situation, you must create a new hardware heading.
Importing by Product
To make changes to on multiple openings, search and select the openings by one of the following:
- Door attributes
- Frame attributes
- Hardware product shortcode
Importing the Openings
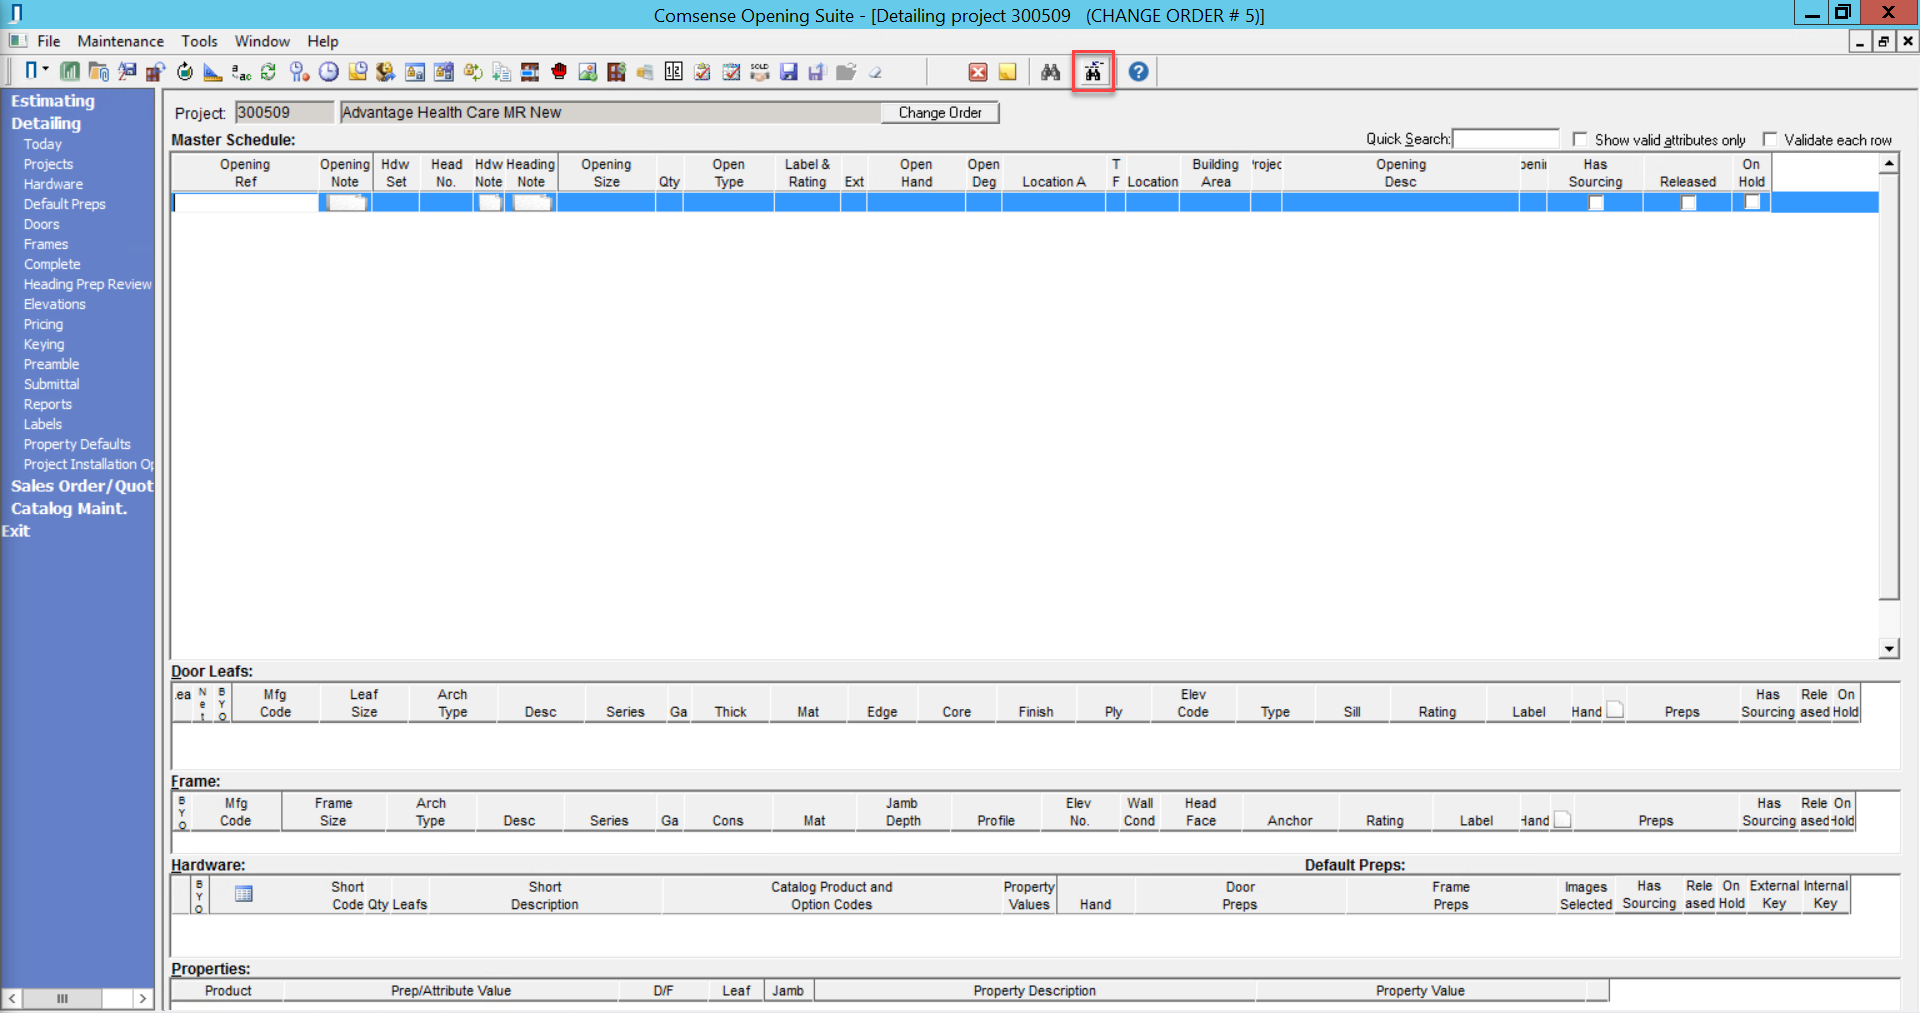
In the Complete window top toolbar:
- Click Find Original
- The icon of binoculars with an arrow
In the Detailing Filter window:
- Select the opening(s) by the opening or product
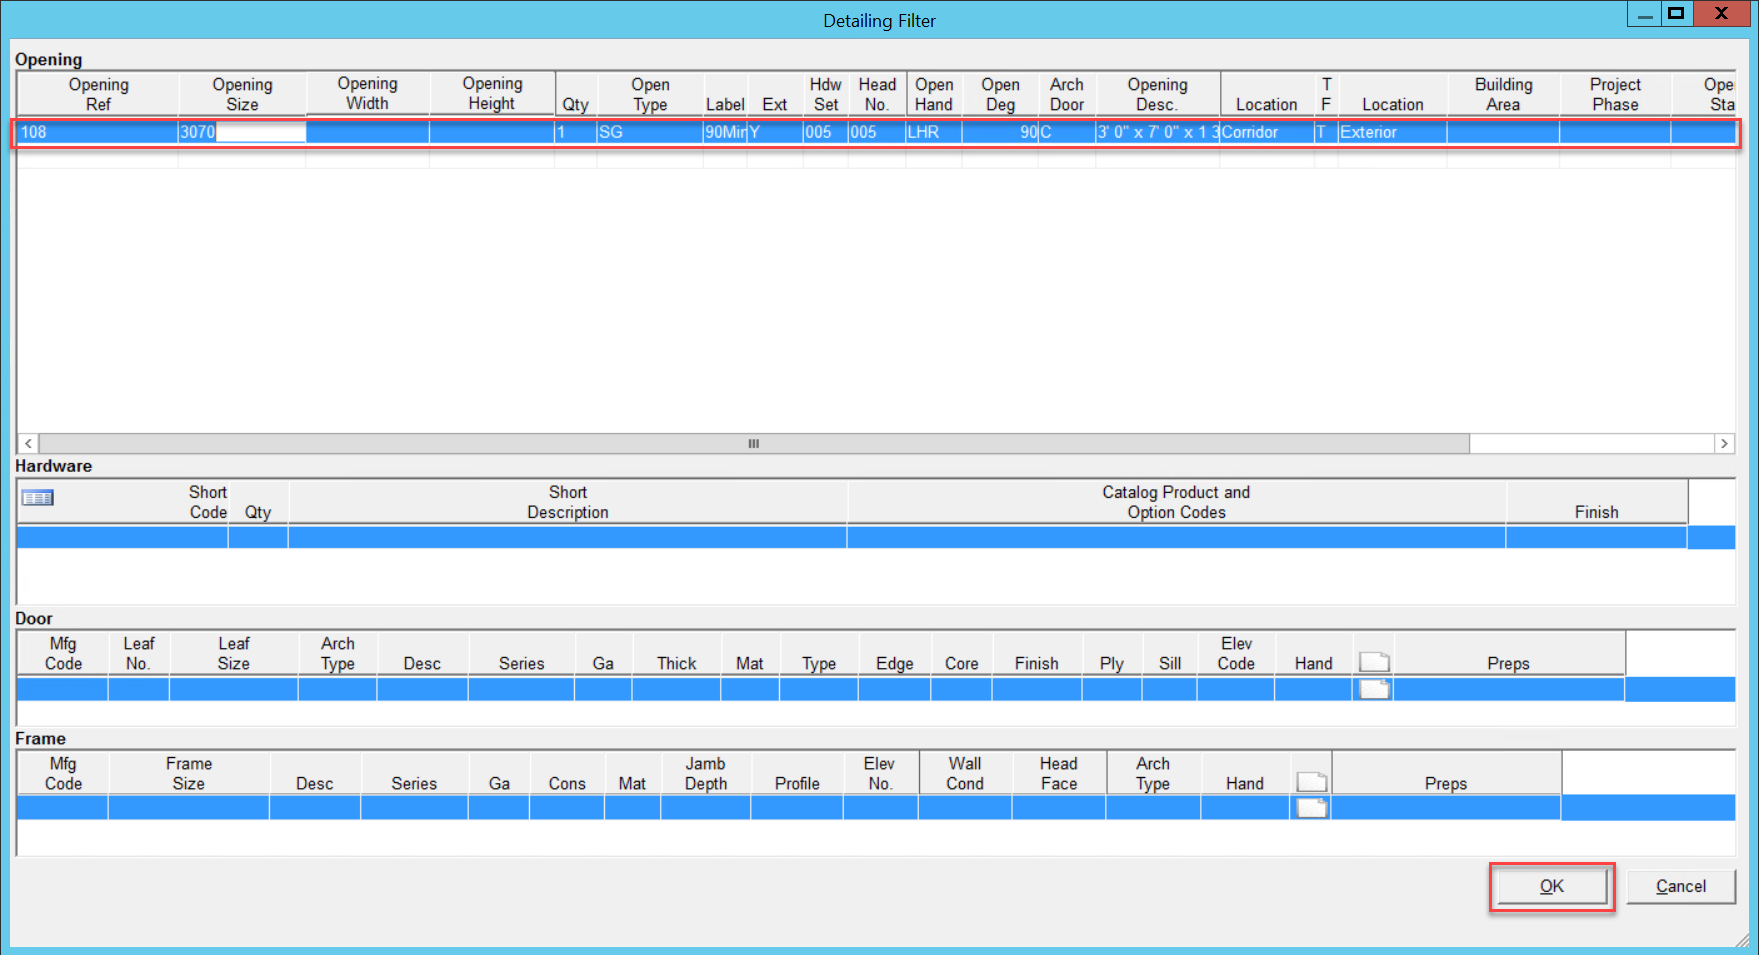
- Click OK
- A list of openings will open
*Note: If you are importing by opening, any other openings with the same heading are listed.
- Select the openings to apply the change order to
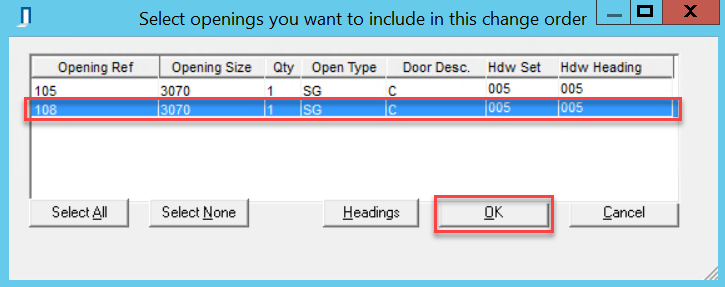
- Click OK
The change order now has existing openings.
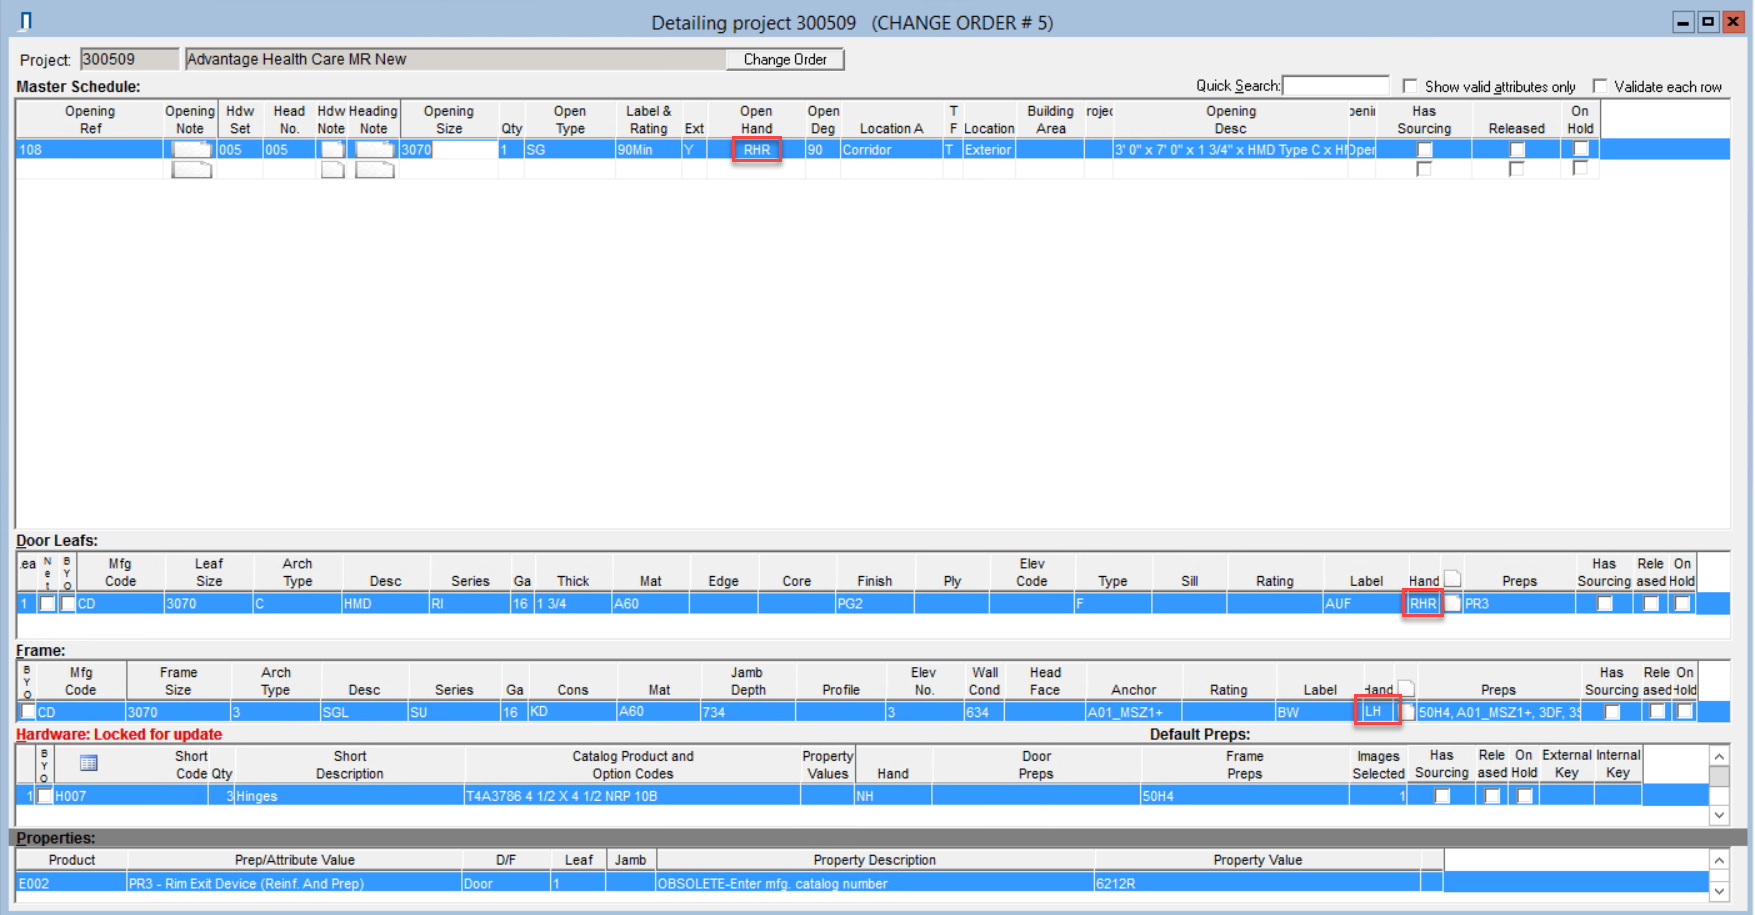
Updating an Opening
All products in Door Leafs pane and Frame pane will update according to the change e.g. changing the Open Hand from LHR to RHR automatically updates the Hand column in Door Leafs and Frame.
In the Complete window:
- Update the opening line item with your changes
- Click Save
This opening is now updated.
Deleting an Opening
In the Complete window:
In the Opening line item:
- Update the Qty field to 0
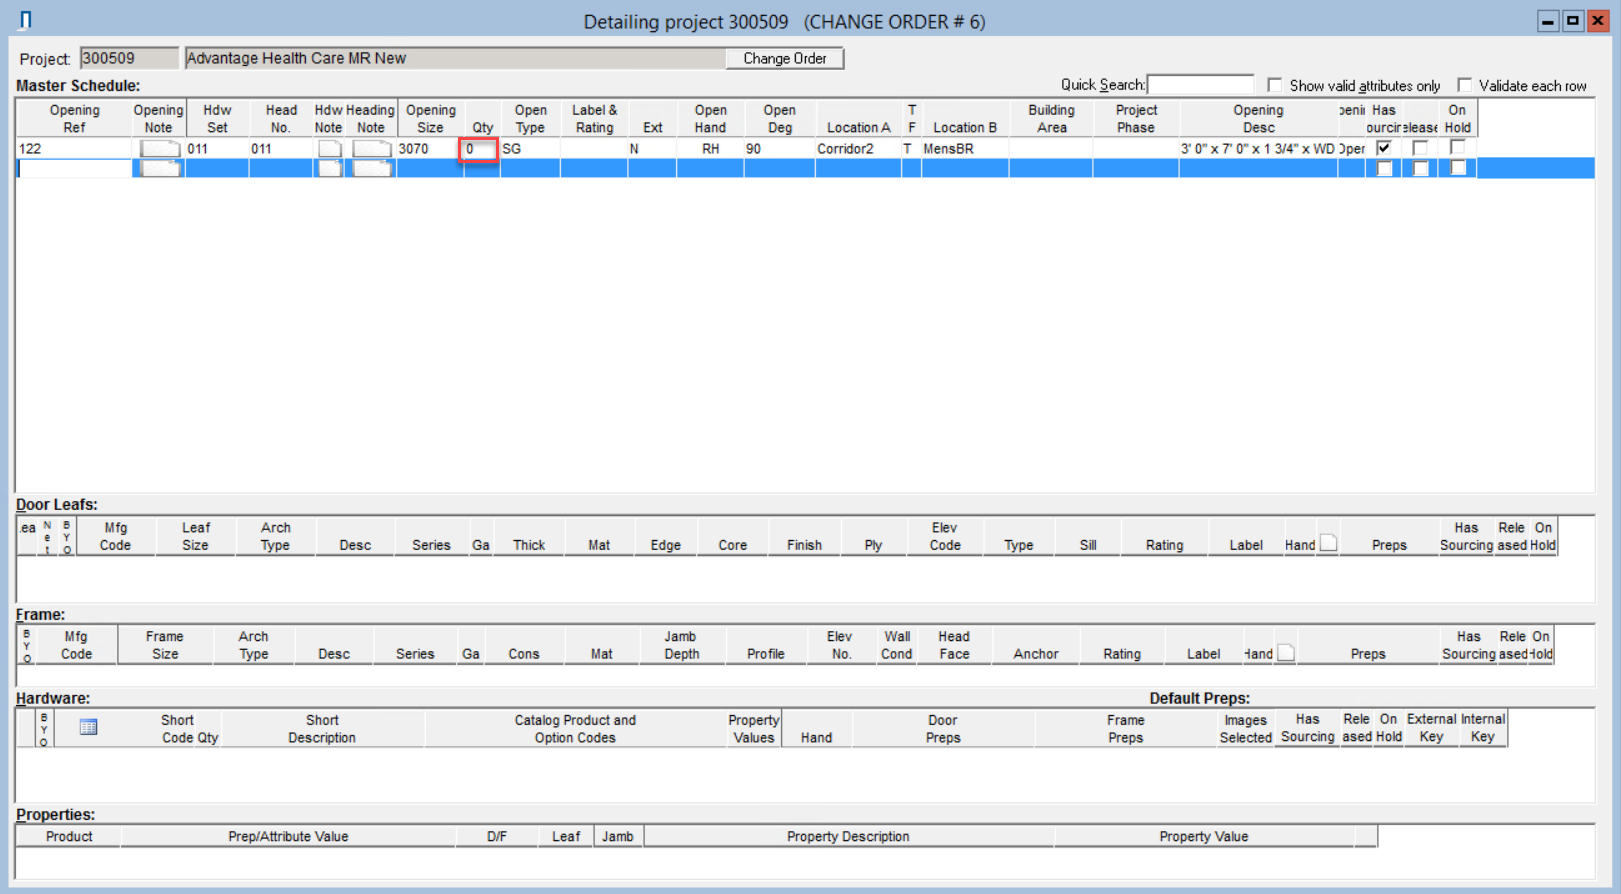
- Click Save
The opening and the corresponding door, frame, and hardware are now deleted on this change order.
Adding New Products to Existing Openings
When adding new products you must be aware of any existing products that will be affected.
Ask yourself:
- Is some of the product already on site?
- Does the on-site product need to be replaced?
Adding Doors
When adding a new door that is a different manufacturer or type from the original door, proceed as usual.
You may add a new door of the same manufacturer and type because either:
- The door on-site was damaged
- The updates to frame and hardware require a new door to be sent
In this case, you must add a new factory prep on the door to create a new door definition. If you do not create a new door definition, the door is considered the original door on the project. The change order, the pricing window, and future project shipments will not include an additional door. A good option is to use a Note prep. The Note pep creates a new door definition and allows you to add a describing note in the Property Notes.
In the Complete window:
- Right-click in the Door Leaf pane
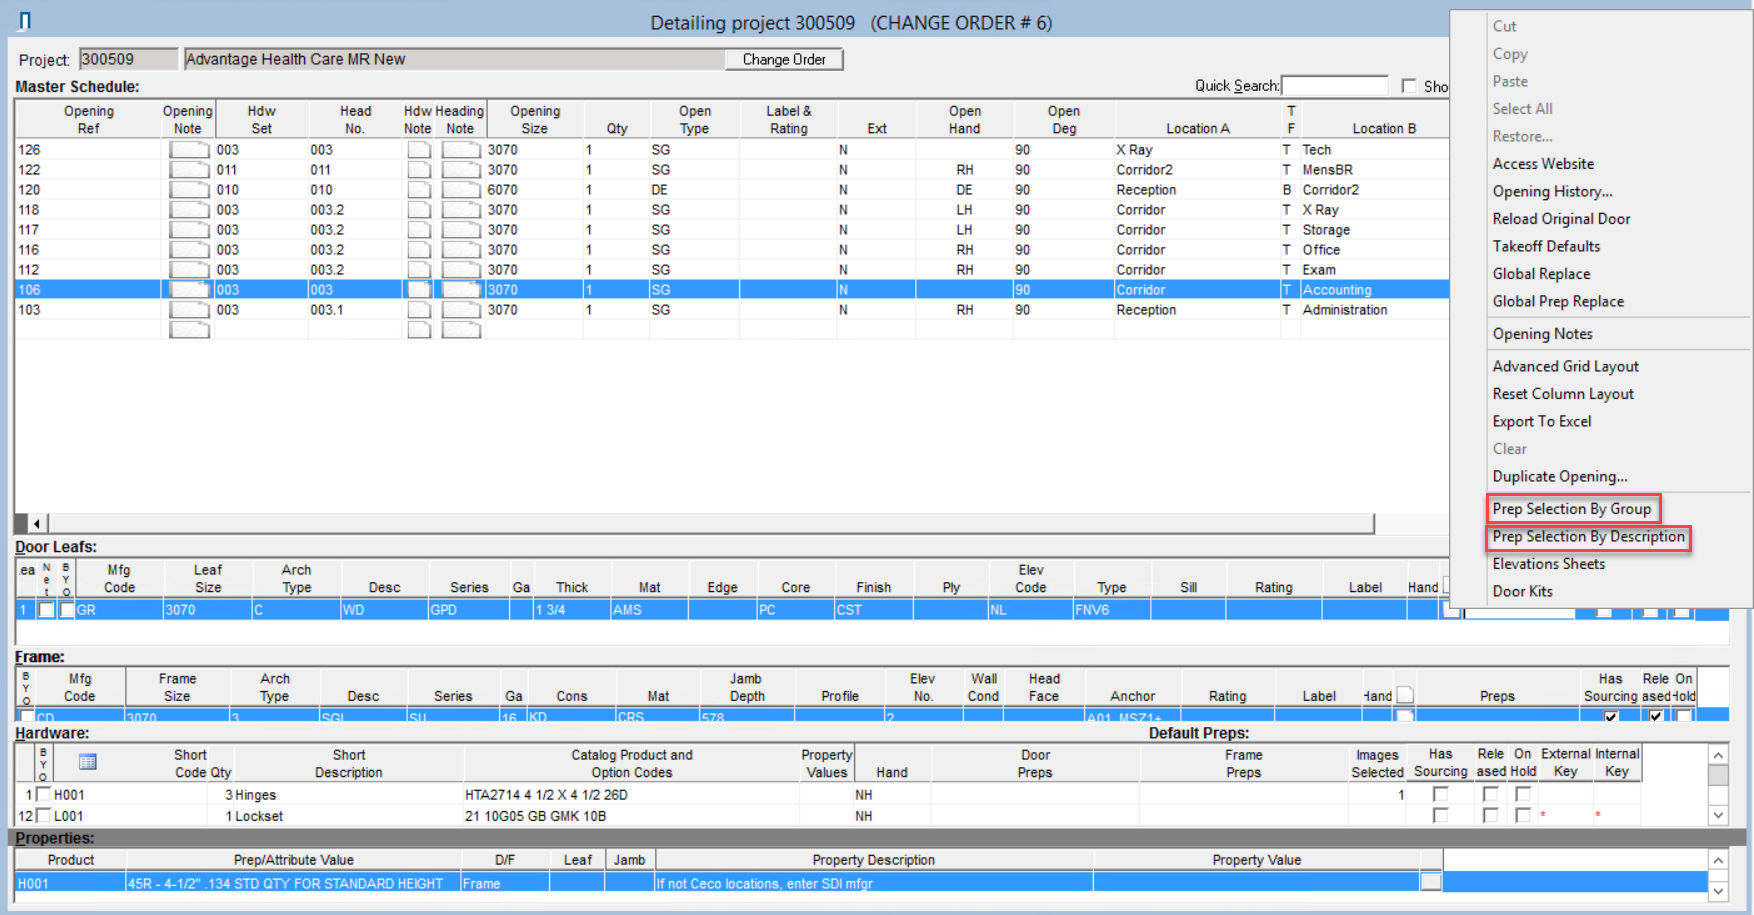
- Click Prep Selection By Group or Prep Selection By Description
- Search & Select the Factory Prep

- Click Add
If this is a Note prep:
- Right-click in the Selected pane
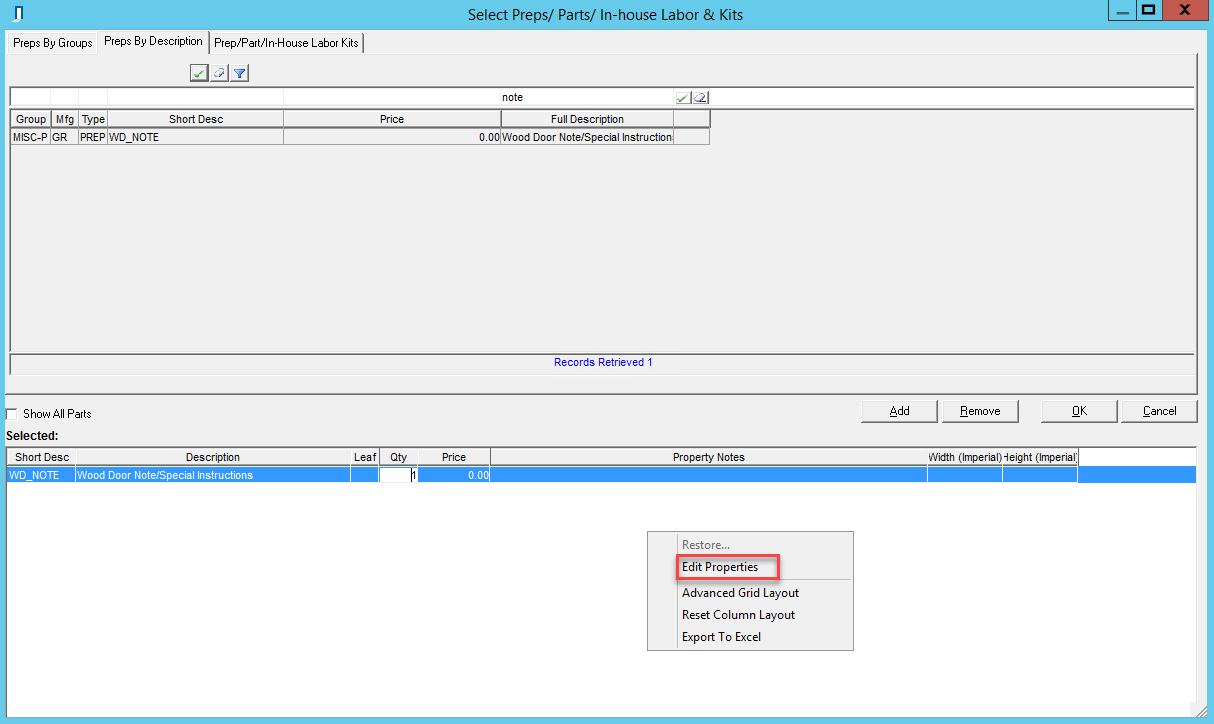
- Click Edit Properties
- Enter a note in the Property Value field
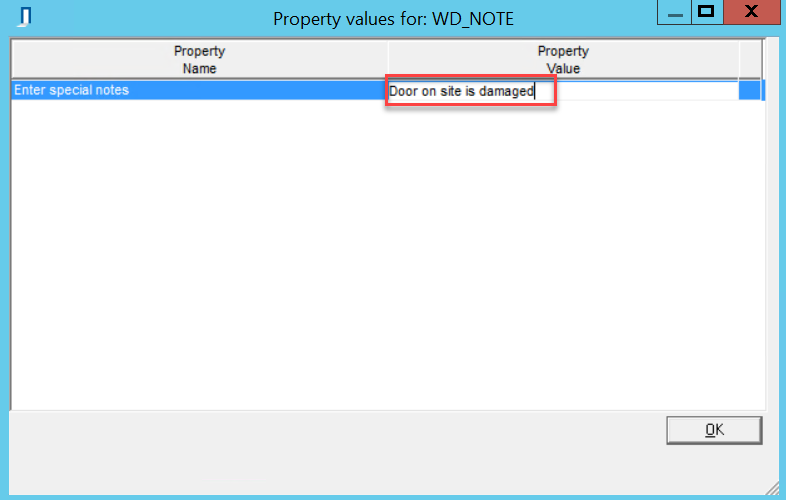
- Click OK
- Click OK
The door now has a factory prep differentiating it from the original door.
Adding Frames
Adding a frame follows the same principles as Adding Doors. If you require a new frame that is the same manufacturer and type, Complete the steps above in the Frame pane, adding factory preps for:
- Head
- Hinge jamb
- Strike jamb
Adding Hardware
*Note: Consider hardware headings and their openings when making changes to hardware.
Add hardware as usual, including the preps and associated properties. Adding new hardware items automatically adds associated preps to doors and frames, which creates new definitions for these products.
If you do not require a new door or frame with the new hardware, you must reload the original to prevent the new definition.
Reloading Original Doors or Frame
In the Door Leafs or Frame pane:
- Right-click on the product line item
- Click Reload (As Built) Door or Frame

The line item will revert back to the original.
Deleting Products from Existing Openings
Deleting Doors
To delete doors you can either:
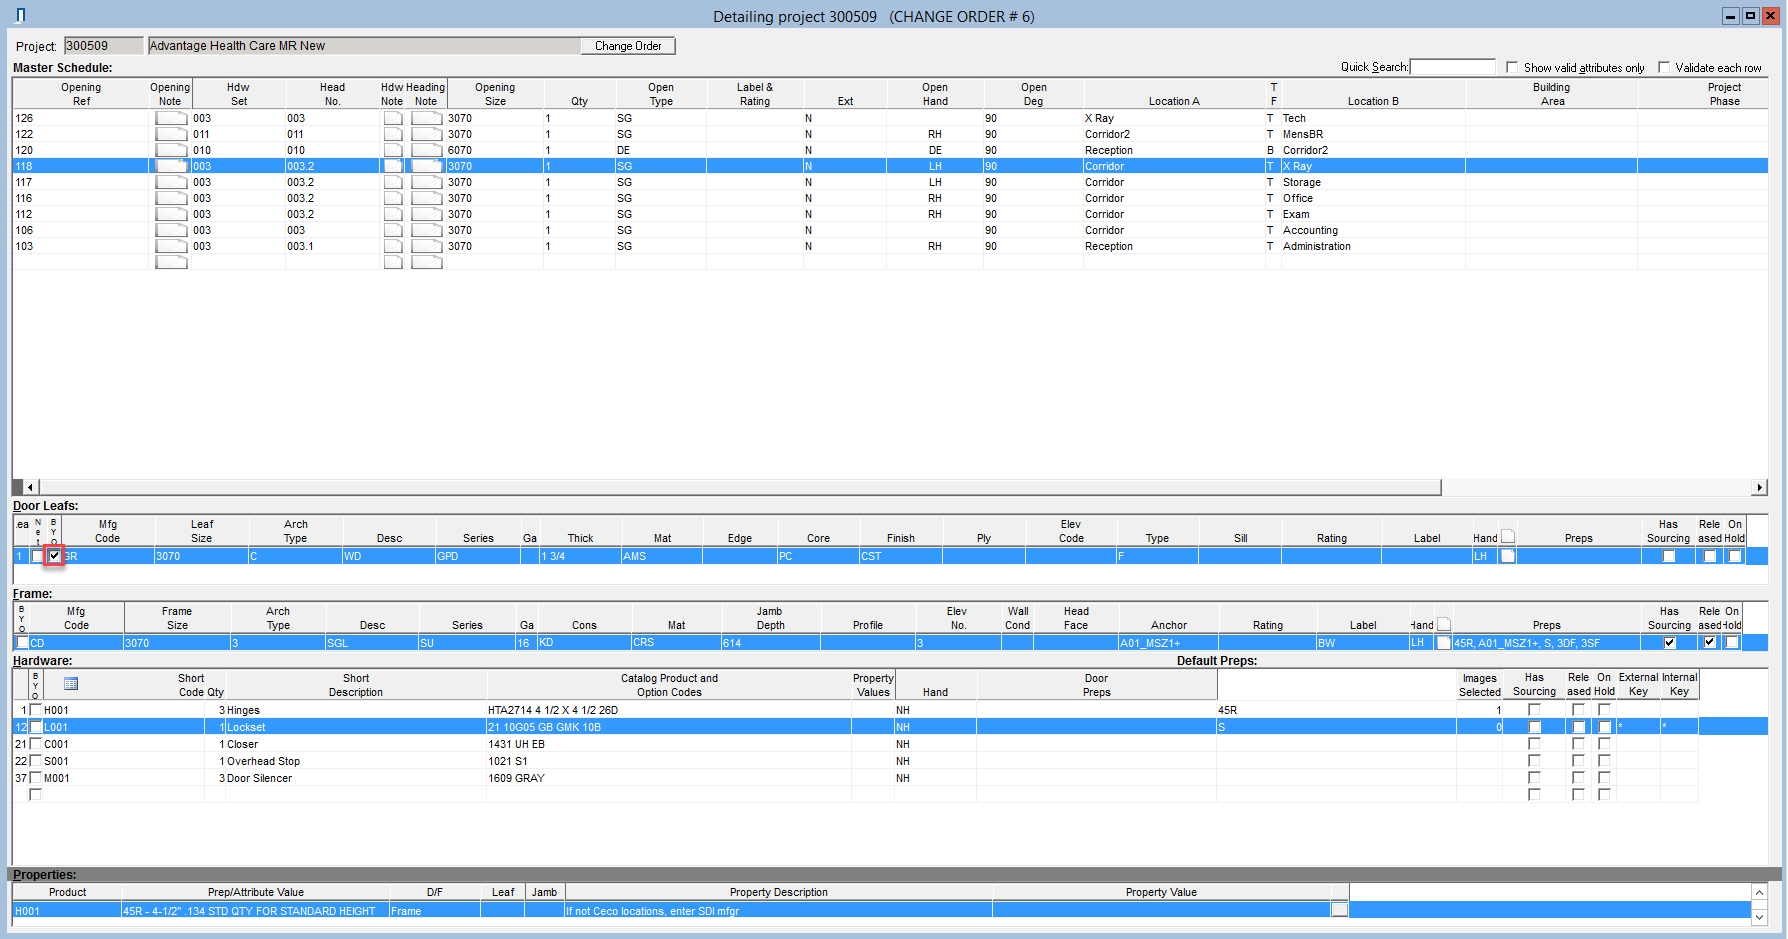
- Check the BYO box to indicate the door is provided by others
- Clear the line item
Checking the BYO Checkbox
Clearing the Door Line Item
In the Door Leafs pane:
- Right-click in the Mfg Code field
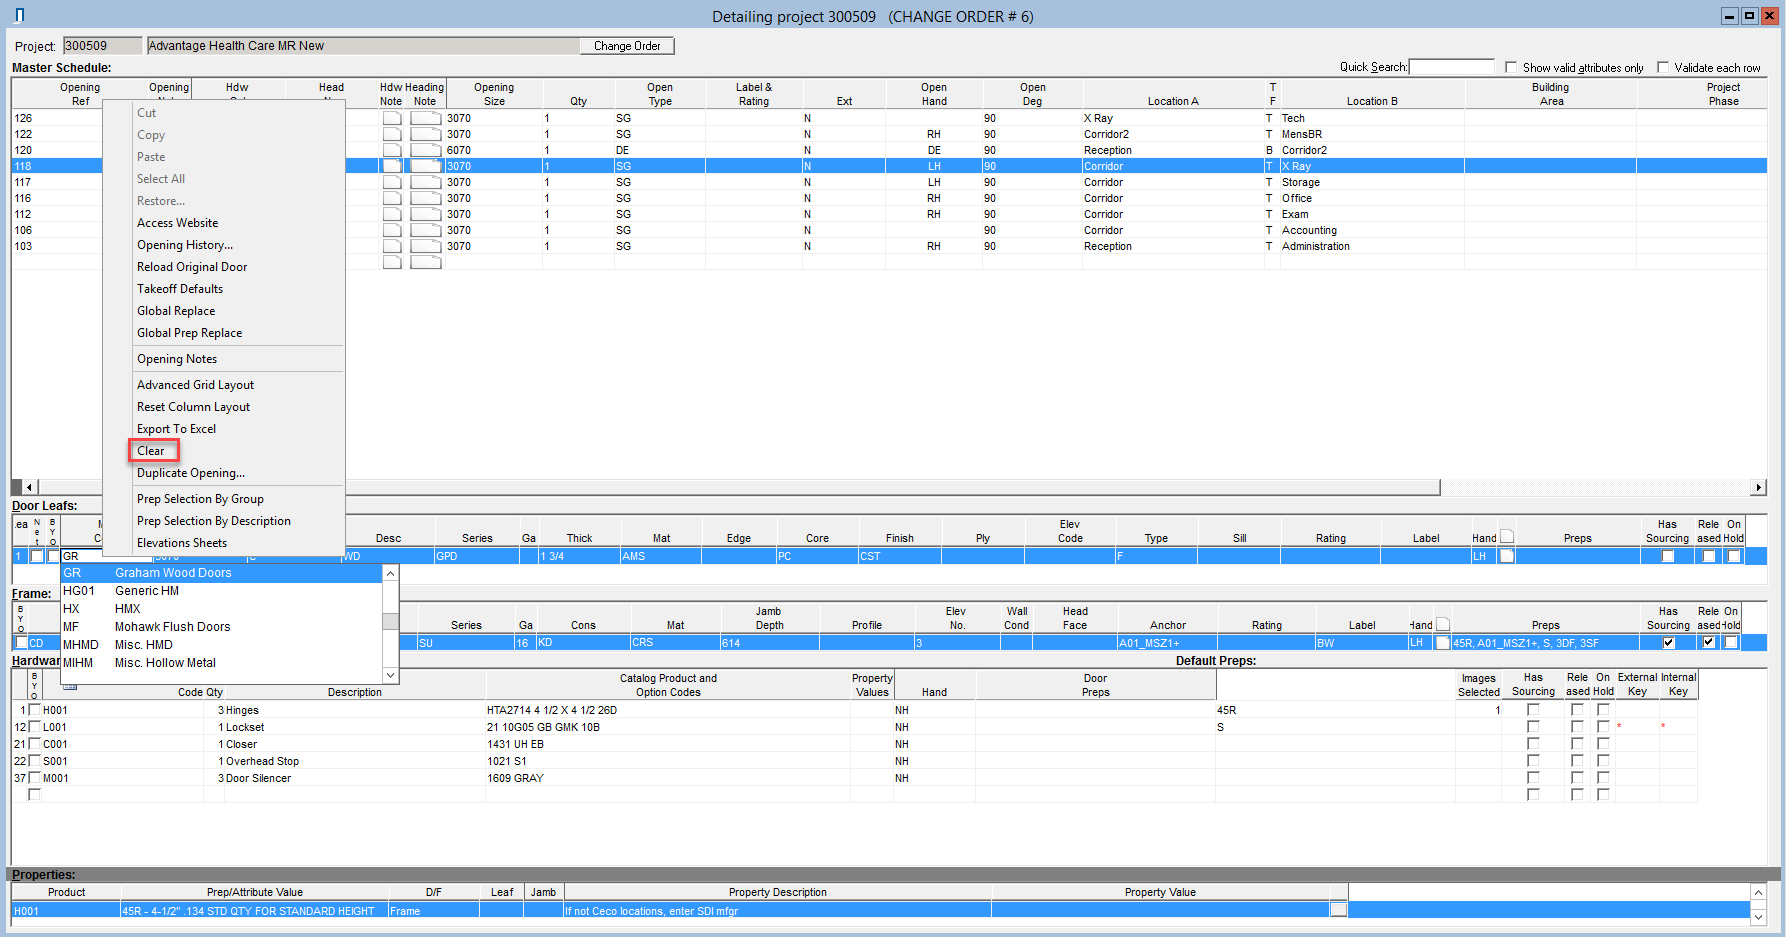
- Click Clear
The door leaf line item is now deleted.
Deleting Frames
Deleting frames follows the same principles as deleting doors. Complete the steps above in the Frame pane to delete any frames.
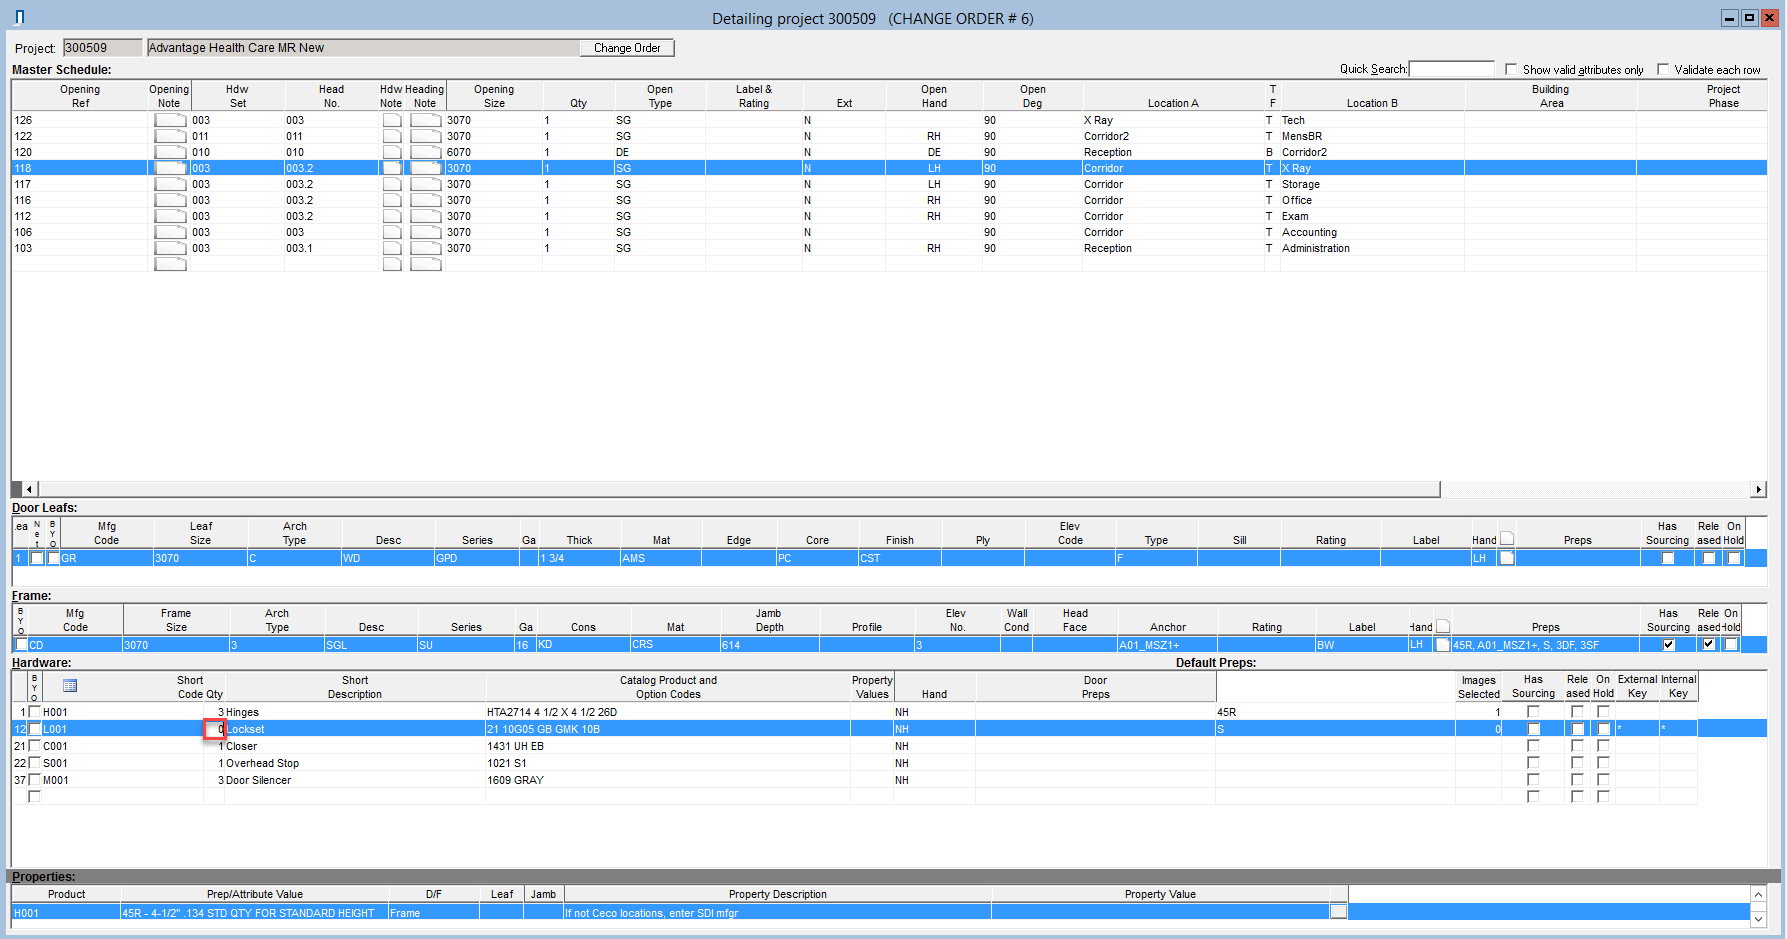
Deleting Hardware
*Note: Consider hardware headings and their openings when making changes to hardware.
In the Hardware pane:
- Update the product quantity to 0 or the amount being supplied.
In the Qty Change dialog box:
- Click Yes or No accordingly
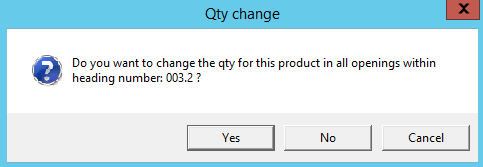
The hardware is now deleted.
Deleting hardware headings deletes any associated preps. If the door and frame must remain as their original state, Reload the Original Doors or Frames.
Changing Products from Existing Openings
Changing products is a combination of adding and deleting the products. Follow the steps in Deleting Products from Existing Openings and Adding Products from Existing Openings to change products. Pay close attention to each affected area of the opening (door, frame, and hardware). Reload existing openings or create new frame or door leaf definitions when necessary.
Verifying Pricing
Accessing Change Order Pricing
*Note: If the original project's pricing is not up to date, you must run pricing in the original project before proceeding.
Advantage > Detailing > Pricing

In the Pricing window:
- Open the project
- Select the change order
- Click OK
In the Price Book Selection window:
- Update any required price book selections
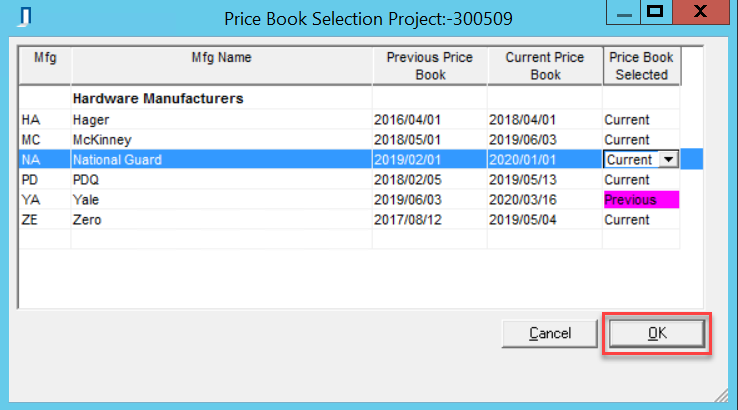
- Click OK
You are now in the pricing window for the change order.
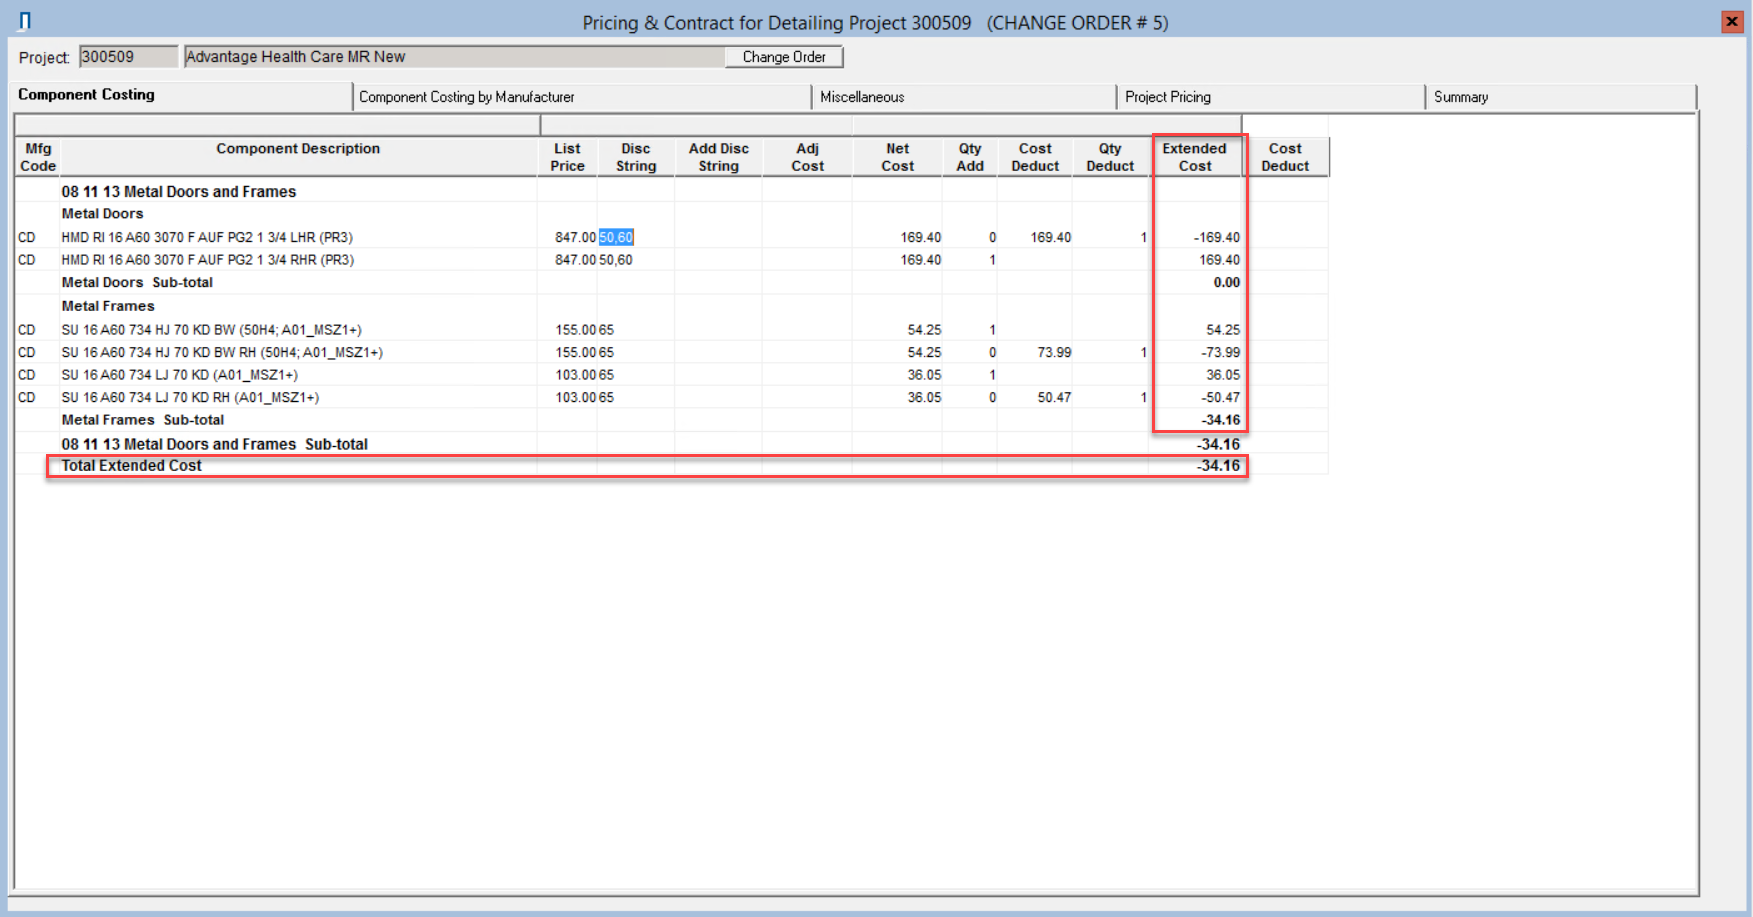
Verifying the Component Costing Tab
Qty Deduct and Qty Add column shows the removed and added products.

Extended Cost column shows the cost of each line item (added or deducted). The Total Extended Cost line item shows the sum of all of the change order line items.
Updating Component Costing
Verify the cost for added and deleted products and complete any required component costing updates using table 1.
| Adjustments | |
|---|---|
| No credit for deleted item | Change the cost on the deleted item to 0.00 |
| Different discounts on added and deleted items | Update discount strings appropriately |
| Particular section requirements for AIA billing | Adjust the sections using the Section Change Wizard |
| Special tax considerations | Adjust the tax in the Project and Cost Group Tax Exempt / On Cost window |
| Incorrect costing | Exit the pricing window and Review the change order |
Verifying the Miscellaneous Tab
If the change order only changes cost or contract amount without affecting products or openings, add those cost groups and sections here, even those with a cost of $0.00.
In the Miscellaneous tab:
- Right-click
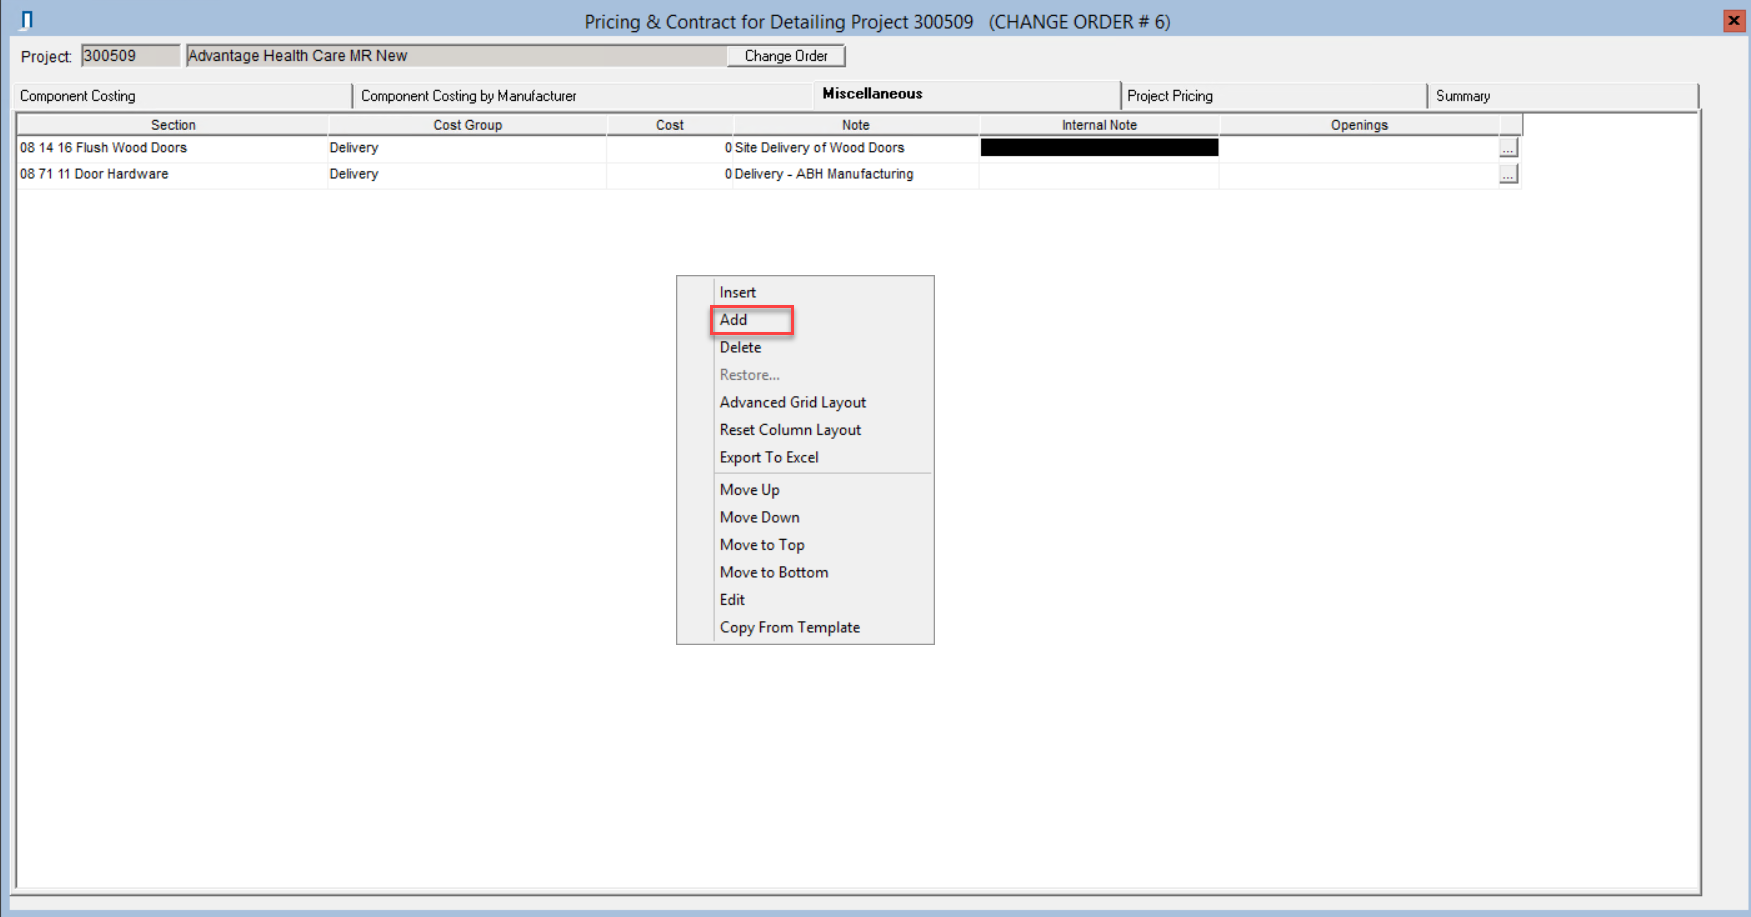
- Click Add
- The Miscellaneous Cost Entry window will open
- Select the Section and Cost Group

- Enter a note
- Enter the cost
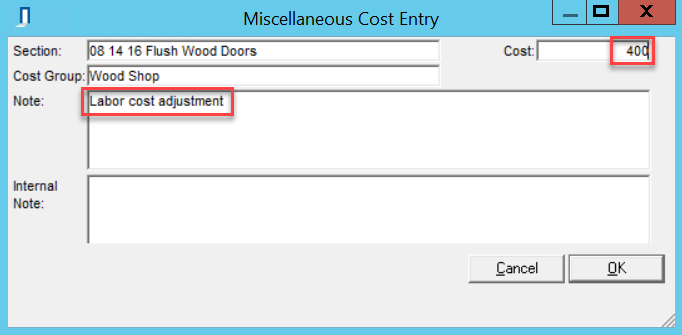
- Click OK
- Repeat steps 1-6 for any other costs
The change order now has miscellaneous costs.
Verifying the Project Pricing Tab
The Project Pricing tab shows you the estimated cost, detailed cost, detailed markup, and contract amount.
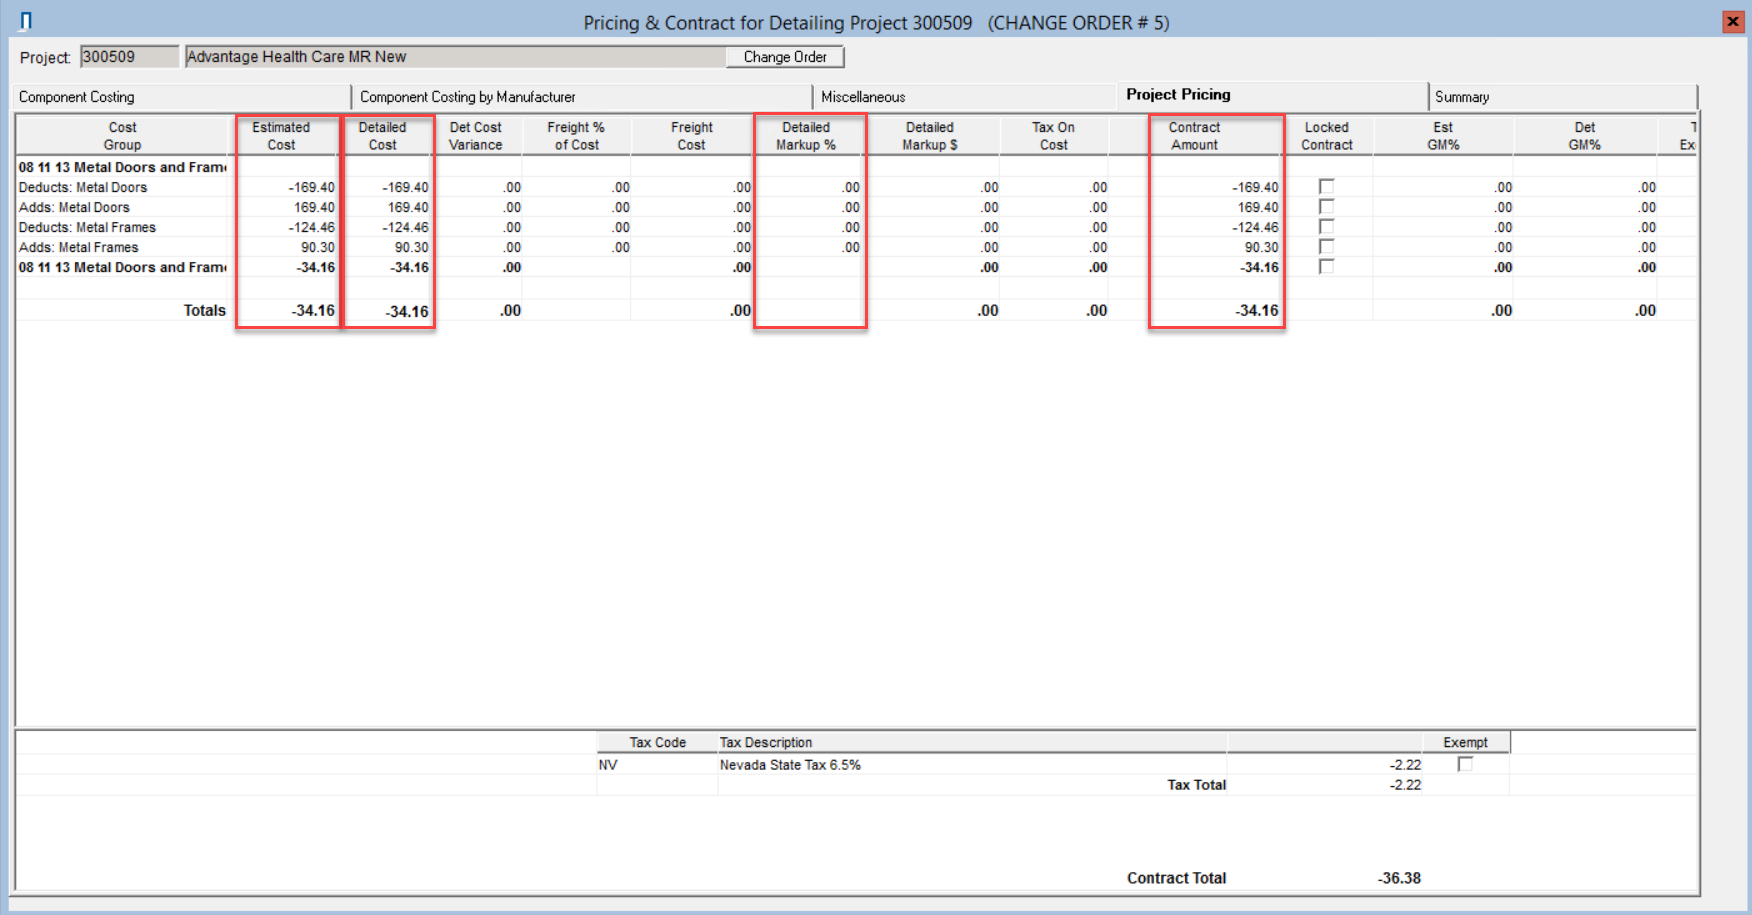
Any selling prices (contract amount) of the original products are gone. You must add a detailed markup to create the selling price of the change order. If you do not update the detailed markup, you are selling the change order products at cost. You can update each line item individually if the credit and charge amounts differ.
If the net effect to the customer should be 0.00, update the Deduct lines to equal the Add lines.
*Note: If there are Add and Deduct lines, do not round the total or the sectional total. The math does not work when dividing positive and negative values. The results are inaccurate.
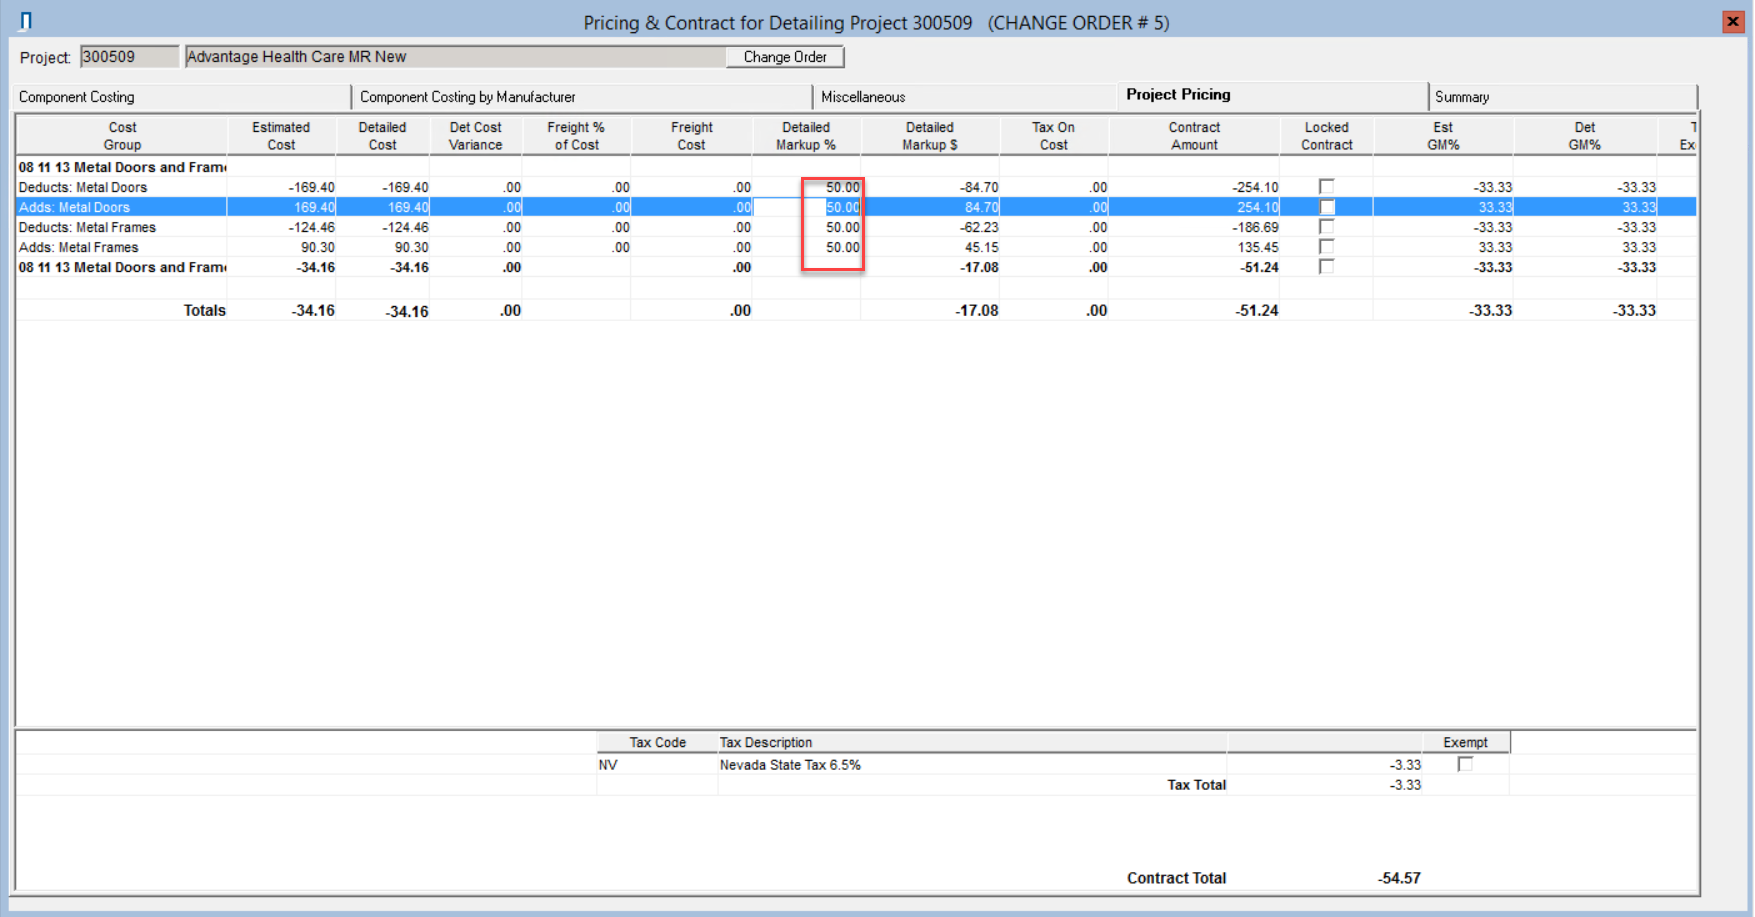
Updating the Detailed Markup Column
In the Detailed Markup % or $ column:
- Enter the markup rate
- Synchronizing Market Percent window will open
If all product markups are the same percentage:
- Click Yes
- Check the Locked Contract checkbox
- All updated line items in the section will check
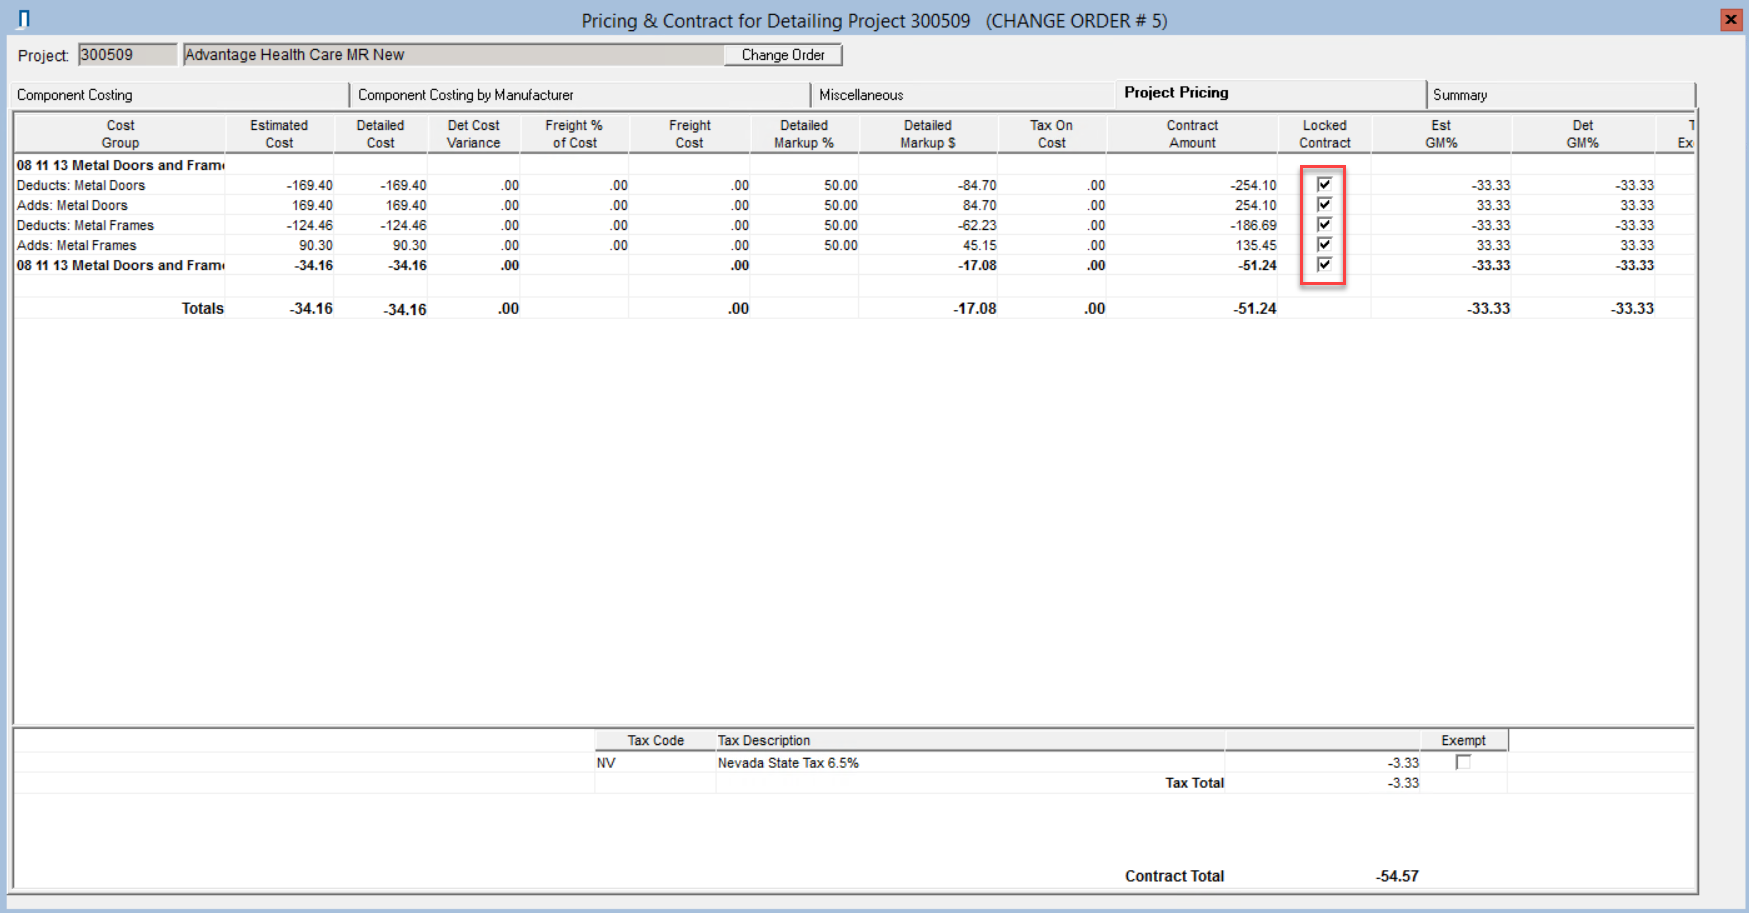
- Click Save & Close
Your change order pricing is up to date.
Creating the Change Order Report
The Change Order report shows all added and deleted components. The Change Order report allows you to see the impact of the change orders on all sections of the project. You can print the Change Order report with specifications to show:
- Individual prices
- Bulk prices
- Taxes
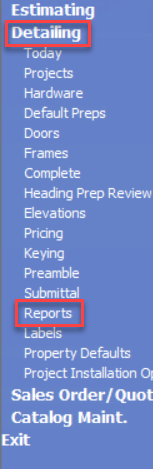
Accessing Reports
*Note: This procedure uses the new submittal report window.
Advantage > Detailing > Reports
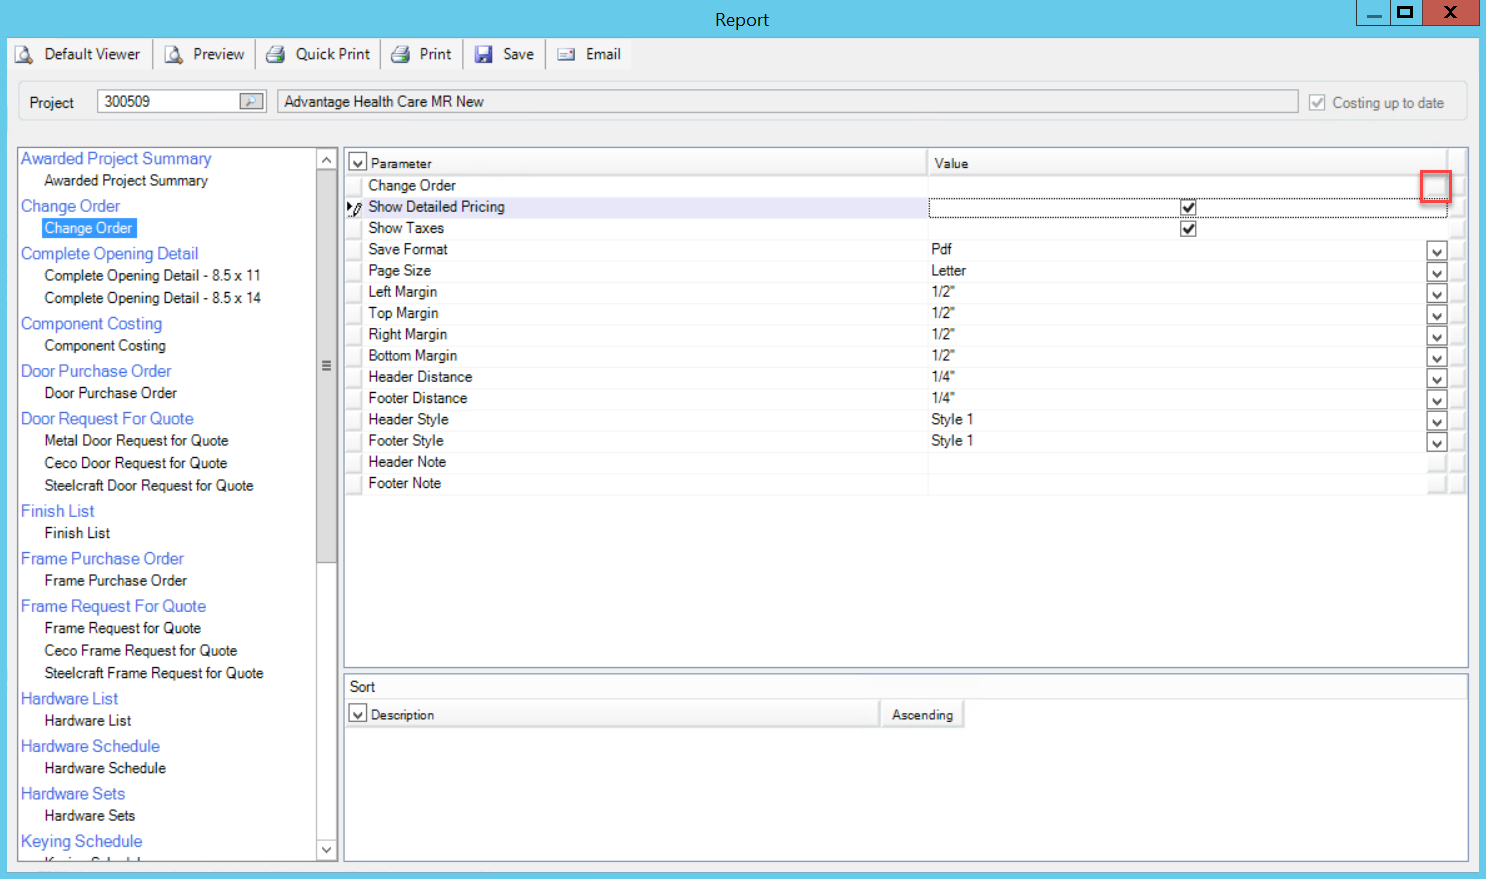
Selecting Change Order Report Preferences
In the Report window Report List pane:
- Select Change Order report
- Open the project
In the Parameters pane:
- Click the Value button on the Change Order line item
- Change Order Selection window will open
- Select the change order
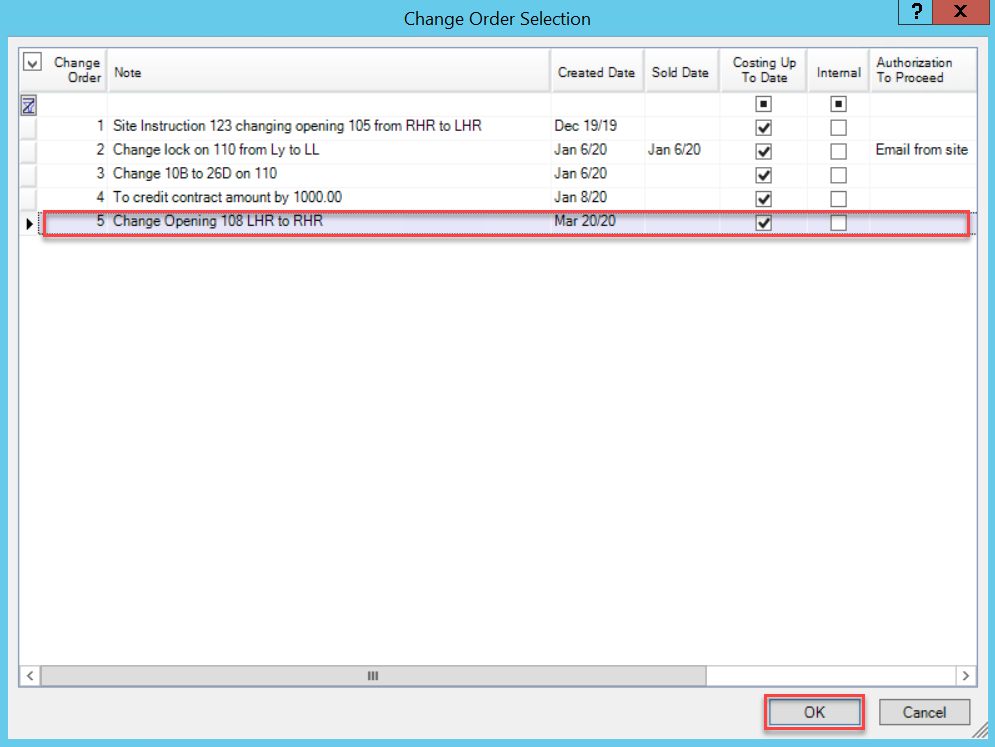
- Click OK
- Update any content parameters
- E.g. Show Detailed Pricing and Show Taxes

- Update the formatting parameters
- Export the Change Order report
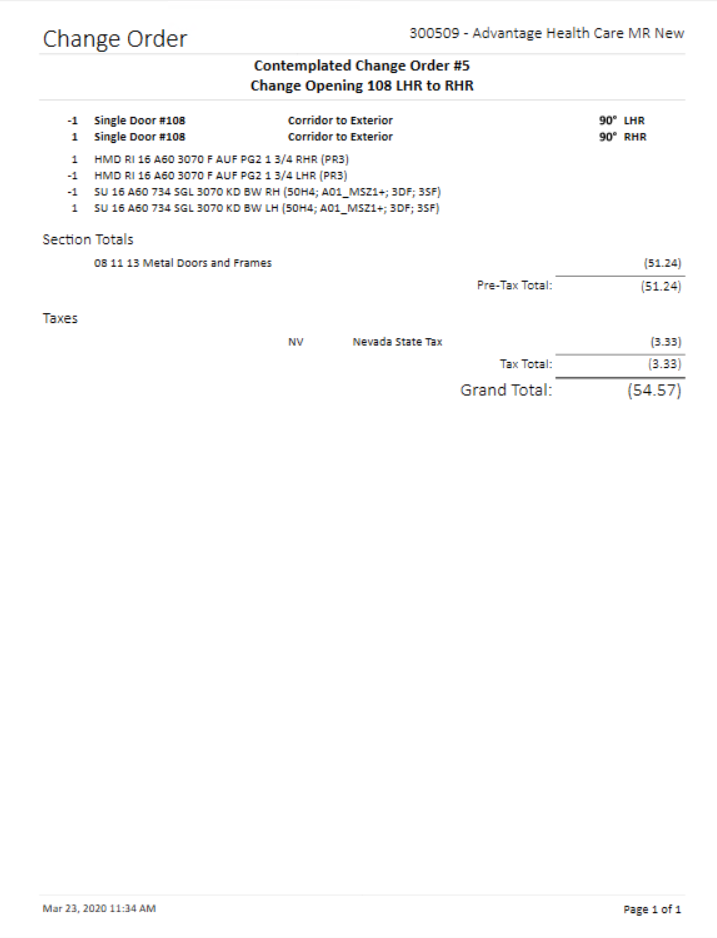
- Review each opening on the Change Order report
If the Change Order report shows changes you were not expecting (e.g. frame being added and deleted), return to the Complete window, correct the change order, and reverify pricing.
You now have a Change Order report showing the total cost and taxes. Send the report to the contractor for approval.
Waiting for Change Order Approval
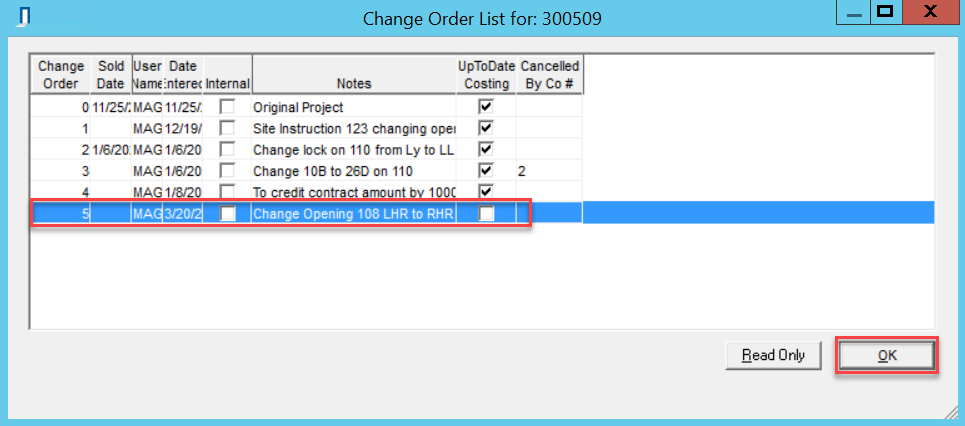
All change orders awaiting approval show as yellow line items in the Complete window.
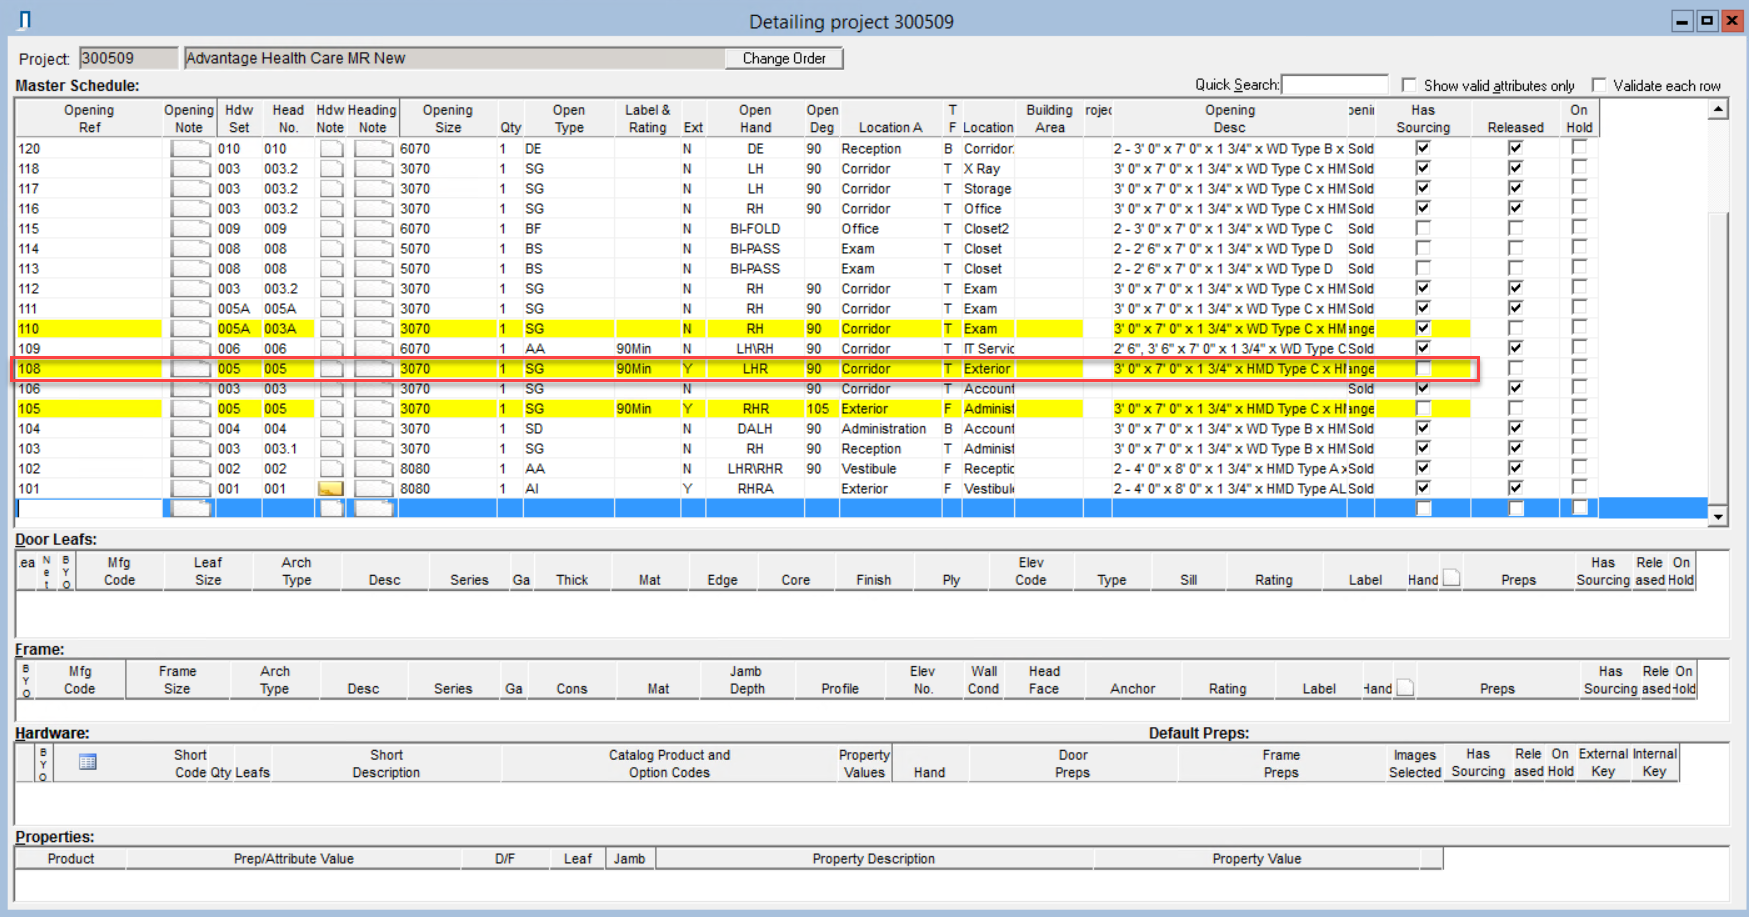
In this example, the Open Hand column is still LHR. To review the change order:
- Click Change Order
- Select a Change Order window will open
- Select the change order
- Click OK
The change order request is now complete. When you are ready to move forward with the approved change order, you must Sell the Change Order.
Comments
Please sign in to leave a comment.