How to: Perform an inventory count in the Product Count window.
Environment: Comsense Enterprise
In this article:
Before Starting an Inventory Count
Before starting an inventory count, it is important you thoroughly review:
- Understand the Product Count Window
- Complete & Pause Inventory Transactions
- Communicate an Inventory Count
- Understand Product Count Statuses
Understand the Product Count Window
The Product Count window is a tool that you can use to create, track, and complete:
- Inventory adjustments
- Cycle counts
- Seasonal or year-end inventory
When completed, inventory counts above update the quantity of product available in the system and the general ledger.
Complete & Pause Inventory Transactions
Complete all pending transactions and pause any future transactions involving inventory. If inventory transactions are in process, the count may be wrong and need a recount. Having a Complete or Open status for all inventory transactions saves you time and money.
Before completing a product count:
- All previous product counts must have the Completed status
- All stock requisitions and work orders must have the Open or Completed status
- We recommend you transfer all stock items in the pool back to the stock (physically and electronically)
Communicate an Inventory Count
Comsense does not automatically suspend inventory transactions after you create a product count in the system. You must let the users know that they cannot release or complete:
- Stock transfers
- Stock requisitions
- Work orders
- Shipments
- Receivings
Or process pool to stock transactions.
Understand Product Count Statuses
The table below details the meaning of each status and it's impact on the system.
| Status | Comsense | Warehouse |
|---|---|---|
| Open | The product count exists in the system and no action has been taken. | The physical count has not started. |
| Released | The original quantities are locked in, the Product Count report can be printed, and the Qty Counted column can be updated. | The physical counting is in process. |
| Completed | The product count quantities are now in the system and the general ledger has accounted for any cost variance. | The physical counting is completed |
Access Product Count
Go to Enterprise > Inventory/Purchasing > Product Count.

Create a New Product Count
The Product Count report displays the product line items by warehouse area i.e. each warehouse area has its own report page(s) with all products. If warehouse area is the only category you require, you can simply Click Add All products in Step 4.
If you require more granular categories, you must create multiple product counts. In each count, select the products by the applicable attribute for the category e.g. select all the products from one supplier.
Product counts in the system can be created a few days before the physical count. In case user create the product count early, leave the status at Open. The open status allows the system to update the Qty Released column with up-to-date quantities on the day of the physical count.
- In the Product Count window, Click New.
- The Warehouse Find window is displayed
- Select the warehouse of the product count.
Click image to enlarge 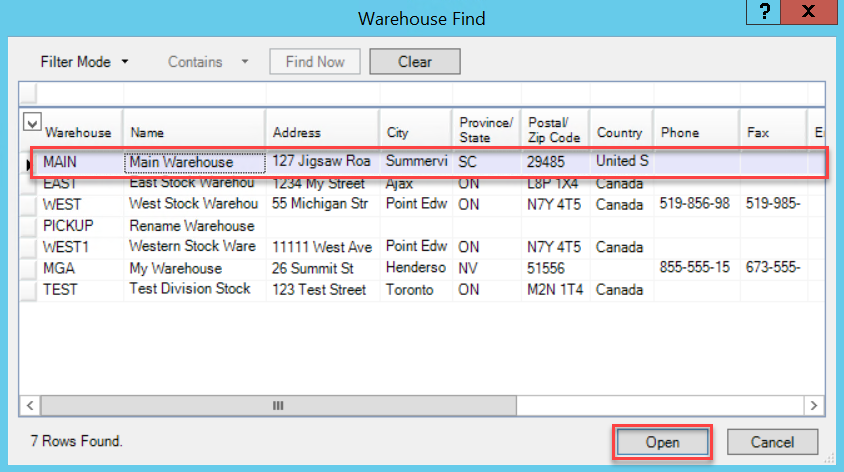
Image 2: Warehouse Find Window - Click Open
- The Warehouse Product Selection window is displayed
- In the Unselected Products pane, Filter & Select the products by the applicable category attributes.
- CTRL + Click or shift + Click the buttons next to the product codes to select multiple products at once
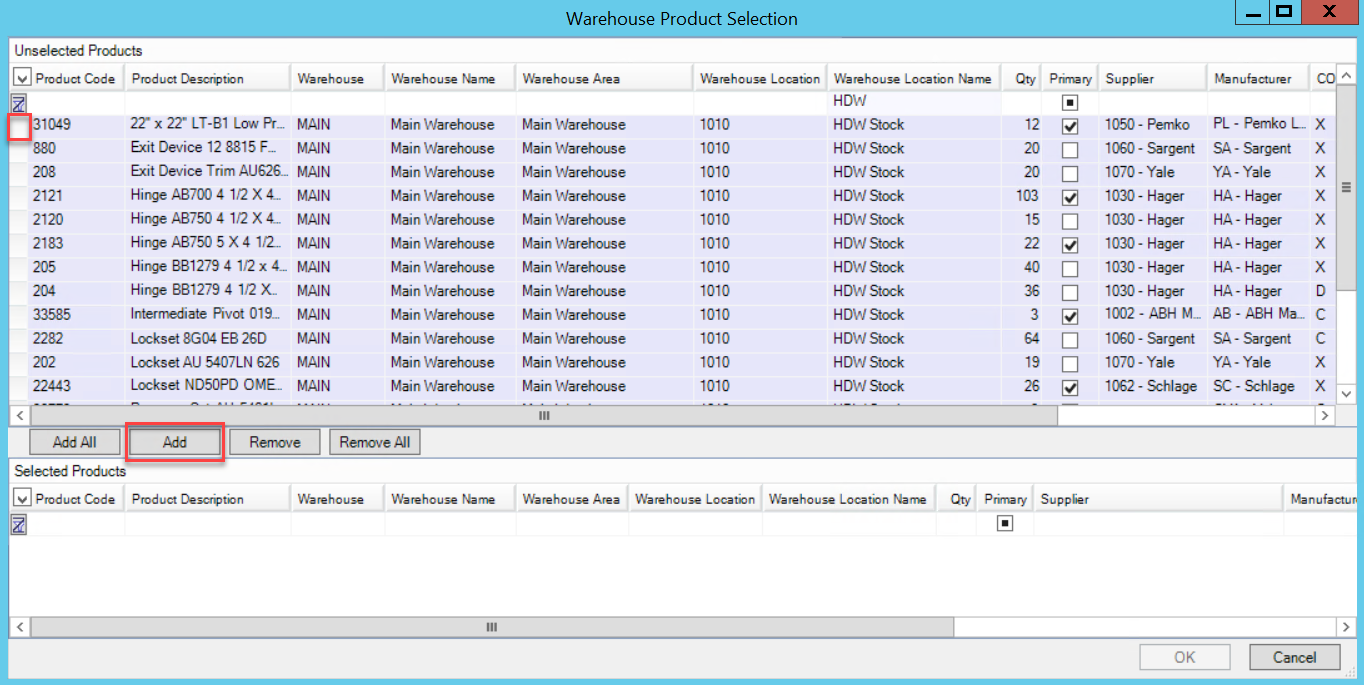
- Click Add.
- The selected products will move to the Selected Products pane
- Click OK.
- In the Product Count window, enter a note detailing the reason for the count
- The note displays on the Product Count report
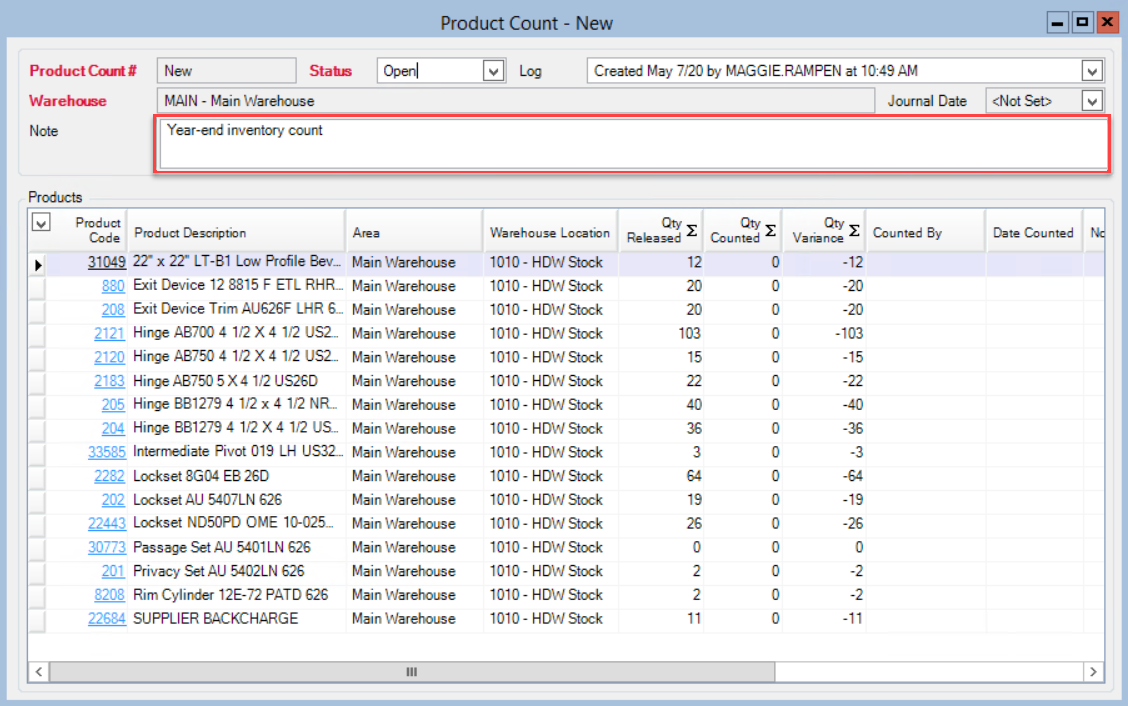
- Click Save.
The product count now has the selected product and the status at Open.
Export the Product Count Report
Always export the document on the day of the inventory count to ensure up-to-date numbers.
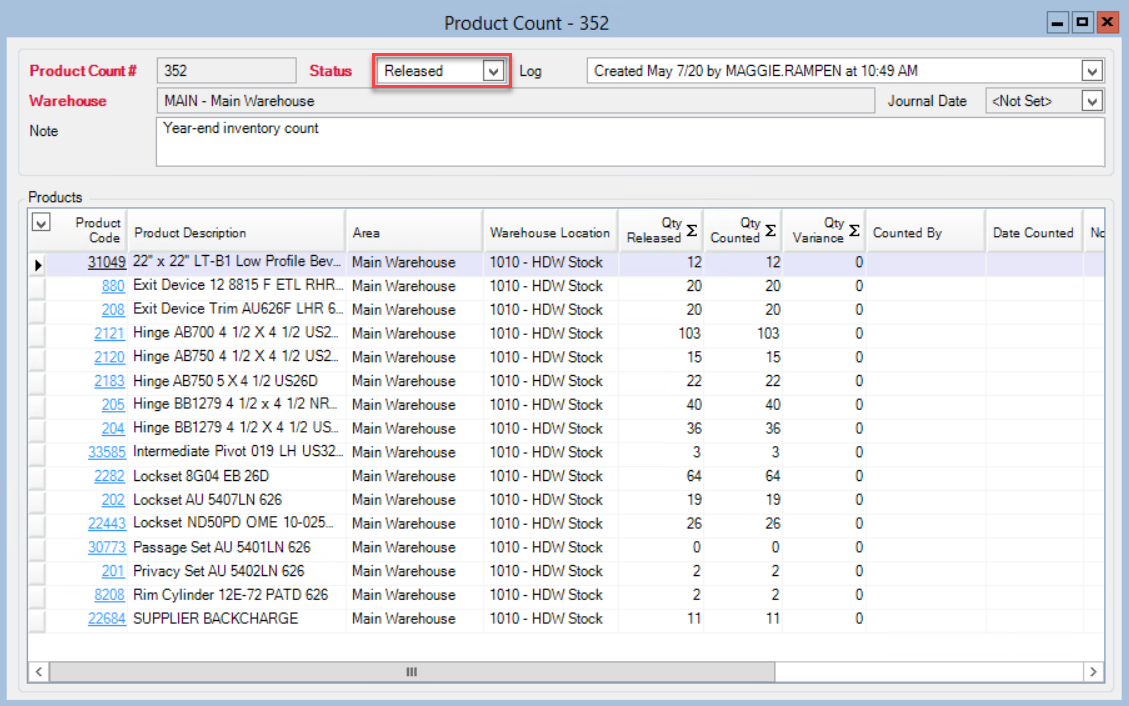
- In the Product Count window, open the product count.
- Update the status to released.
:
- In the top toolbar, click Save.
- Click Print.
- The Generate Report window is displayed
- Click your preferred export method.
- E.g. Email, Print, Save As PDF, etc.
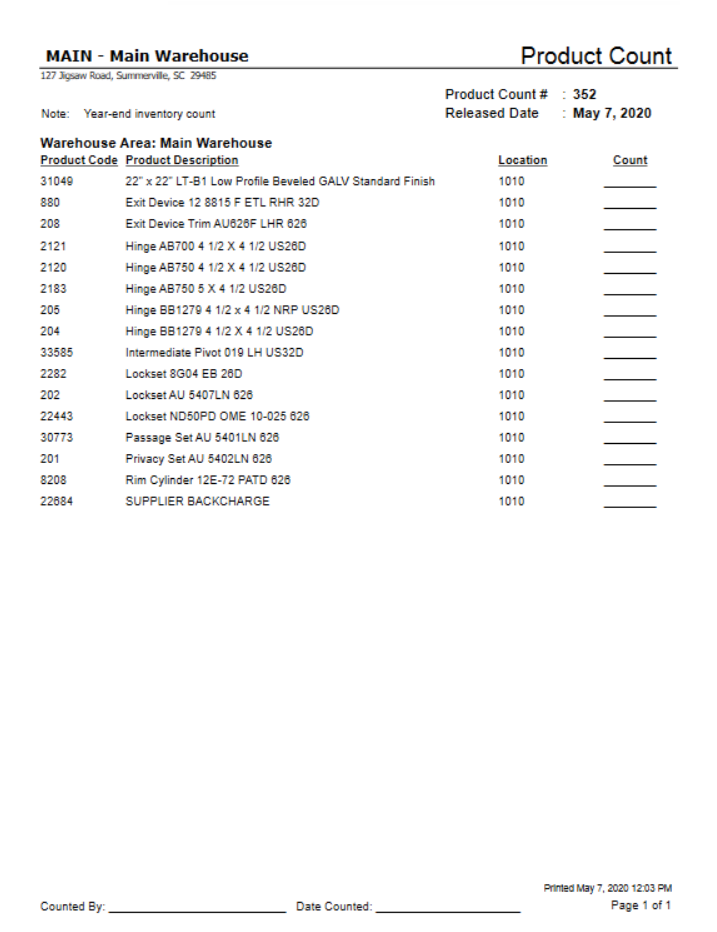
- Distribute the report to the product counter.
Enter the Physical Product Count
Note: The Qty Counted column will be pre-populated with the numbers from the Qty Released column.
- In the Product Count window, open the product count.
- In the Products pane, update the Qty Counted fields using the numbers on the Product Count report.
- The Qty Variance field will update for each product
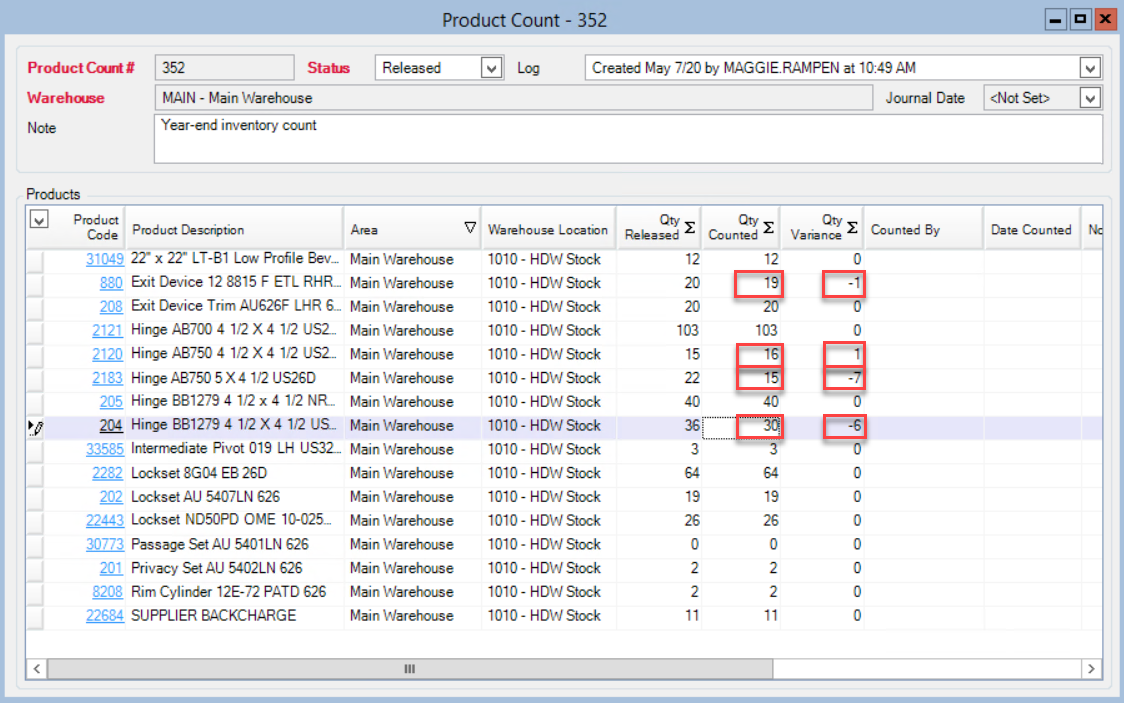
- Fill:
- Counted By fields
- Date Counted fields
- Enter product notes.
- Click Save.
The product count now includes the physical count information.
Review the Product Count Variance
Completing a product count in Comsense creates a general ledger entry that cannot be undone. Always review the product count variance for any issues before updating the product count status to Complete. If there are significant or unusual variances, you may want to recount the product or investigate the variance before completing the product count transaction.
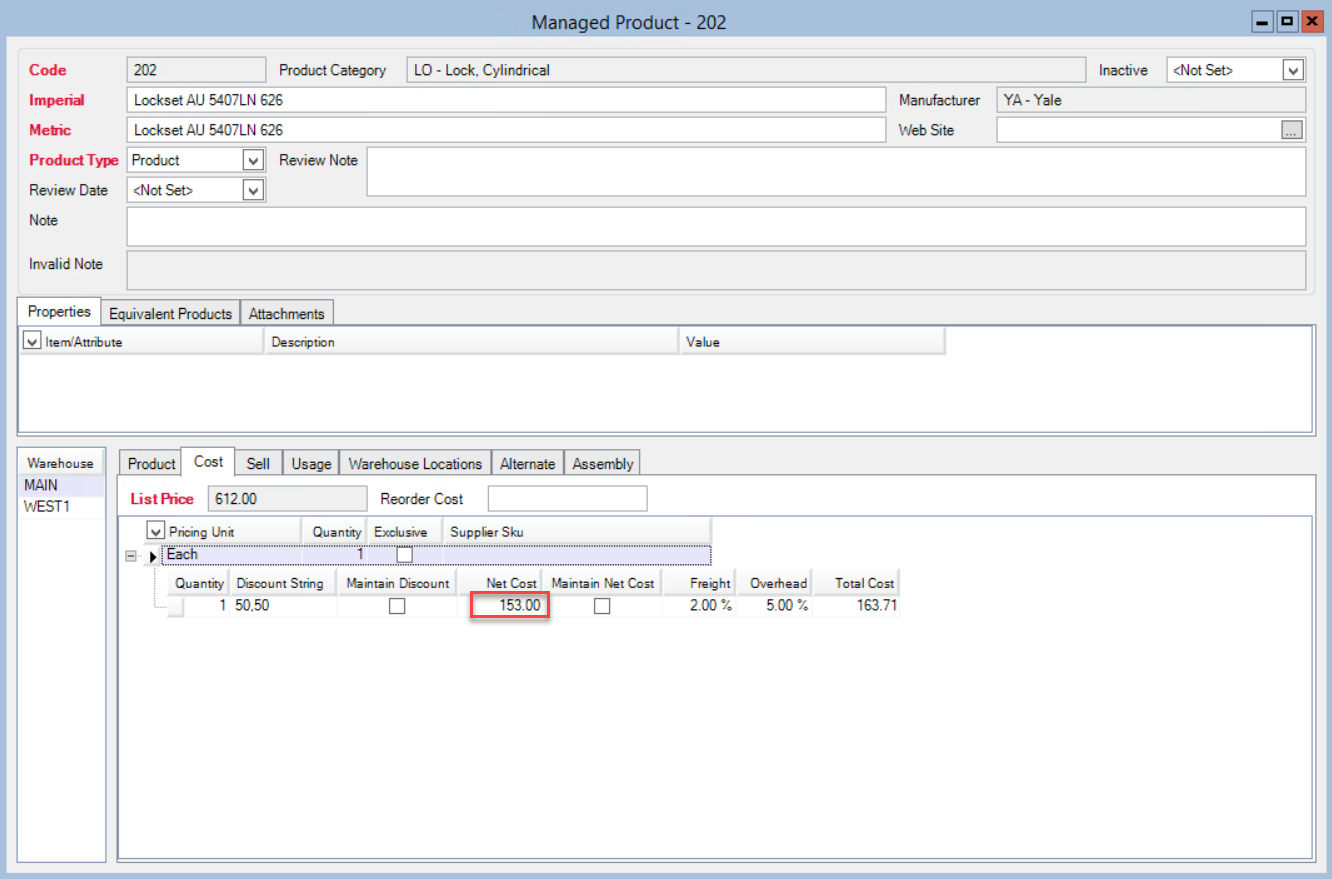
Note: Quantity decrease uses the FIFO costing method and quantity increase uses the replacement cost (net cost) from the Product Master window's cost tab.
- In the Product Count window, click Print.
- The Generate Report window is displayed
- In the Parameters pane, check the Print Variance checkbox.
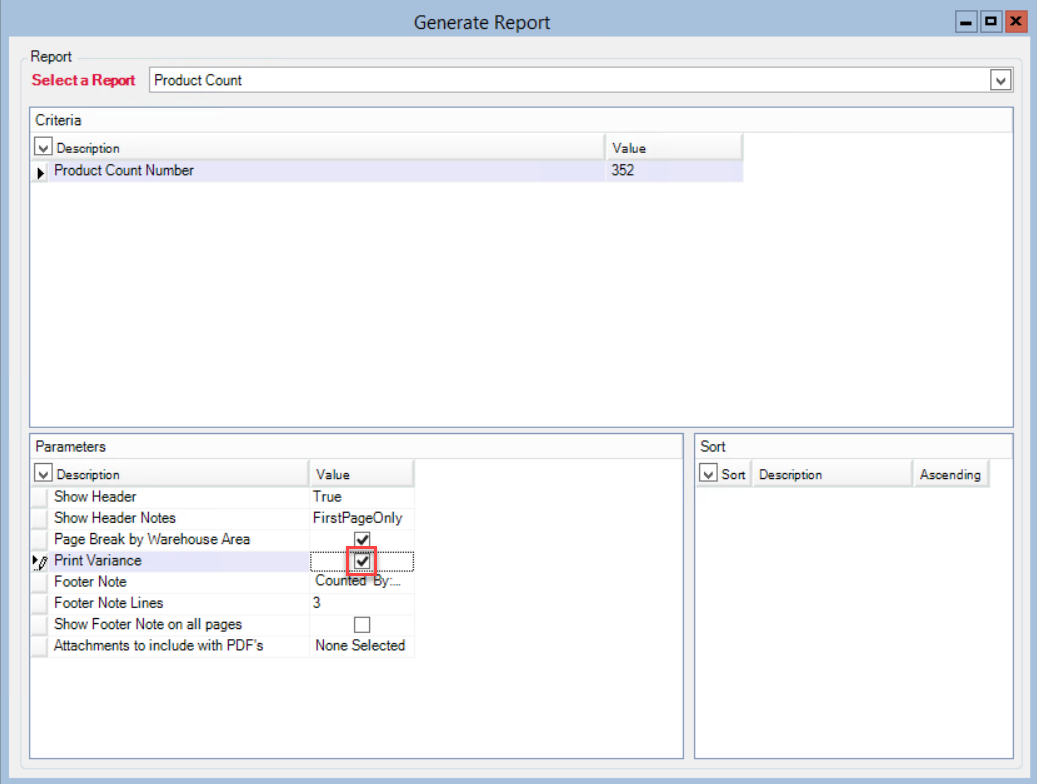
- In the top toolbar, click your preferred export method.
- Review the Count/Variance column.
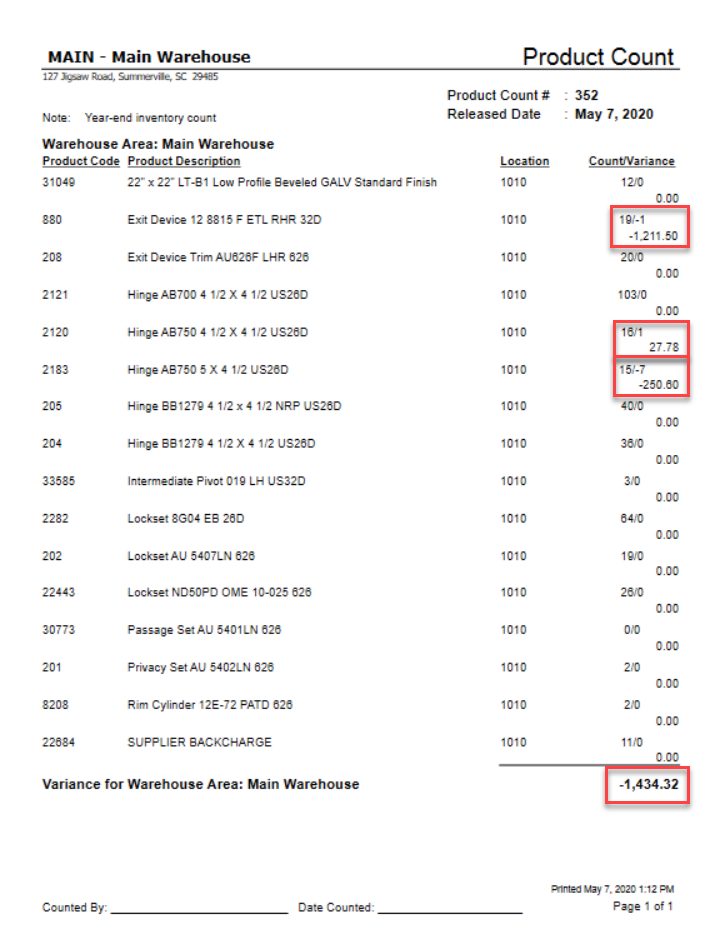
User now knows the cost variance and can determine if he can complete the product count.
Complete the Product Count
Once you are certain the quantity counted is correct and any cost variances have been approved, you can complete the product count.
In the product count window:
- Update the status to Completed.
- Click Save.
The new product count information is in the system, the journal entry for any cost variances in the general ledger, and work can return to normal.
Comments
Please sign in to leave a comment.