How to: Complete a customer return on a project.
Environment: Comsense Enterprise
In this article:
- Understanding Customer Returns on a Project
- Accessing Customer Returns
- Completing the Customer Return Wizard
- Completing the Customer Return Information
- Generating the Customer Return Pickup Slip
- Completing the Customer Return
- After the customer return
Understanding Customer Returns on a Project
Unlike sales order customer returns, project customer returns:
- Create a demand for a new product in the project
- Remove the original product from the project's shipped list
- Do not automatically issue a credit to the customer
- Do not have a restocking charge field
- May require a change order
Accessing Customer Returns
Enterprise > Order Entry > Customer Return
Completing the Customer Return Wizard
In the Customer Return top toolbar:
- Click New
- The Customer Return Wizard will open
- Click Next
- Open the project
- Click Next
- All shipped items from the project are in the Assigned Pane
- Select the return products by either:
- Removing all products & Adding the return products
- Removing the non-return products individually

- Click Next
- Click Finish
The selected products are now in a customer return for this project.
Completing the Customer Return Information
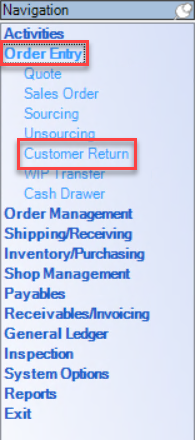
Adding Notes
In the Customer Return window:
- Enter a note detailing the return
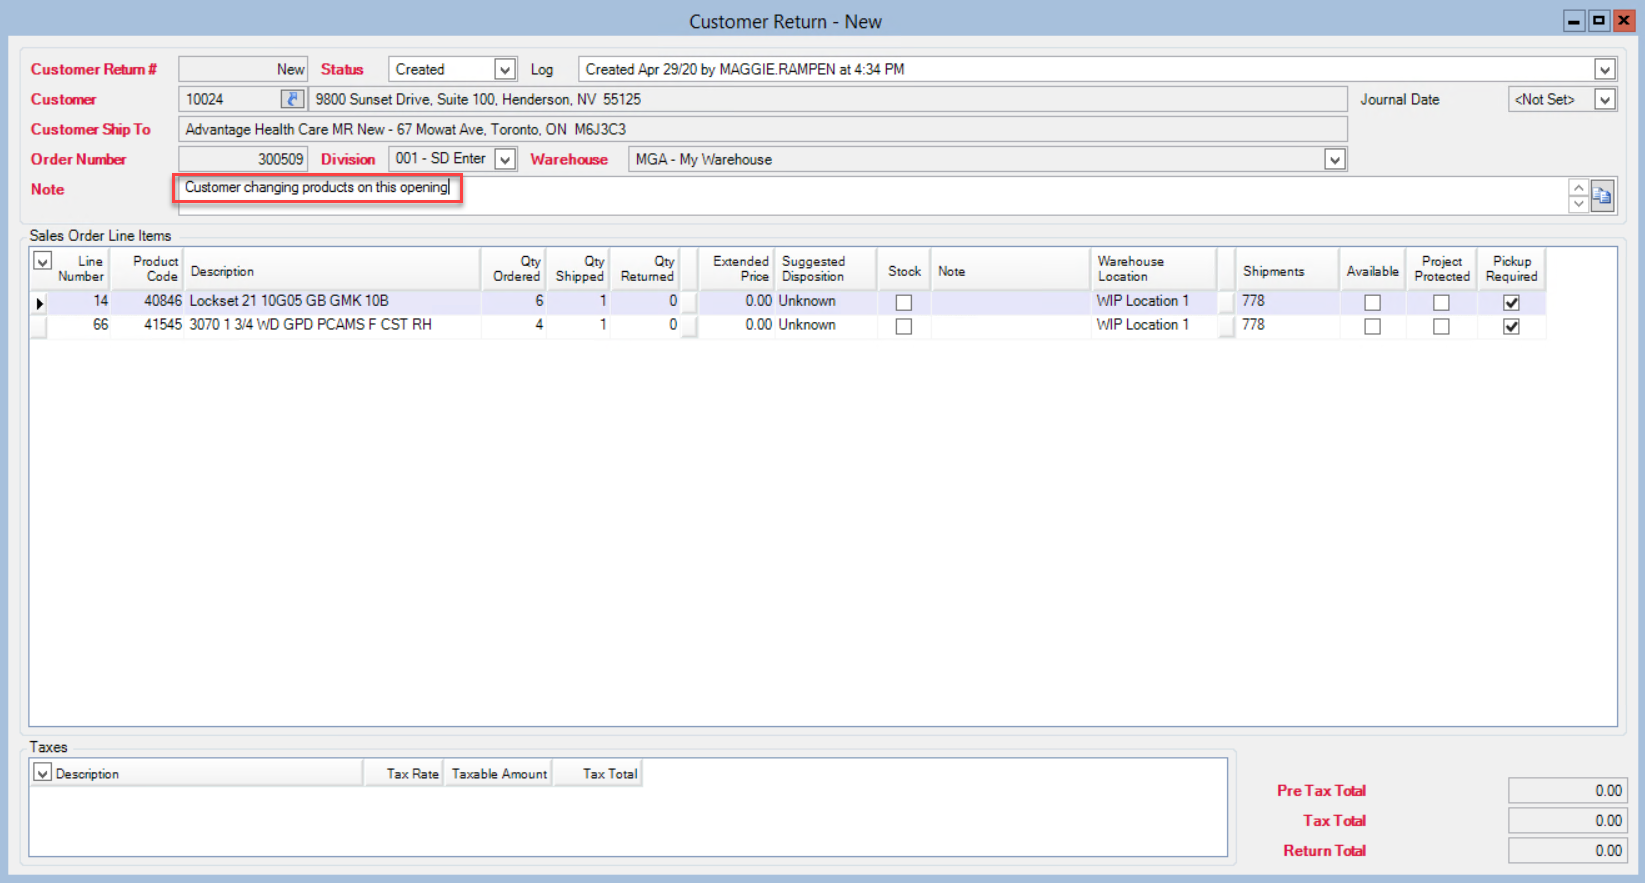
To copy the note to all line items without a note:
- Click Duplicate Note
The main note field is now on the return line items.
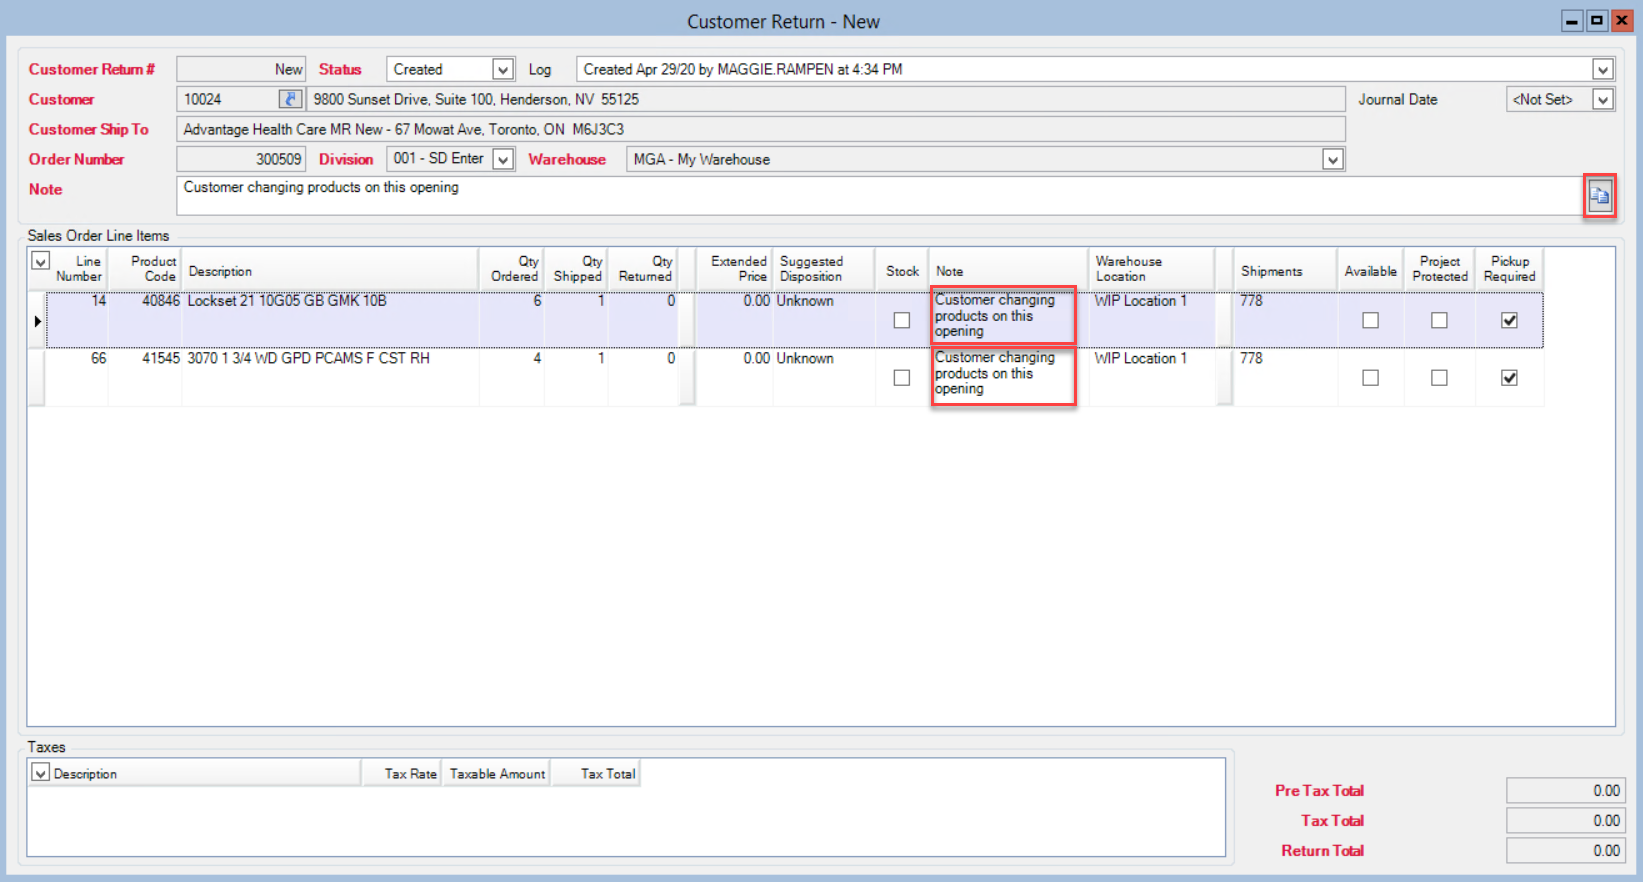
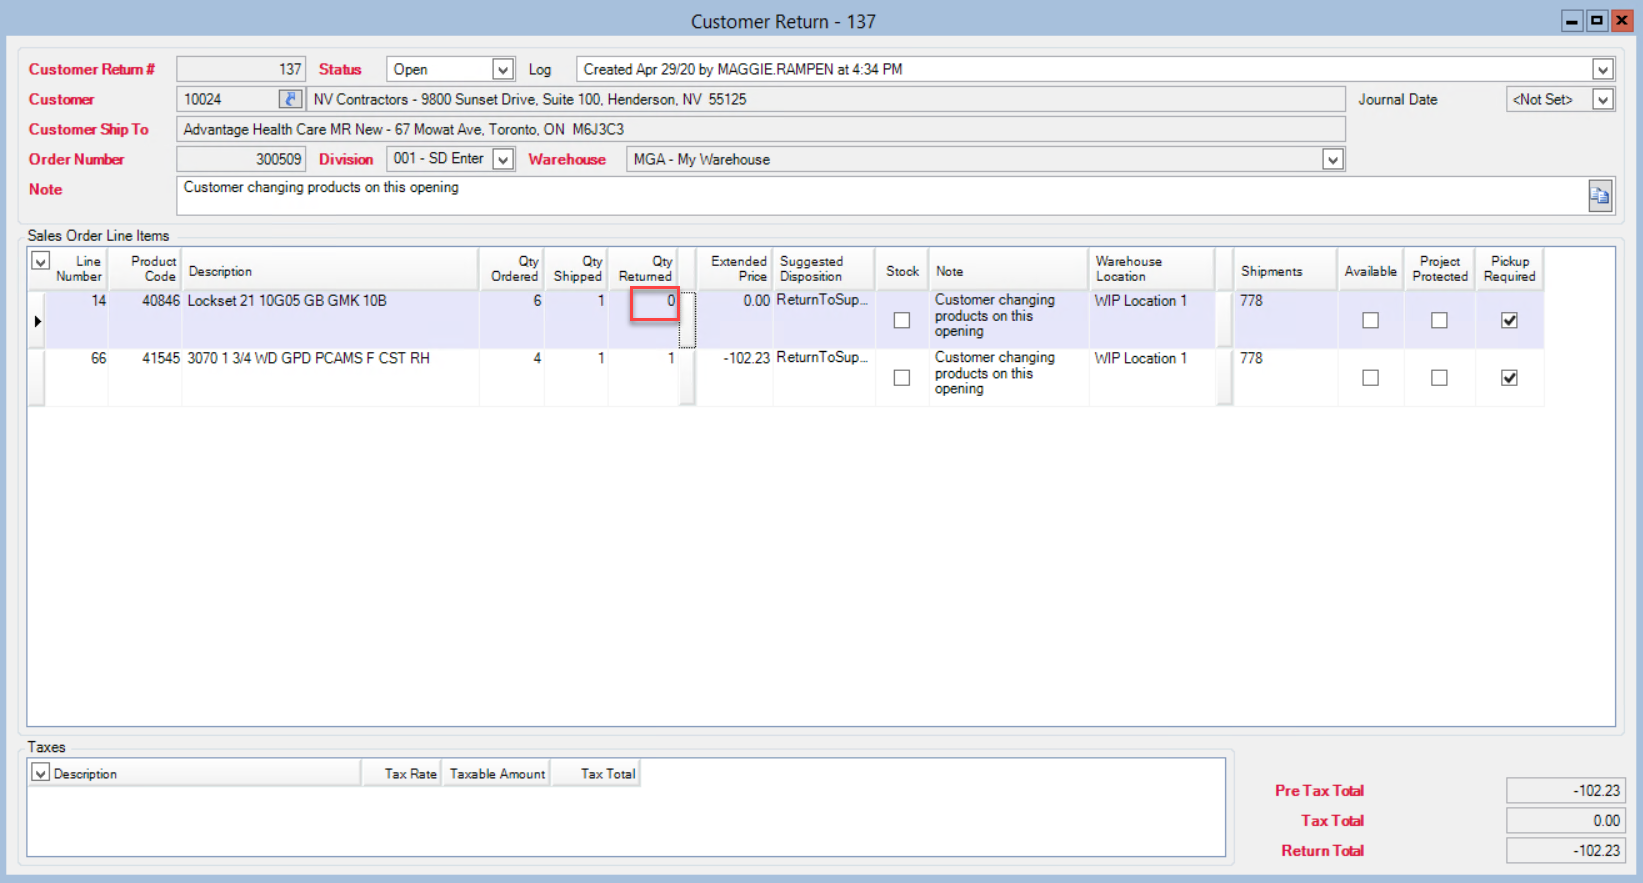
Updating Quantity
On the return item line items:
- Click the Qty Returned button
In the Customer Return Openings window:
- Check the Returned checkbox for the return items
- Click OK
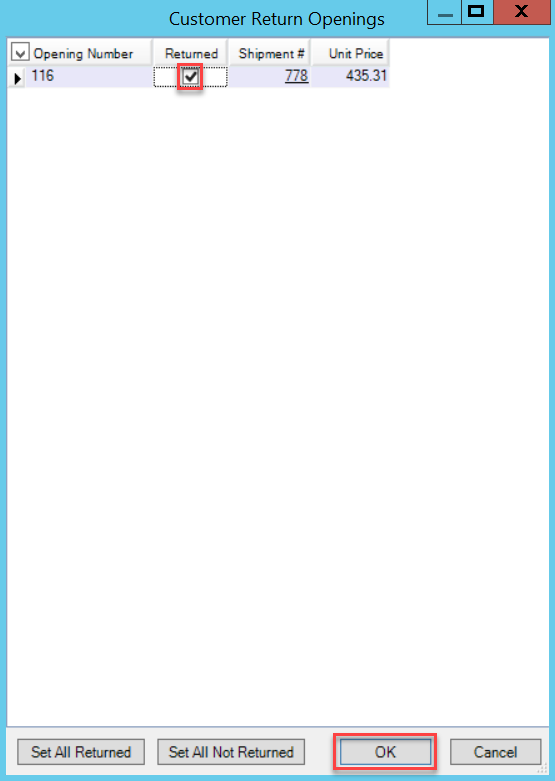
- Repeat steps 1-3 for all line items
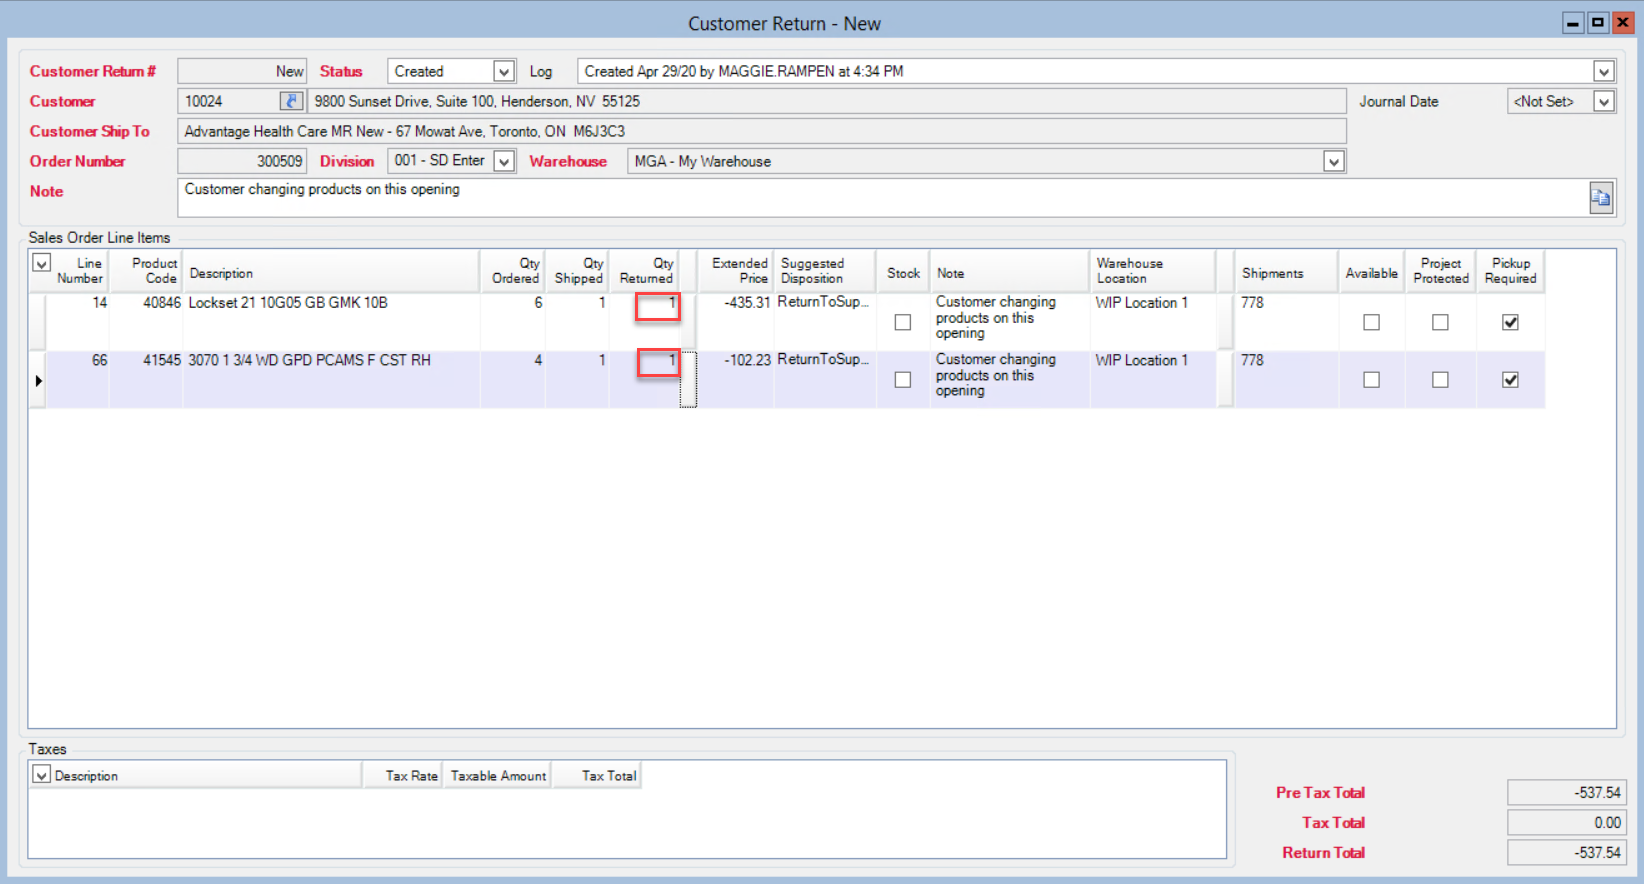
The line items now have return quantities.
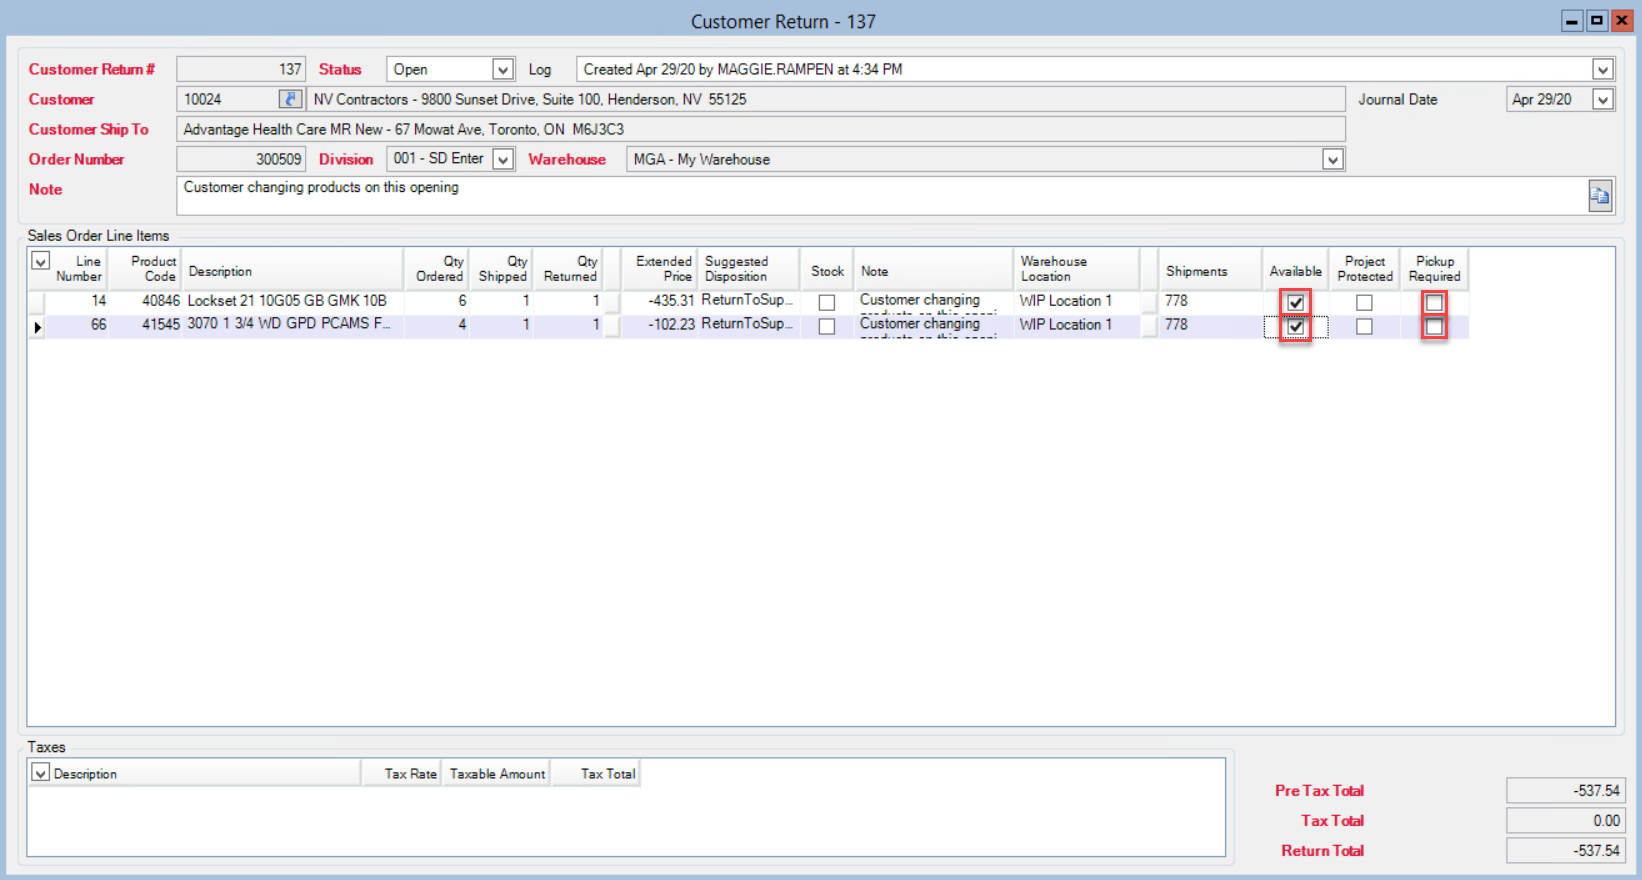
Updating the Remaining Line Item Fields
In the return line items:
- Select the suggested disposition
- Select the warehouse location
- Check any applicable checkboxes
- Project Protected
- The product is only available for sourcing on this project
- Pickup Required
- The product requires pickup from the customer
- Project Protected
- Click Save
- The status will update to Open
The return line items are now complete.
Generating the Customer Return Pickup Slip
In the Customer Return top toolbar:
- Click Print
- The Generate Report window will open
- Select any preferences in the Parameters pane
- Select the export method
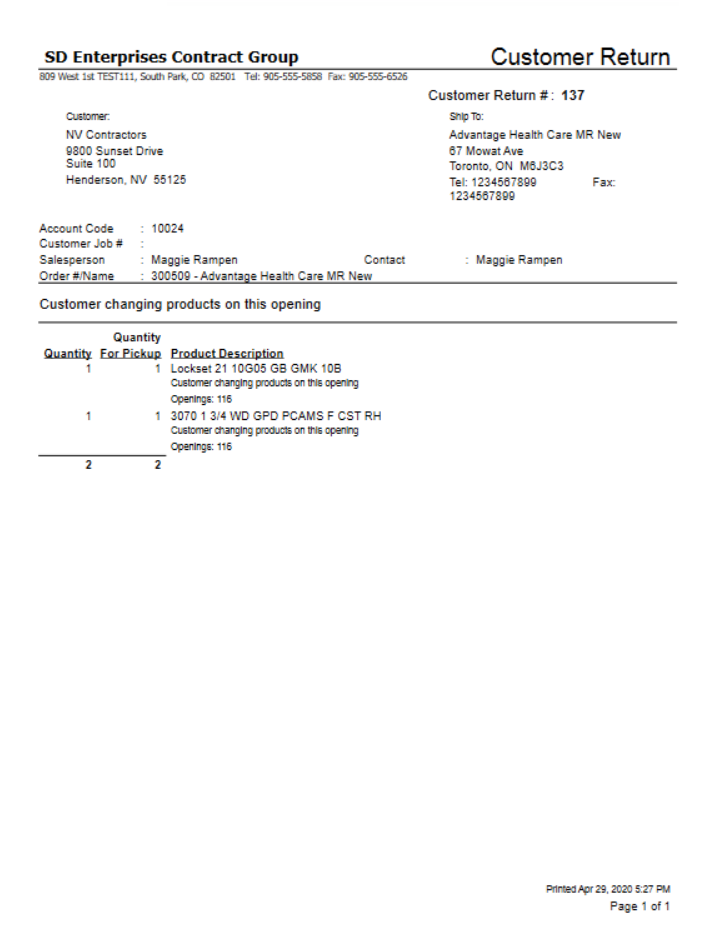
You now have the customer return pickup slip.
Completing the Customer Return
After you receive the returned product, you can begin completing the customer return. It is important to make sure the customer return matches the returned products.
In the Customer Return window:
- Open the customer return
- Update any quantities based on the return items
- Uncheck the Pickup Required checkbox
If the product is available for other orders:
- Check the Available checkbox
In the Status field:
- Select Released
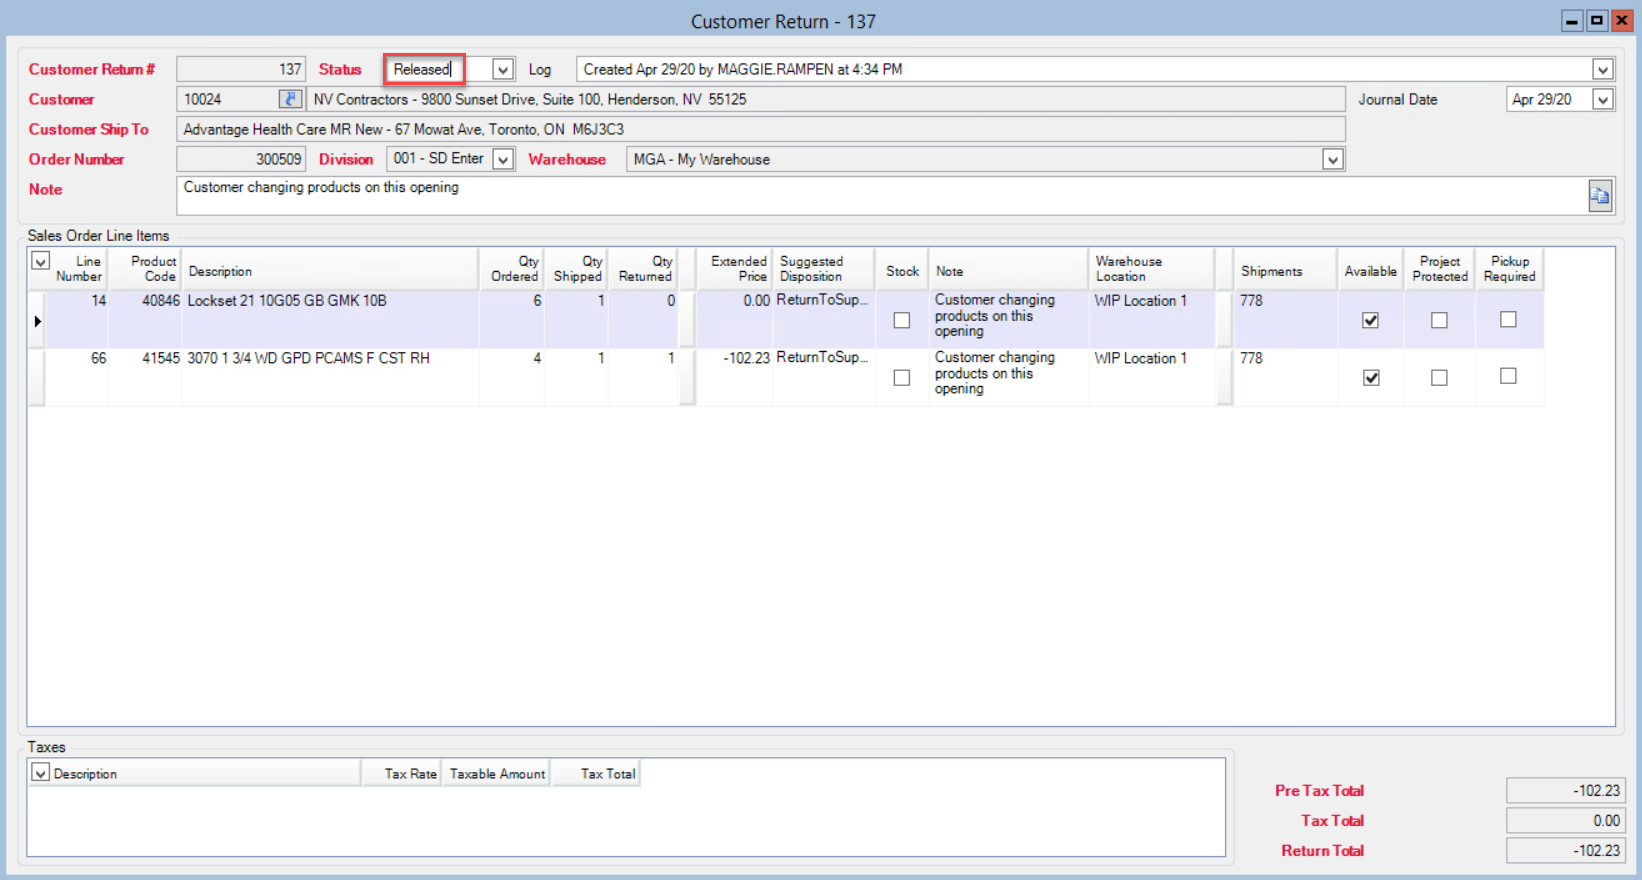
Tip: Review the customer return carefully because you cannot update the fields after the customer return is saved as Released.
- Click Save
After you inspect the returned product:
- Update the status to Completed
- Click Save
The product is now in the pool and the items are no longer sourced on the project.
After the Customer Return
After the customer return is complete, you must update the project and handle the returned product accordingly to reconcile the general ledger transactions.
Providing a Replacement Product
If the customer requires a replacement product due to damage etc., proceed as usual with sourcing.
Returning the Product to the Supplier
- Complete the Supplier Return to determine the product value from the supplier
- Create a Change Order where you:
- Remove the product
- Apply the determined product value
Returning the Product to Stock
- Inspect the returned product to determine the value
- Create a Change Order where you:
- Remove the product
- Apply the determined product value
Reusing the Product in the Change Order
The customer may be returning the product for a modification due to a change e.g. returning a door that requires a new prep to accommodate the new hardware.
- Create a Change Order where you:
- Reload the original product
- Add product modifications
- Source the opening as usual
Comments
Please sign in to leave a comment.