How to: Use the Purchase Order Management window.
Environment: Comsense Enterprise
In this article:
Understanding the Purchase Order Management Window
The main purpose of the Purchase Order Management window is to:
- View a list of purchase orders that all meet specific criteria
- E.g. released purchase orders without confirmation numbers
- View all the information from multiple purchase orders in one list
- View the products on a purchase order without opening the purchase order
The Purchase Order Management window pulls a list of purchase orders based on the criteria you select the Purchase Order Management wizard. The Purchase Order Management wizard automatically launches when you Access Purchase Order Management.
Purchase Order Pane
The Purchase Order pane is the top pane of the Purchase Order Management window and displays each purchase order as a line item. Each line item has all the information found in the Purchase Order window and relevant supplier information.
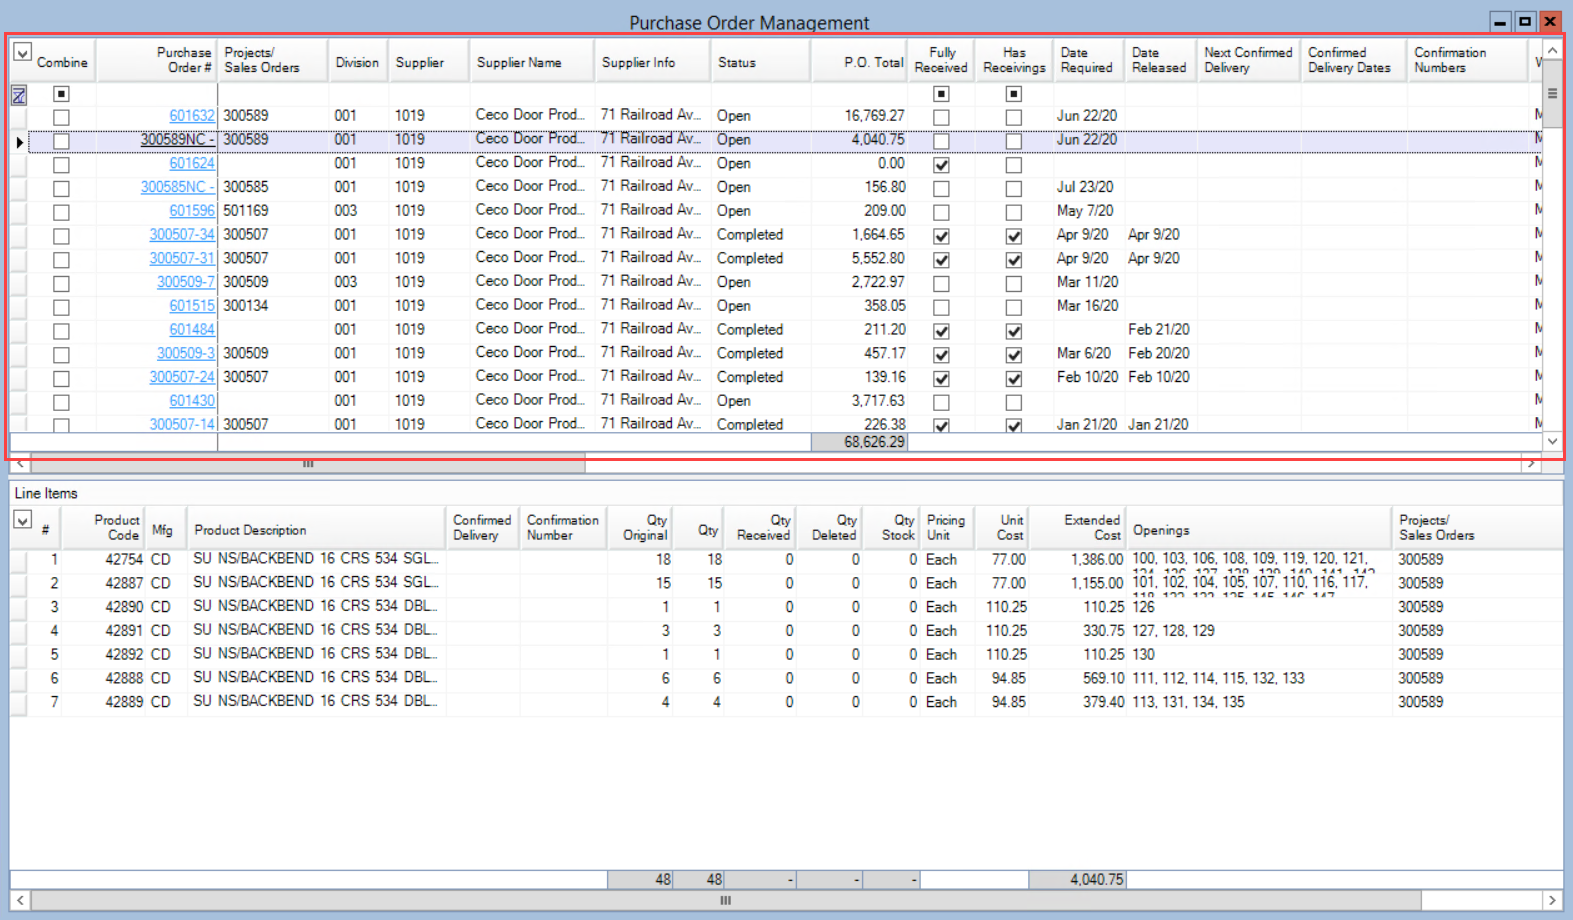
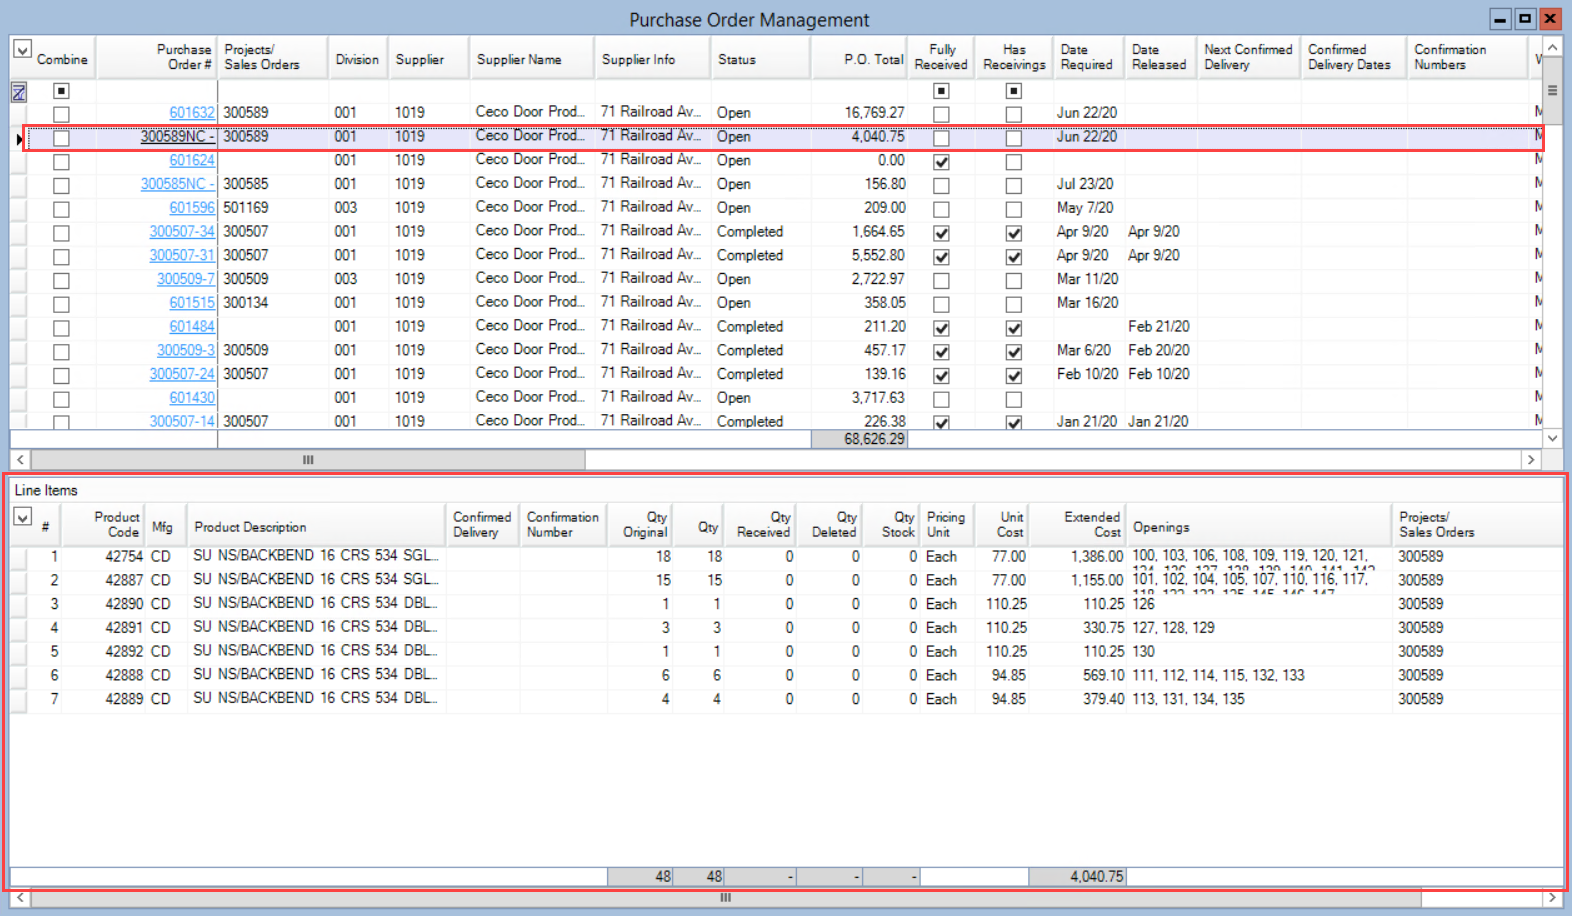
Line Item Pane
The Line Item pane is the lower pane of the Purchase Order Management window and displays each product line item from the selected purchase order in the Purchase Order pane. The product line item has all the same fields as the product line items the Purchase Order window.
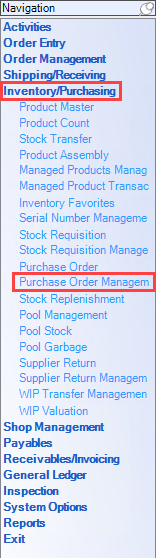
Accessing Purchase Order Management
Enterprise > Inventory/Purchasing > Purchase Order Management
Completing the Purchase Order Management Wizard
You must complete the Purchase Order Management wizard to use the Purchase Order Management window.
Status/Division Selection Page
On the Status/Division Selection page, you select the desired status and division criteria. Purchase orders that meet the selected status and division criteria will populate the Purchase Order Management window. The Purchase Order Management wizard automatically:
- Selects the Open and Released status
- Assigns all divisions
In the Status pane:
- Uncheck any inapplicable statuses
- Check any applicable statuses
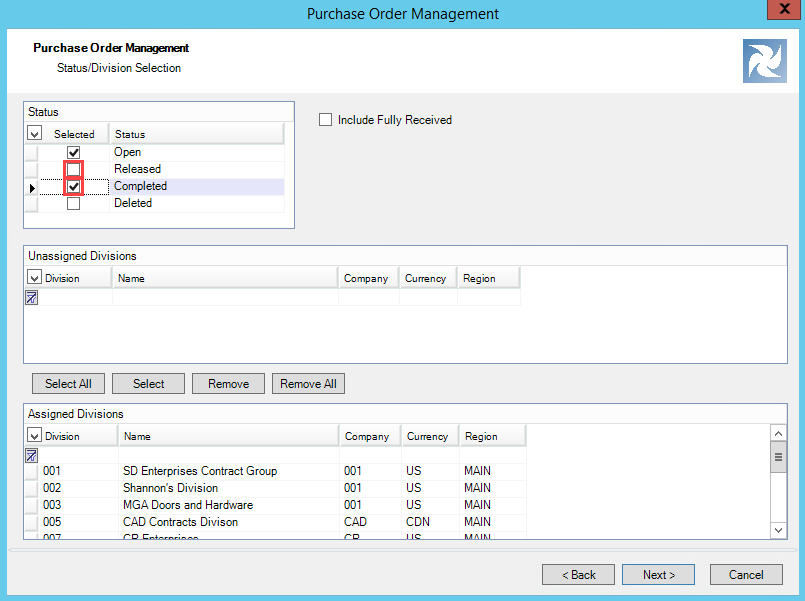
- Select the applicable divisions
If you want to include fully received purchase orders:
- Check the Include Fully Received checkbox
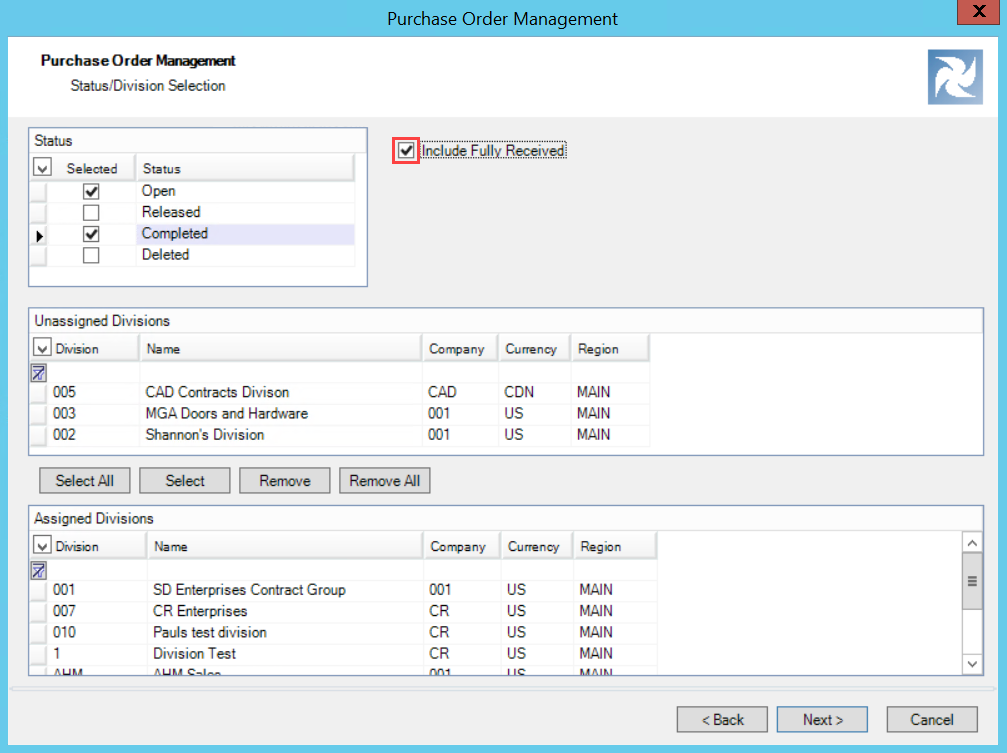
- Click Next
The status and division criteria for the purchase order list are selected.
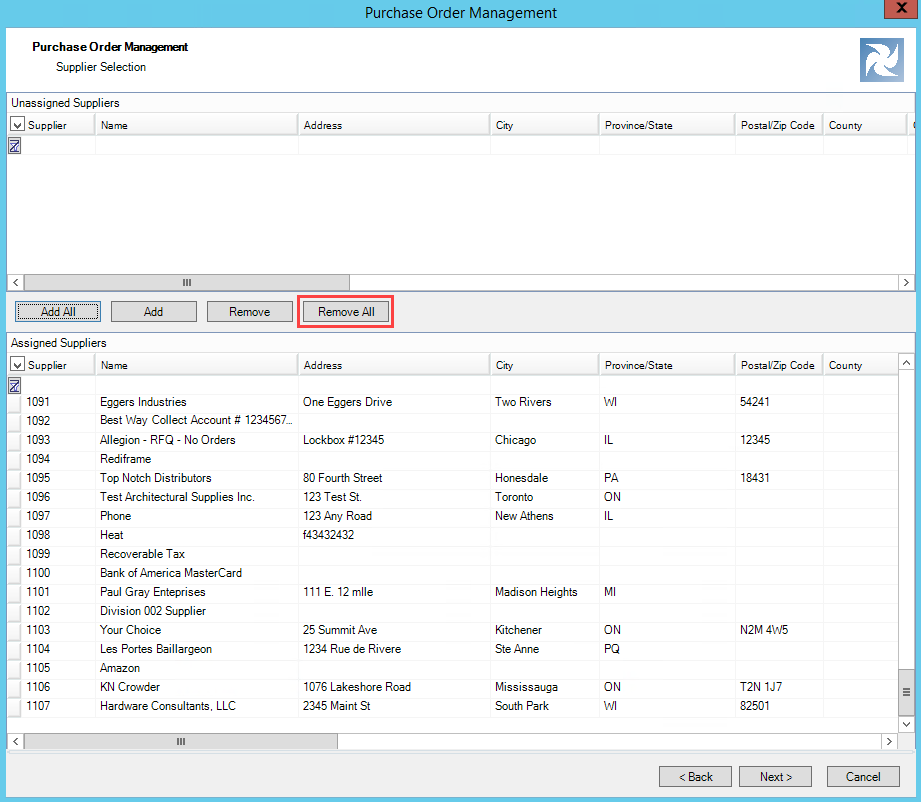
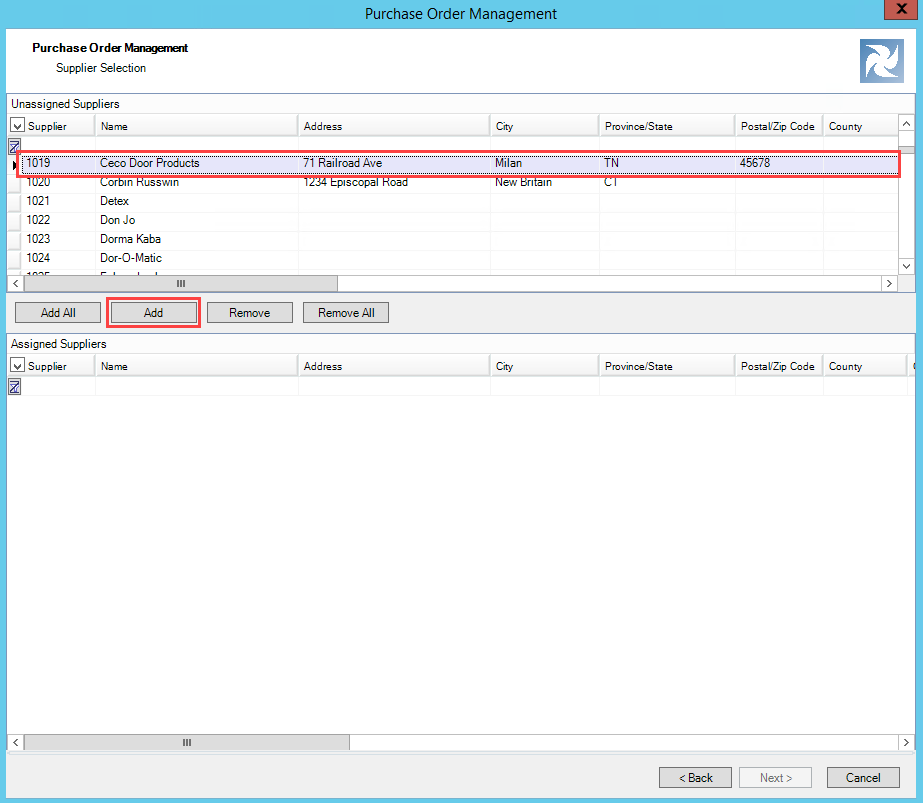
Supplier Selection Page
On the Supplier Selection page, you select the supplier criteria. Purchase orders from the selected suppliers and meet the status and division criteria will populate the Purchase Order Management window. The Supplier Selection Page automatically selects all suppliers.
Select the applicable suppliers and Click Next.
Using the Purchase Order Management Window
The main functions in the Purchase Order Management window are:
- Filtering Purchase Orders with Custom Filters
- Combining Purchase Orders
- Exporting Purchase Order Lists
- Opening Purchase Orders
- Viewing the Total Price of All Listed Purchase Orders
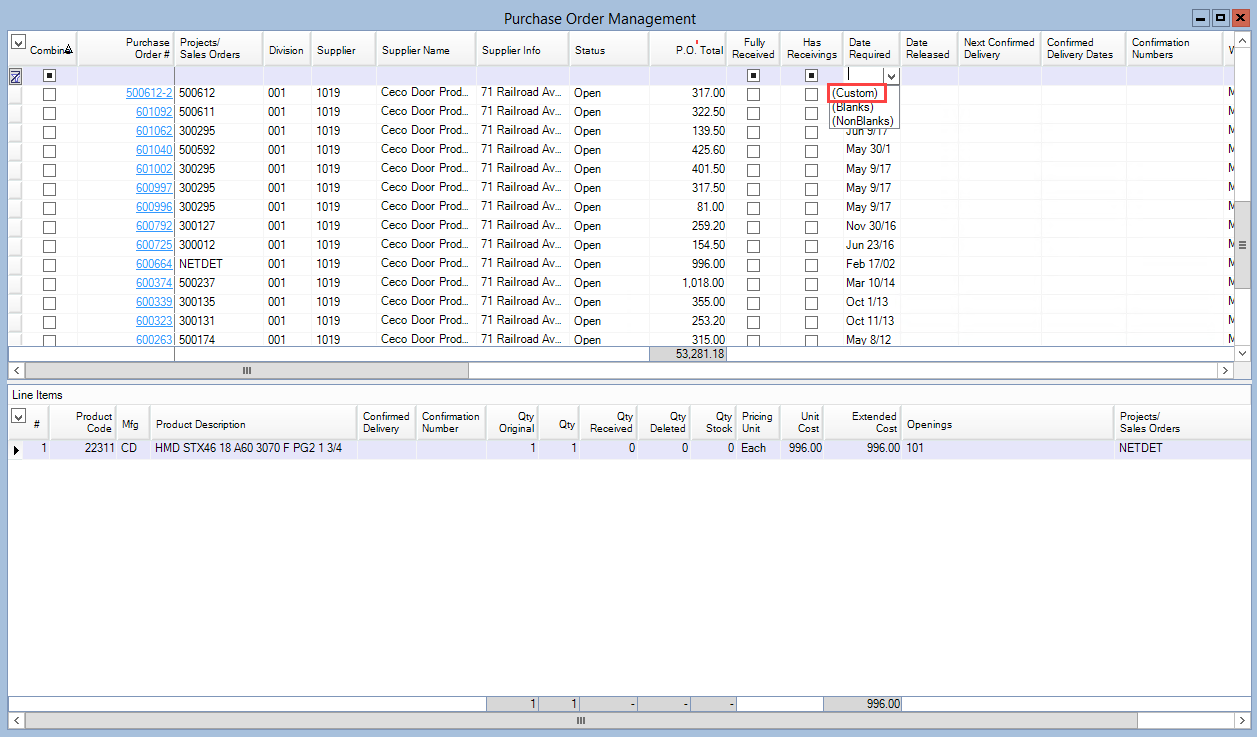
Filtering Purchase Orders with Custom Filters
You can create custom filters for any of the columns in the top pane.
In a filter field:
- Click the Down Arrow
- Click (Custom)
- The Custom Filter window will open
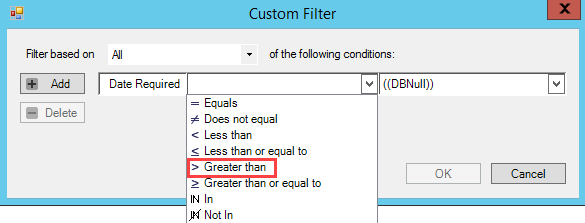
In the Condition field drop-down list:
- Select the applicable condition
- E.g. > Greater than, < Less than, etc.
In the Value field:
- Select the applicable value

- Click OK
The purchase order list now only shows the purchase orders that meet the custom filter criteria.
Combining Purchase Orders
You can only combine purchase orders if all the purchase orders have:
- The same supplier
- Open status
- Same ship to warehouse
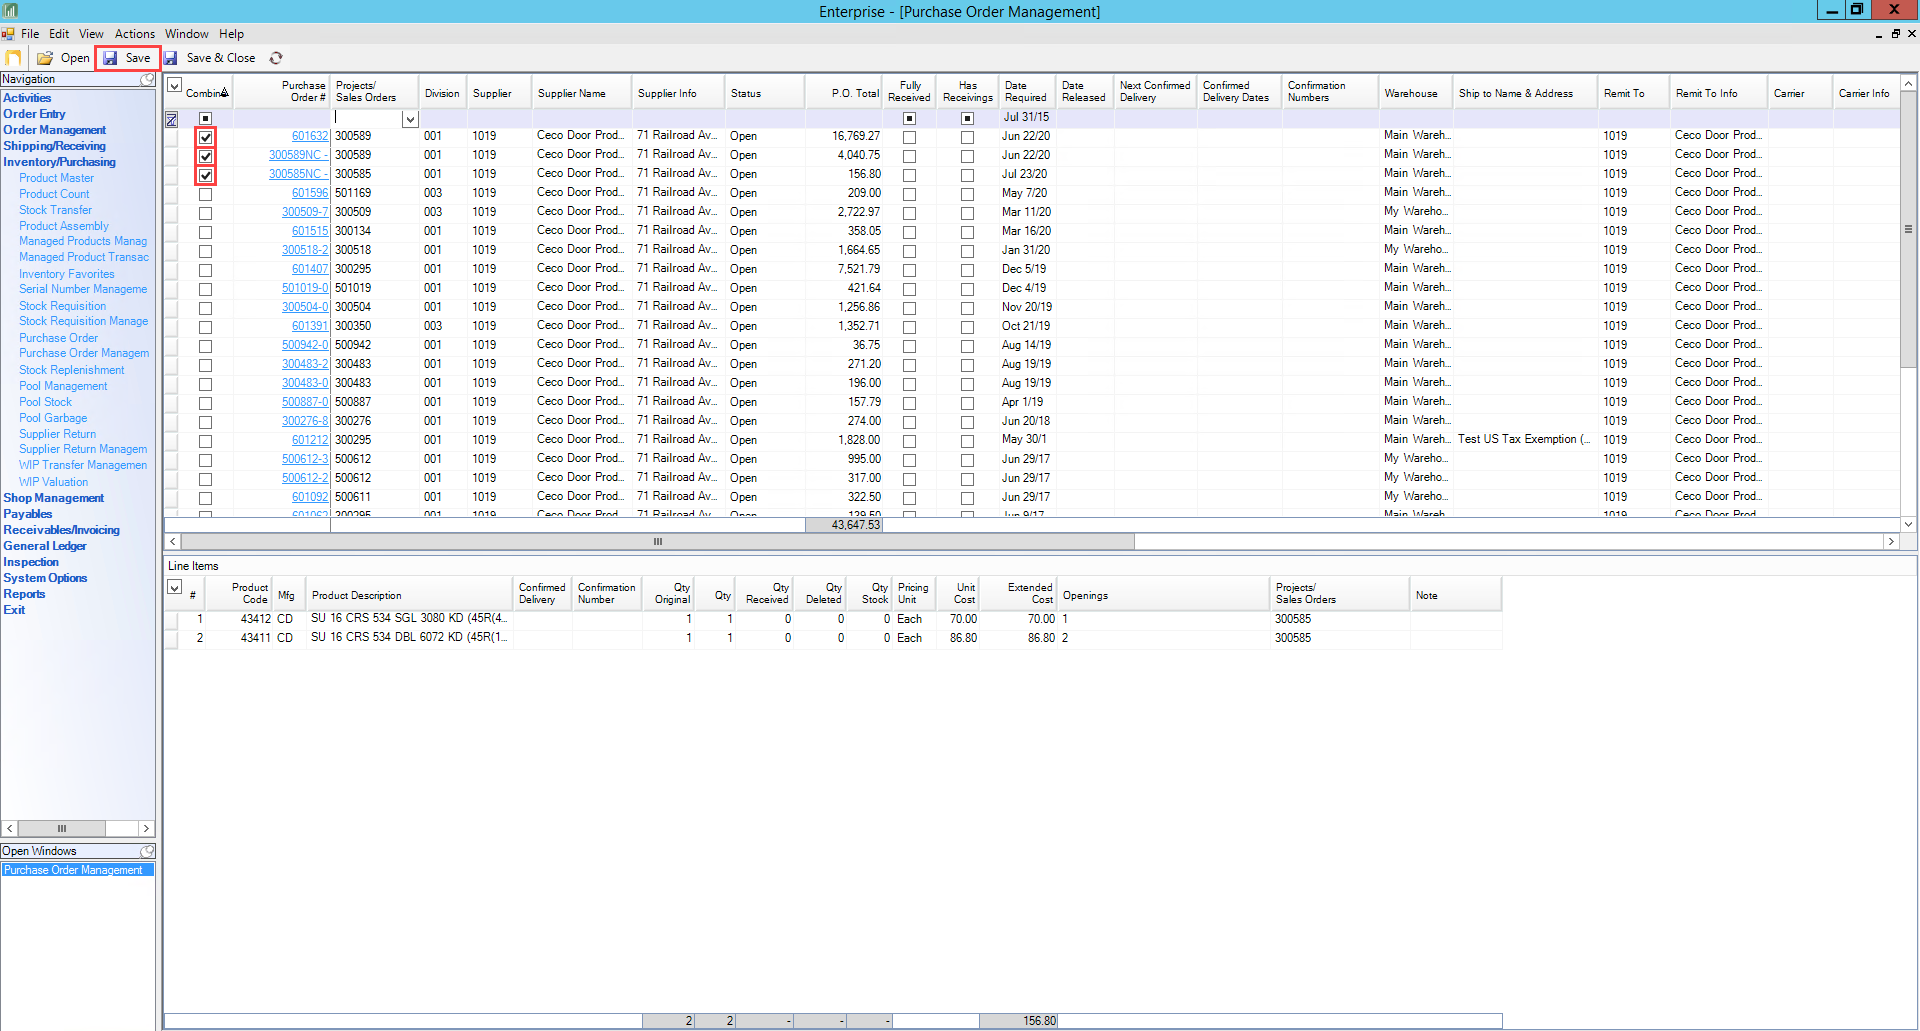
To combine purchase orders, Check the combine checkbox for each purchase order and Click Save
Exporting Purchase Order Lists
You can export filtered lists to Clipboard, Word, Excel, or PDF. This function is useful for compiling a list of purchase orders for supplier follow-up e.g. filtering and exporting a list of released purchase orders with no confirmation numbers to send to the supplier for follow-up.
In the Purchase Order Management window:
- Ensure the list of purchase orders meets the required criteria
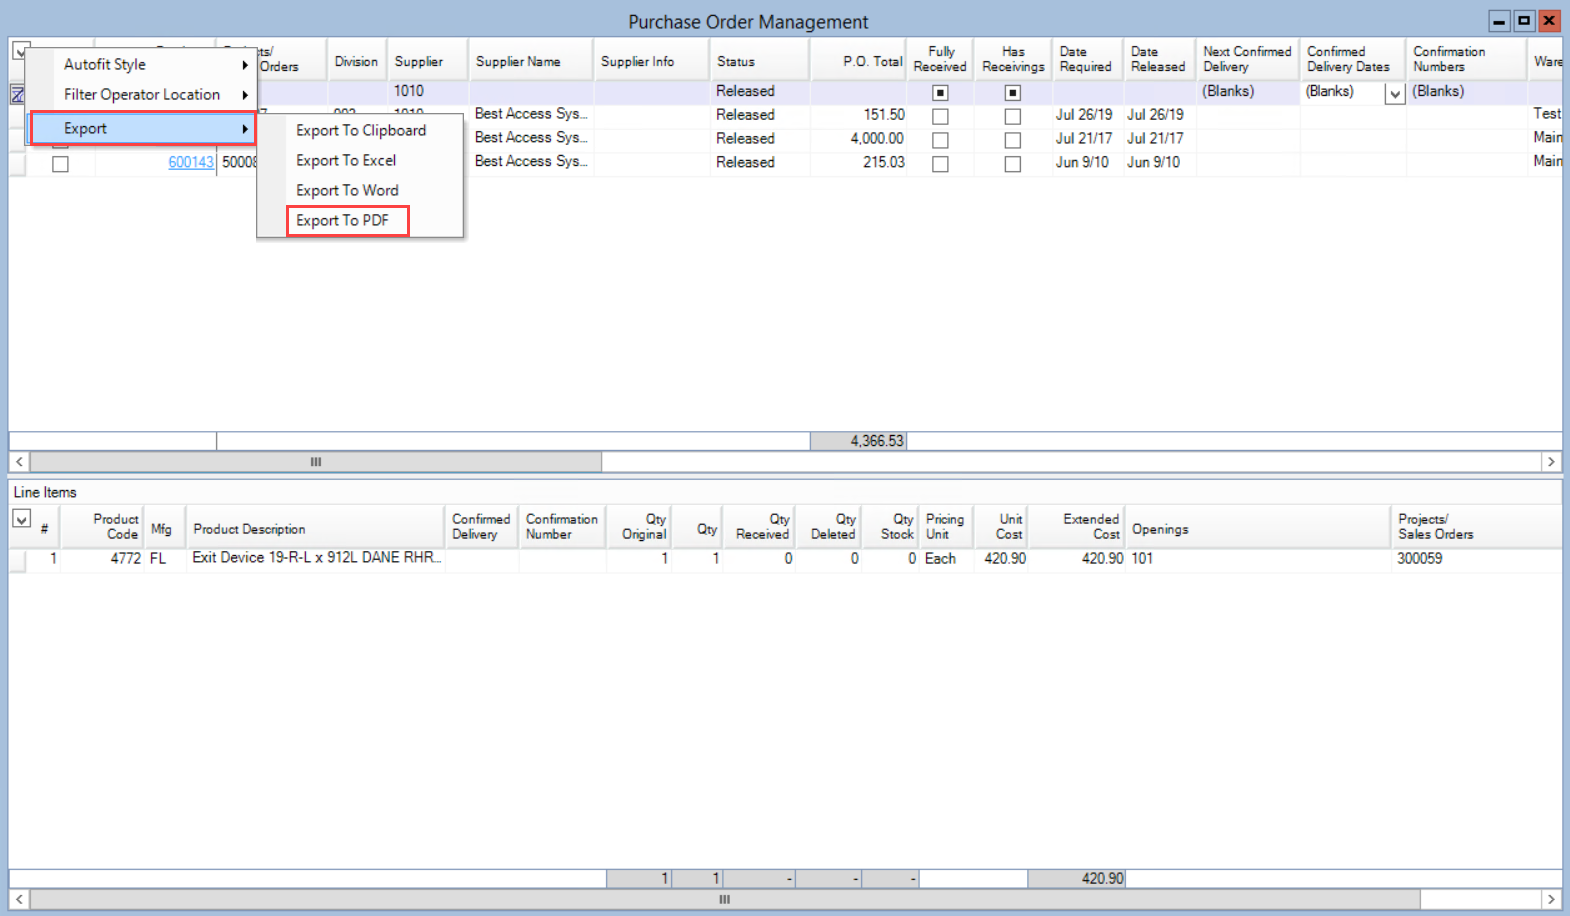
- Click the Down Arrow on the left column header
- Hover the mouse over Export
- The Export menu will expand
- Click one of the Export To options
- E.g. Clipboard, Excel, Word, or PDF
*Note: Export to Clipboard only copies the information. You must manually paste the information in a tool such as a word processor or email.
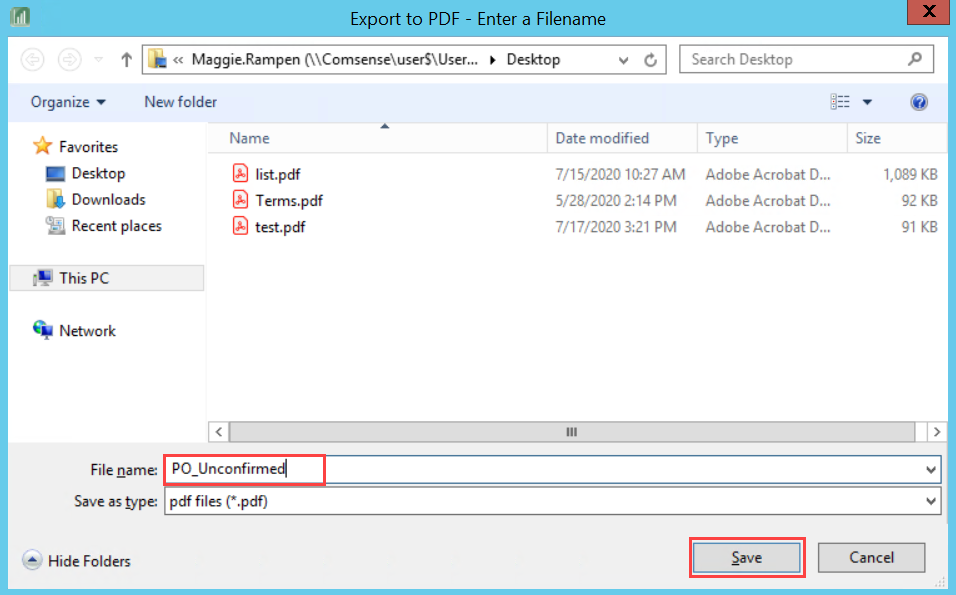
In the File Explorer window:
- Select the save location
- Enter the file name
- Click Save
The purchase order list is now exported.
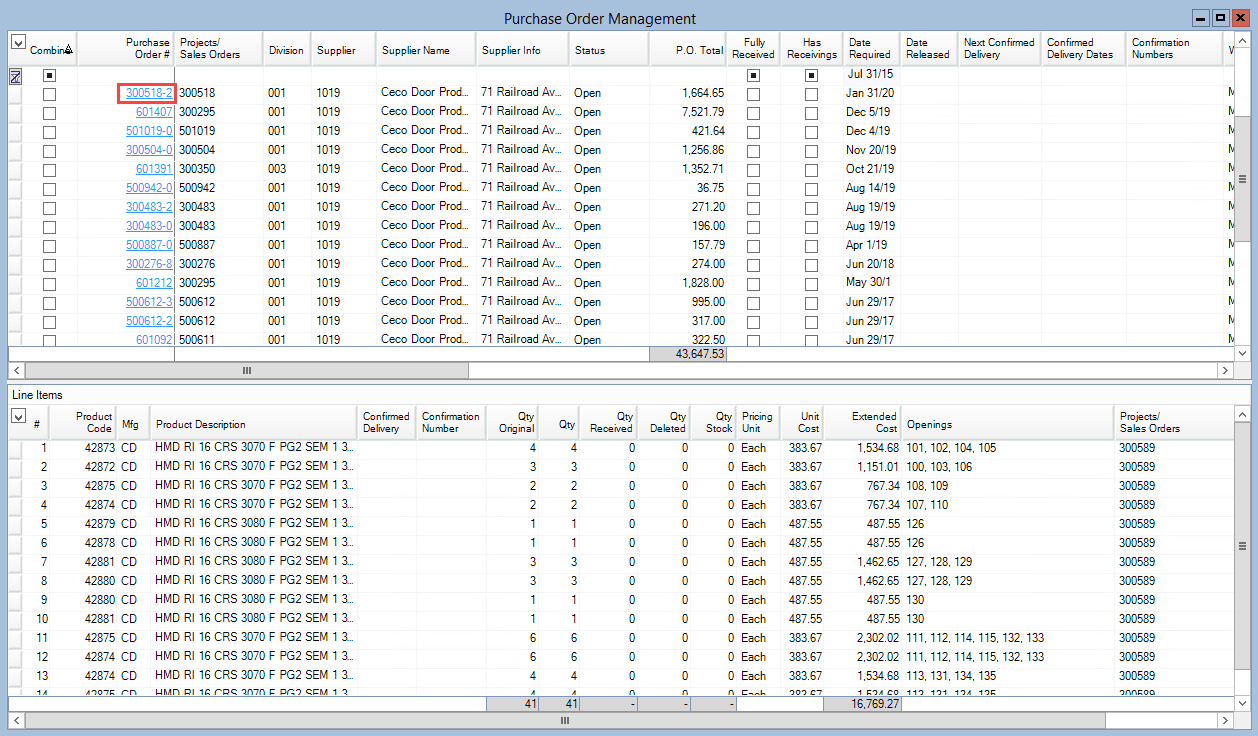
Opening Purchase Orders
To open one of the purchase orders in the Purchase Order window, Click the Purchase Order Number.
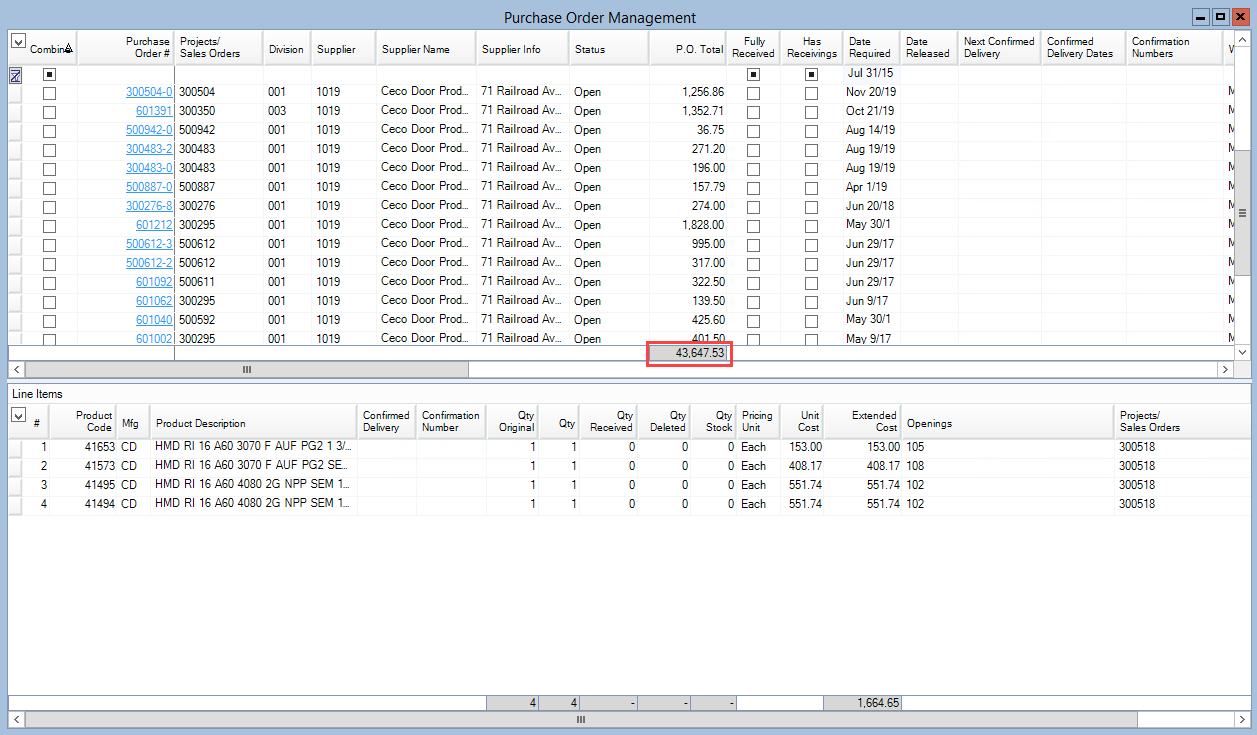
Viewing the Total Price of All Listed Purchase Orders
The total cost of all listed purchase orders is in the P.O. Total field below the list of purchase orders.
Comments
Need to be able to able to view all product purchase history with a supplier.
Please sign in to leave a comment.